
1. Okwu mmalite
This manual provides instructions for the proper use and maintenance of your Cable Matters Punch Down Tool. This tool is designed for efficiently terminating network cables into patch panels or keystone jacks, supporting various cable categories including Cat 5, Cat 5e, Cat 6, Cat 6A, Cat 7, and Cat 8. It includes both 110 and 66 style blades for versatile application.
2. Ozi nchekwa
- Yiri ngwa nchedo onwe onye kwesịrị ekwesị mgbe niile, dị ka enyo nchekwa, mgbe ị na-eji ngwaọrụ aka.
- Keep fingers clear of the blade area during operation to prevent injury.
- Ensure the tool is clean and free from debris before and after each use.
- Store the tool with the blade securely stored within the body when not in use.
- Ejila ngwa a mee ihe ndị ọzọ karịa imewe ya.
3. Ihe ngwugwu
- 1 x Cable Matters Punch Down Tool
- 1 x 110 Blade
- 1 x 66 Blade
4. Nhazi
4.1 Nwụnye na mwepụ agụba
The punch down tool features a removable blade system with twist and lock sockets. To install or remove a blade:
- Locate the blade release mechanism, typically a rotating collar or button near the blade housing.
- Twist the collar or press the button to unlock the current blade.
- Carefully pull out the existing blade or insert the desired 110 or 66 blade.
- Twist the collar or release the button to lock the new blade securely in place. Ensure the blade is firmly seated before use.

4.2 Adjustable Impact Settings
The tool offers adjustable impact force settings (Lo/Hi) to suit different cable termination requirements and various types of jacks, blocks, or patch panels. To adjust the impact setting:
- Locate the switch or dial marked 'Lo' and 'Hi' on the tool's body.
- Select 'Lo' for lighter impact, suitable for smaller gauge wires or delicate components.
- Select 'Hi' for stronger impact, typically used for standard terminations or tougher insulation.

5. Ntuziaka ọrụ
5.1 Terminating Cables into a Keystone Jack or Patch Panel
Follow these steps to properly terminate network cables:
- Kwadebe eriri: Carefully strip approximately 1 inch (2.5 cm) of the outer jacket from the network cable, exposing the twisted pairs. Untwist the pairs and arrange the individual wires according to the T568A or T568B wiring standard, matching the color code on your keystone jack or patch panel.
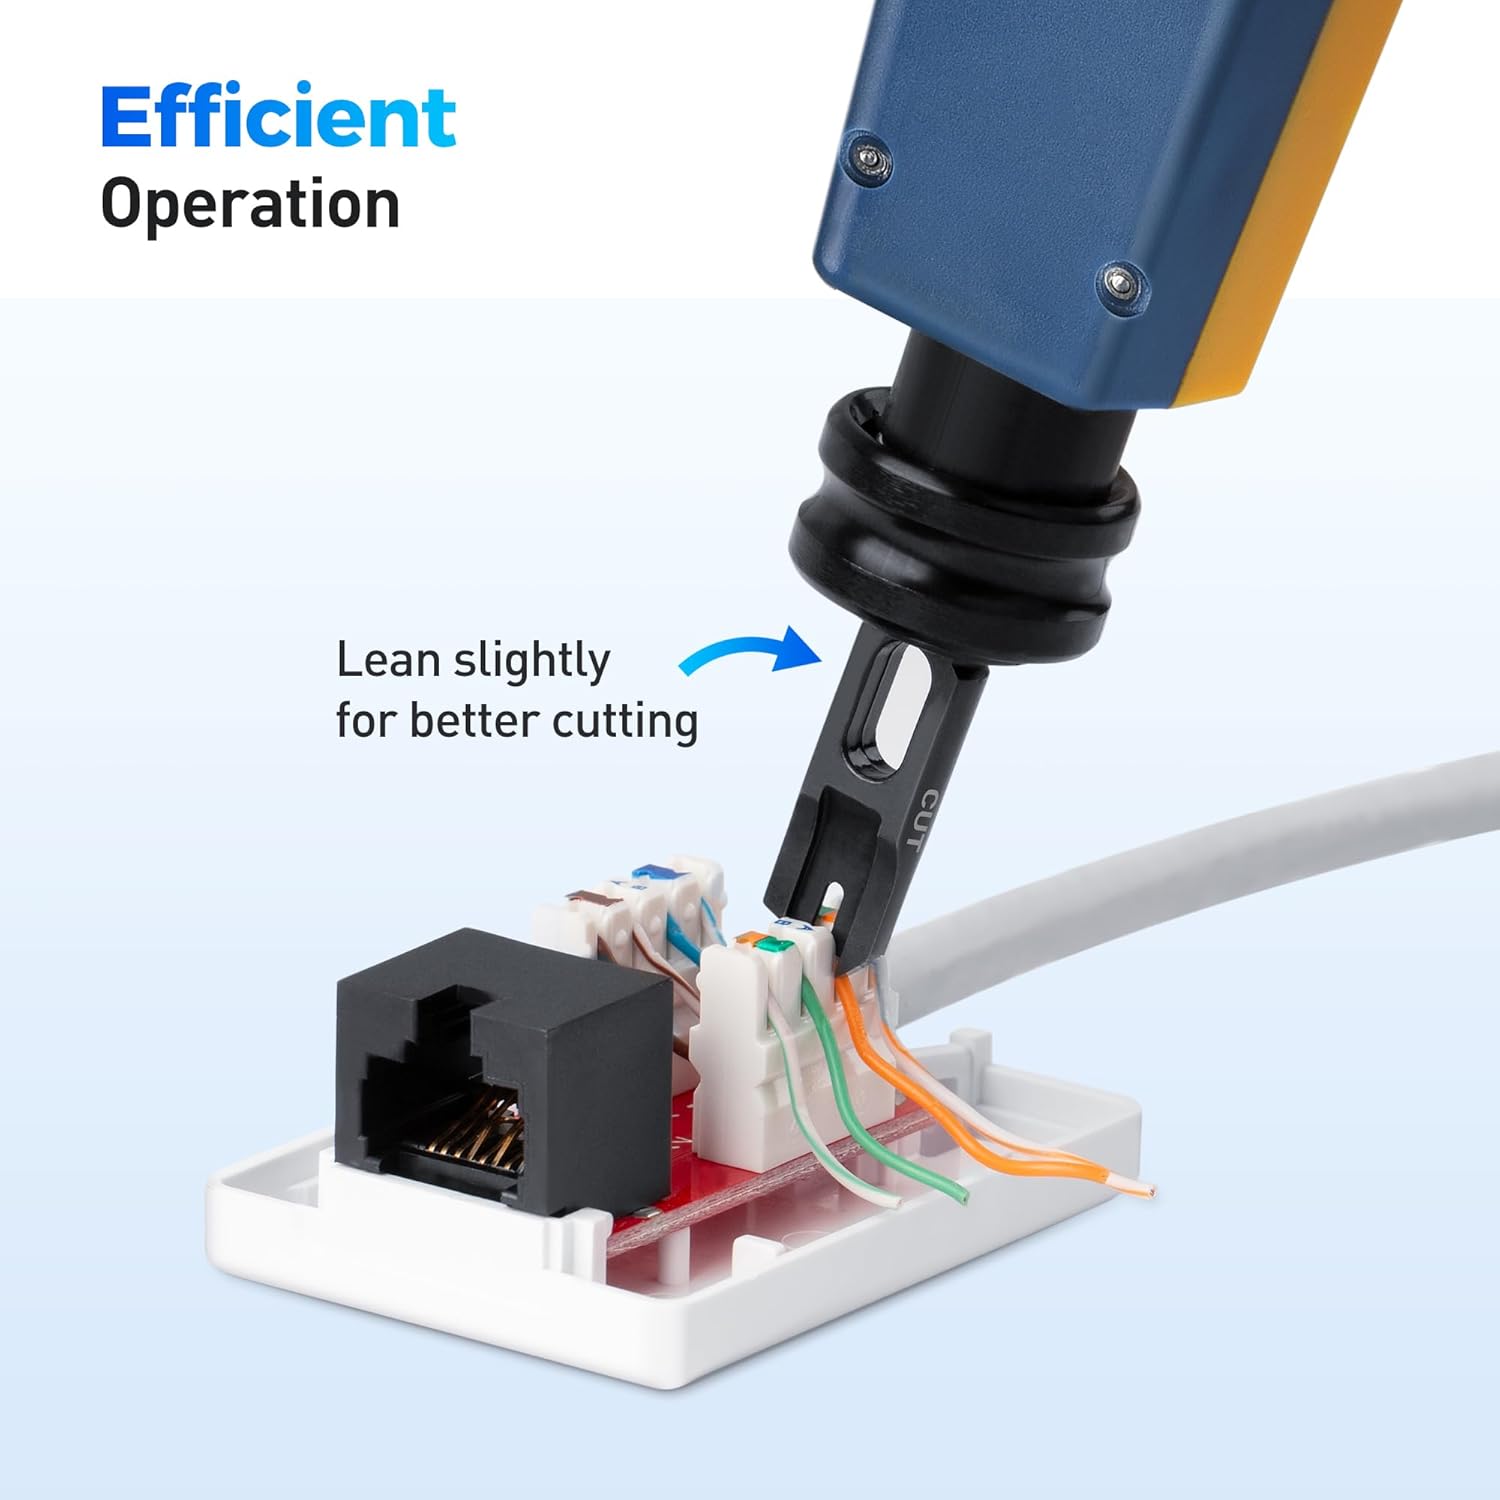
- Position the Wires: Place each individual wire into its corresponding slot on the keystone jack or patch panel. Ensure the wire extends slightly beyond the cutting edge of the terminal.
- Punch Down: Hold the punch down tool firmly. Align the blade over the wire and the terminal slot. Apply downward pressure until the tool's spring-action mechanism activates, seating the wire into the terminal and simultaneously trimming the excess wire. The cutting side of the blade should face outwards, away from the center of the jack/panel.
- Verify Termination: Inspect each termination to ensure the wire is fully seated, and the excess wire is cleanly cut. Repeat for all wires.

6. Nlekọta
- Nhicha: After each use, wipe the tool and blades with a clean, dry cloth to remove any dust, wire fragments, or debris.
- Nchekwa: Store the tool in a dry, cool place, away from direct sunlight and moisture. Ensure the blade is stored safely within the tool body or in a protective case.
- Nyocha agụba: Periodically inspect the blades for wear or damage. Worn blades can lead to improper terminations or incomplete cuts. Replace blades as needed.
7. Nchọpụta nsogbu
| Nsogbu | Ihe nwere ike ime | Ngwọta |
|---|---|---|
| Wires not cutting cleanly | Dull or damaged blade; incorrect blade orientation; insufficient impact force. | Replace blade; ensure cutting side faces outwards; adjust impact setting to 'Hi'. |
| Wires not seating properly | Insufficient impact force; incorrect wire placement; debris in terminal. | Adjust impact setting to 'Hi'; ensure wires are fully pushed into slots; clean terminals. |
| Tool not punching down | Blade not fully inserted or locked; tool malfunction. | Ensure blade is securely locked; contact customer support if issue persists. |
8. Nkọwapụta
- Nọmba nlereanya: 180221
- Akara agụnyere: 110, 66
- ndakọrịta: Cat 5, Cat 5e, Cat 6, Cat 6A, Cat 7, Cat 8 network or voice cables
- Impact Settings: Low (Lo), High (Hi)
- Ibu ihe: 6.3 ounces
- Akụkụ ngwugwu: 8.43 x 3.43 x 1.38 sentimita asatọ
- Onye nrụpụta: Ihe gbasara eriri USB
9. Akwụkwọ ikike na nkwado
For warranty information or technical support, please refer to the official Cable Matters websaịtị ma ọ bụ kpọtụrụ ndị ahịa ha ozugbo. Ị nwekwara ike ịga na Ụlọ Ahịa Cable Matters na Amazon maka ozi ngwaahịa ọzọ na akụrụngwa nkwado.