
1. Ngwaahịa gafereview
The AZEITE NE3 Intelligent Visual Ear Sampling Stick is a new generation ear cleaning tool equipped with a high-definition camera. It features advanced WiFi connectivity and a smart image transmission chip, along with a 3-axis gyroscope for stable, 360° wide-angle real-time video. This device is designed for precise earwax removal and can also be used for inspecting other body parts such as teeth, nasal cavity, throat, and skin pores.
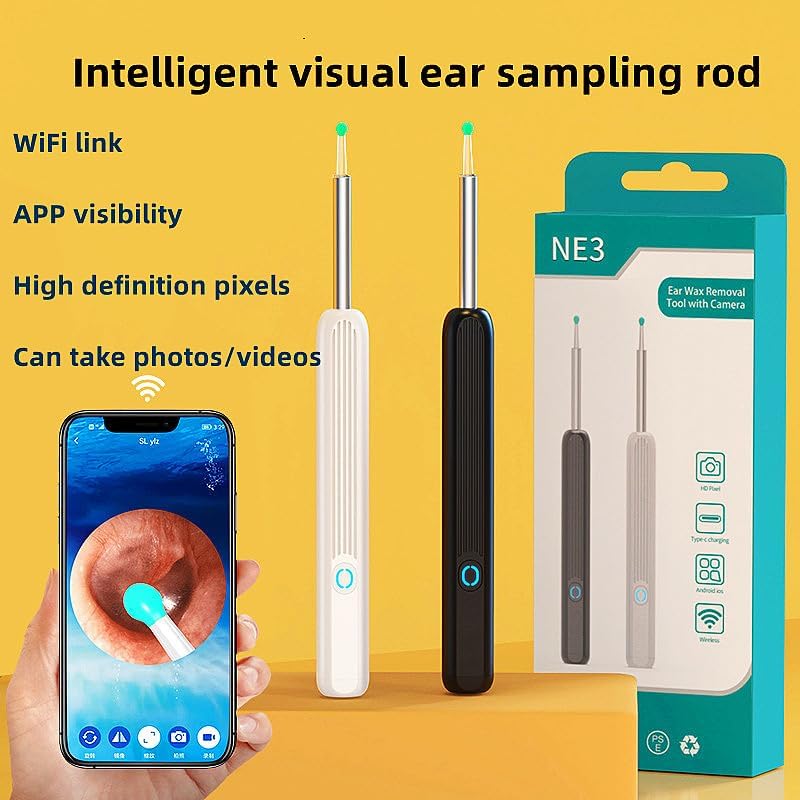
Figure 1: AZEITE NE3 Intelligent Visual Ear Sampling Stick with smartphone app interface.
Akụkụ ndị bụ isi:
- Innovative PC+silicone elastic ear spoon for gentle and comfortable use.
- APP visibility with high-definition display.
- IPX5 ọkwa mgbochi mmiri.
- WiFi connectivity for real-time video.
- Skin-friendly ear spoons.
- Interchangeable ear spoon heads to prevent cross-infection.
- Three-axis intelligent gyroscope for stable imaging at various angles.
- Capable of taking photos and recording videos.
2. Ozi nchekwa
Please read all safety instructions before using the device. Improper use can lead to injury.
- Do not insert the ear sampling stick too deeply into the ear canal to avoid damaging the eardrum.
- Always use the device gently and with caution.
- Ensure the ear spoon head is securely attached before use.
- Clean the ear spoon heads thoroughly before and after each use to prevent infection.
- Keep out of reach of children. Adult supervision is recommended when used by minors.
- If you experience any discomfort, pain, or bleeding, discontinue use immediately and consult a medical professional.
- Statements regarding this device have not been evaluated by the FDA and are not intended to diagnose, treat, cure, or prevent any disease or health condition.
3. Ihe ngwugwu
The 8-piece set typically includes:
- Ntị Anya Ọgụgụ isi Sampling Stick (main unit)
- Multiple interchangeable ear spoon heads (e.g., zinc alloy with silicone sleeves, silicone+PC dual color)
- Ịchaji eriri (ụdị-C)
- Akwụkwọ ntuziaka onye ọrụ
4. Ntuziaka Nhazi
4.1 Ịchaji ngwaọrụ
Before first use, fully charge the device using the provided Type-C charging cable.
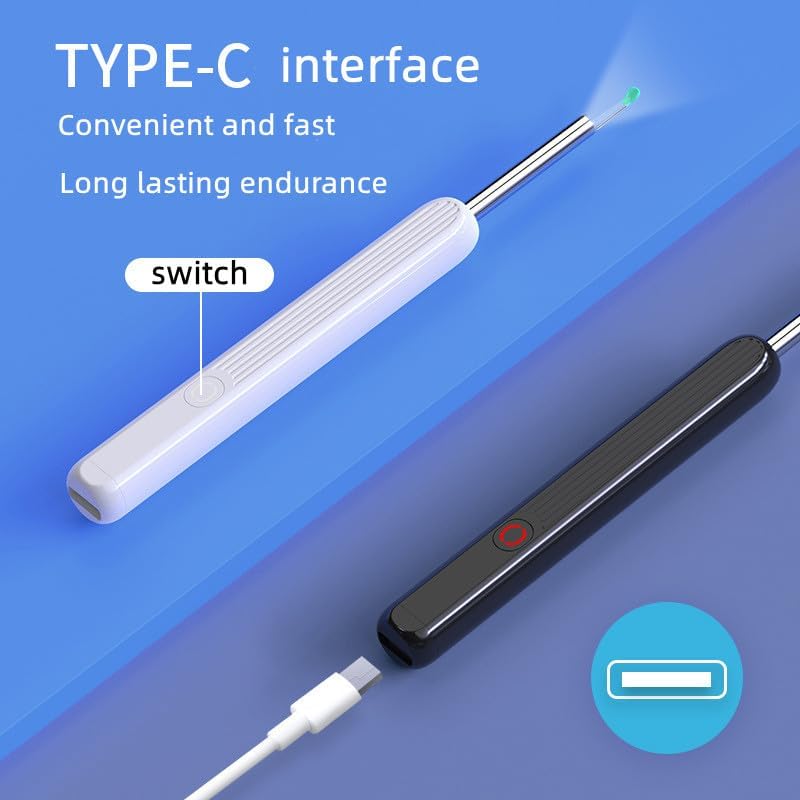
Figure 2: Type-C charging interface for convenient and fast charging.
4.2 APP Installation and Connection
The device connects to your smartphone or tablet via WiFi for visual operation. Follow these steps:
- Budata APP: Scan the QR code in the manual or search for the designated APP (e.g., "SL yz" as seen in images) on your device's app store (compatible with iPhone, iPad, and Android smartphones).
- Ike Na: Press and hold the power button on the ear sampling stick for 2 seconds. The blue light will flash, indicating it is waiting for the APP to connect.
- Open APP: Click on the APP icon to open it. The main interface will appear.
- Find WiFi: In the APP, follow the short guide to find the device's WiFi network.
- Jikọọ na WiFi: Go to your phone's WiFi settings, select the network named "HNDEC-0000X" (or similar, specific to your device), and click to connect.
- Return to APP: Return to the APP. The ear picking rod indicator light will be constantly on, indicating a successful connection.
- Malite iji: You can now enter normal use mode.
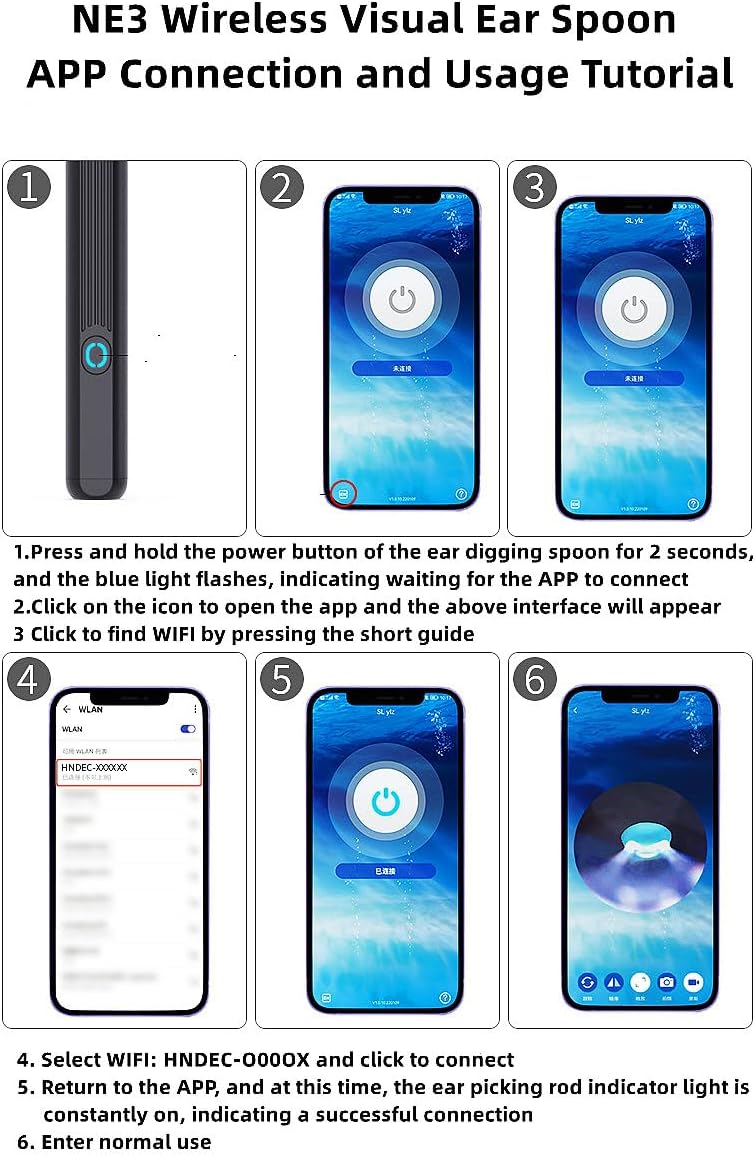
Figure 3: APP connection and usage tutorial for the NE3 device.
5. Ntuziaka ọrụ
5.1 Attaching Ear Spoons
The device comes with interchangeable ear spoon heads. To attach, gently twist the ear spoon head onto the device until it is secure. Ensure it is firmly in place to prevent detachment during use.
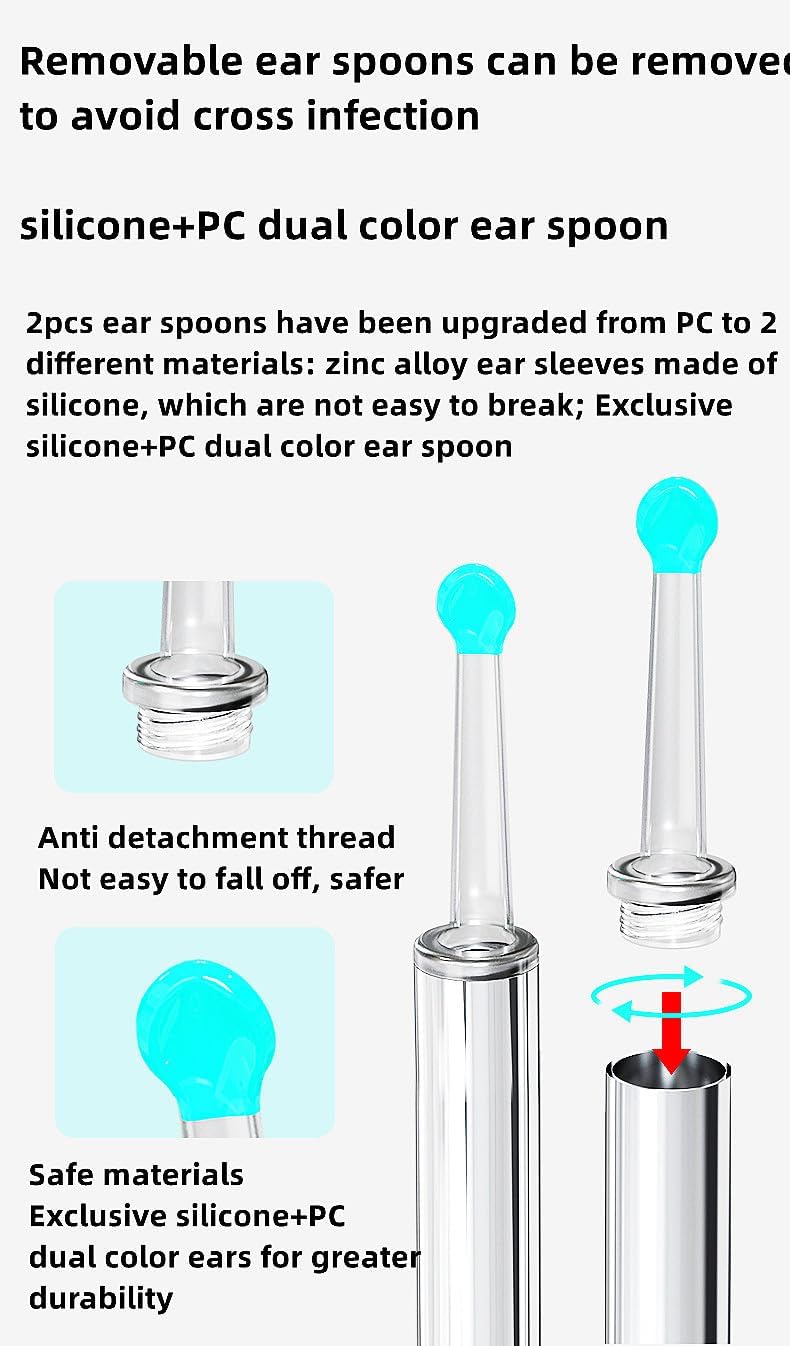
Figure 4: Removable ear spoons with anti-detachment design for safety and hygiene.
5.2 Using the Visual Function
Once connected to the APP, the device's camera will transmit a live feed to your smartphone screen. The integrated 3-axis intelligent gyroscope ensures that the image orientation remains accurate regardless of how the ear spoon lens rotates, providing a stable and clear view.
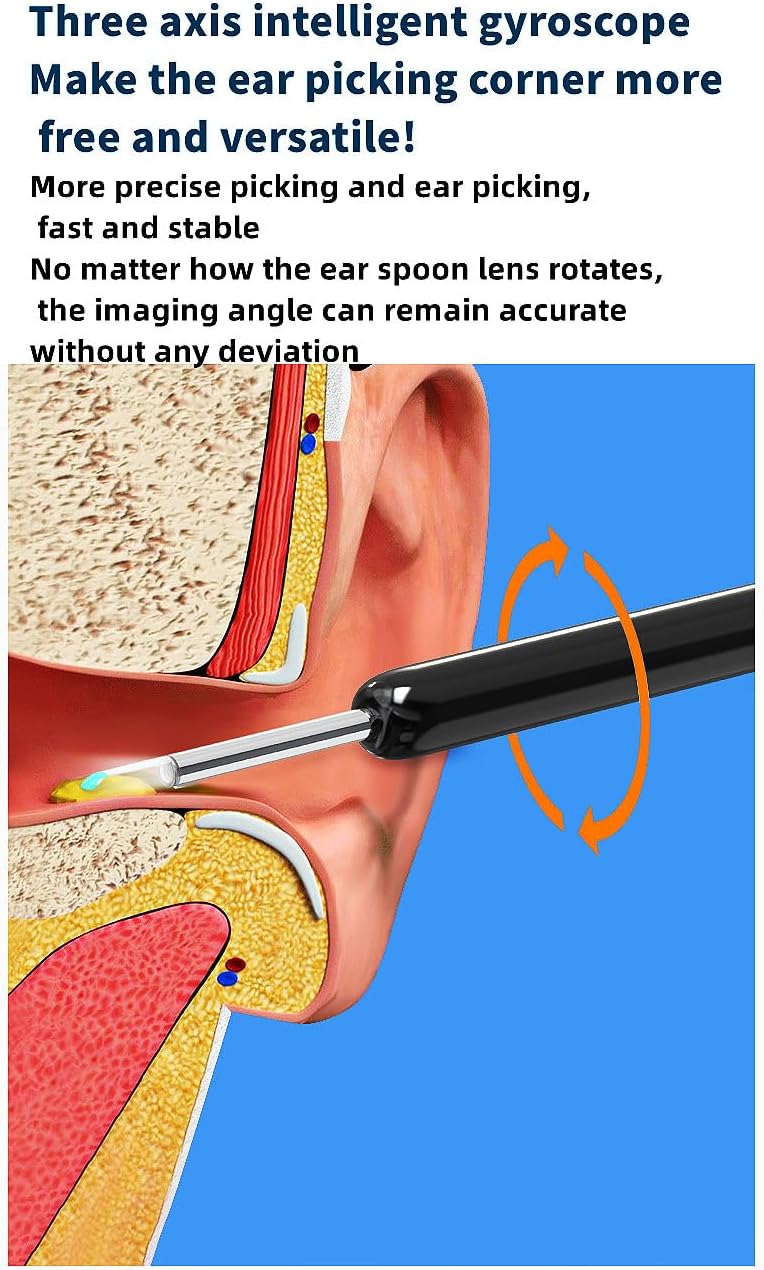
Figure 5: The 3-axis intelligent gyroscope ensures precise and stable imaging.
5.3 Ise foto na vidiyo
The APP interface includes options to capture photos and record videos of the visual feed. Refer to the APP's on-screen controls for these functions.

Figure 6: APP interface for visual ear sampling, photo, and video recording.
5.4 Ojiji zuru oke
Gently insert the ear sampling stick into the desired area. Use the live visual feed on your device to guide your actions. The wide range of uses includes checking earwax, teeth, nasal cavity, throat, skin pores, and other body parts. Always proceed with caution and avoid applying excessive force.
6. Nlekọta
6.1 Cleaning the Ear Spoons
After each use, remove the ear spoon head and clean it thoroughly with an alcohol wipe or mild soap and water. Rinse well and allow to air dry completely before reattaching or storing. This prevents cross-contamination.
6.2 Cleaning the Device Lens
The device lens is IPX5 waterproof, dustproof, and fog-proof. You can gently wipe the lens with a soft, damp cloth. Do not submerge the entire device in water. Ensure the lens is dry before storage.
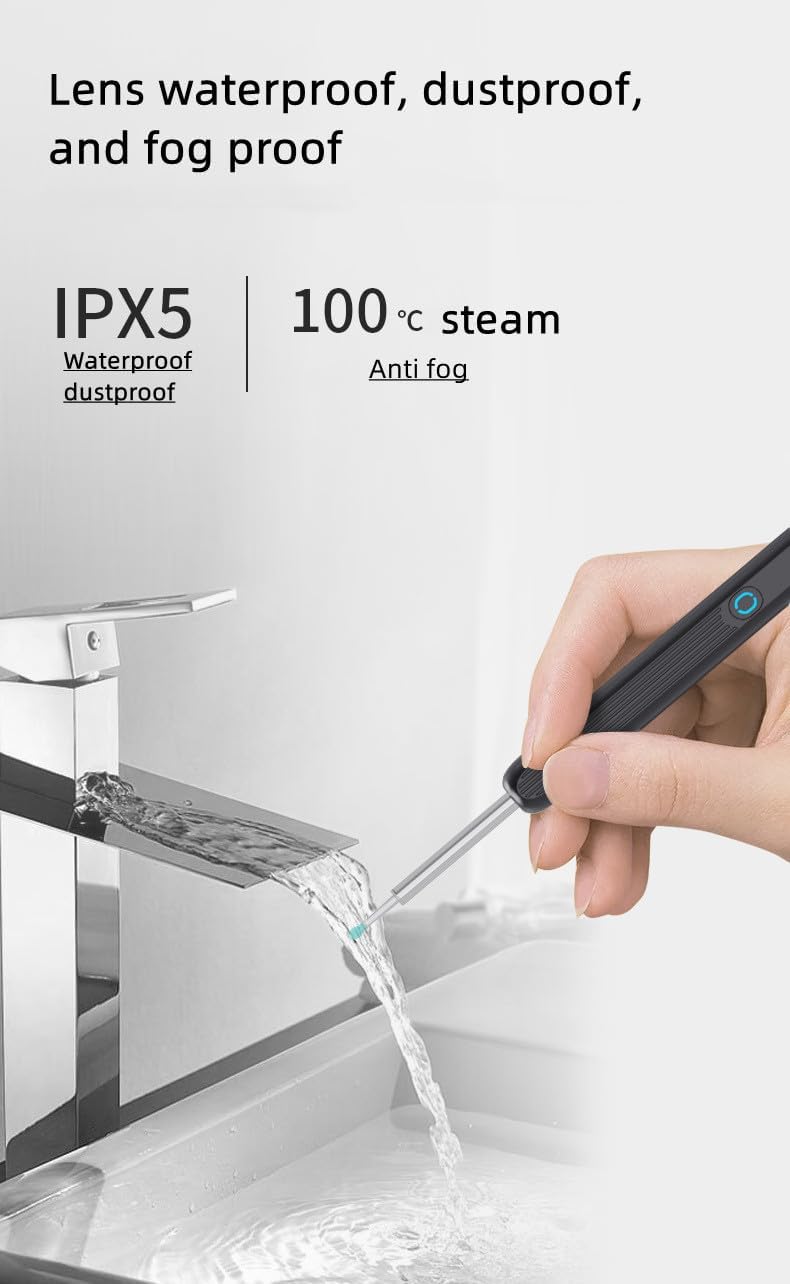
Figure 7: The device lens features IPX5 waterproof, dustproof, and fog-proof capabilities.
6.3 Nchekwa
Store the device and its accessories in a clean, dry place away from direct sunlight and extreme temperatures.
7. Nchọpụta nsogbu
- Ngwaọrụ anaghị agbanwu: Ensure the device is fully charged. Connect it to the Type-C charger and wait for the charging indicator.
- Cannot connect to APP/WiFi:
- Make sure the device is powered on and the blue light is flashing.
- Verify that your phone's WiFi is enabled and you have selected the correct device network (e.g., "HNDEC-0000X").
- Restart both the device and your smartphone, then try connecting again.
- Ensure the APP has necessary permissions (e.g., location, WiFi) on your smartphone.
- Image is blurry or unclear:
- Clean the camera lens carefully as described in the Maintenance section.
- Ensure there is adequate lighting in the area you are examining.
- Check for any debris on the lens or ear spoon head.
- Ear spoon head detaches during use: Ensure the ear spoon head is securely twisted onto the device before use. Replace if the attachment mechanism appears damaged.
8. Nkọwapụta
| Akụkụ ngwaahịa | 6.46 x 2.76 x 0.67 sentimita asatọ |
| Onye nrụpụta | AZEITE |
| Njikọta | Njikọ WiFi |
| Gyroscope | 3-axis intelligent gyroscope |
| Ngosi nke enweghị mmiri | IPX5 (lens) |
| Nchaji Interface | Ụdị-C |
| Ndakọrịta | iPhone, iPad & Android Smart Phone |
9. Akwụkwọ ikike na nkwado
For warranty information and customer support, please refer to the documentation included with your purchase or contact the manufacturer directly. Specific warranty terms may vary by region and retailer.