
Okwu mmalite
This manual provides essential information for the safe and effective operation, setup, and maintenance of your Garvee 10-inch 15A Table Saw. Please read all instructions carefully before use to ensure proper functionality and to prevent injury. Keep this manual for future reference.

Image: The Garvee 10-inch Table Saw, showcasing its main components and stand.
Ntuziaka nchekwa
Na-ebute nchekwa ụzọ mgbe niile mgbe ị na-arụ ọrụ ike. Ọdịda ịgbaso ntuziaka ndị a nwere ike ibute nnukwu mmerụ ahụ ma ọ bụ mmebi ihe onwunwe.
- Gụọ akwụkwọ ntuziaka a: Ghọta usoro ọrụ niile yana ịdọ aka ná ntị nchekwa tupu eji ya.
- Yiri Ngwa Nchekwa Onwe Onye (PPE): Always wear safety glasses, hearing protection, and a dust mask. Avoid loose clothing and jewelry.
- Jikwaa mpaghara ọrụ dị ọcha: Keep the work area well-lit and free of clutter.
- Gbaa mbọ hụ na ọ kwụsie ike: Always operate the table saw on a stable, level surface.
- Use Safety Devices: Never operate the saw without the blade guard, anti-kickback pawls, and splitter in place, unless specifically instructed for a particular operation.
- Use a Push Stick: Always use the provided push stick when feeding small workpieces or when your hands are close to the blade.
- Kpupu tupu mmezi: Disconnect the power supply before changing blades, making adjustments, or performing maintenance.
- Nchekwa ibu ibu: The saw is equipped with overload protection. If the motor stops due to overload, turn off the saw, unplug it, and allow it to cool before restarting.

Foto: Ofeview of the Garvee Table Saw's safety features, including the monocular shield, blade guard, and internal overload protection.

Image: Proper use of the push stick to safely guide material through the saw blade.
Ihe ngwugwu
Upon unpacking, ensure all the following items are present and undamaged:
- Garvee 10-inch Table Saw Unit
- 10-inch 24-Tooth Carbide Tipped Blade
- Mgbakọ nchekwa agụba
- Metal Stand Components
- Pịa osisi
- Wrenches (for blade changes and adjustments)
- Rip ngere
- Mgbakọ Miter Gauge
- Akwụkwọ ntuziaka mgbakọ

Image: All components included in the Garvee Table Saw package, laid out for inspection.
Melite
1. Mgbakọ guzoro
Assemble the metal stand components according to the diagrams in the assembly manual. Ensure all bolts are securely tightened for stability.
Video: Detailed steps for assembling the stand of the Garvee 10-inch Table Saw.
2. Attaching the Table Saw Unit
Carefully place the table saw unit onto the assembled stand and secure it using the provided hardware. Verify that the saw is level and stable.
3. Installing Blade Guard and Accessories
Install the blade guard, rip fence, and miter gauge. Ensure the blade guard moves freely and covers the blade adequately. The rip fence should slide smoothly and lock securely.
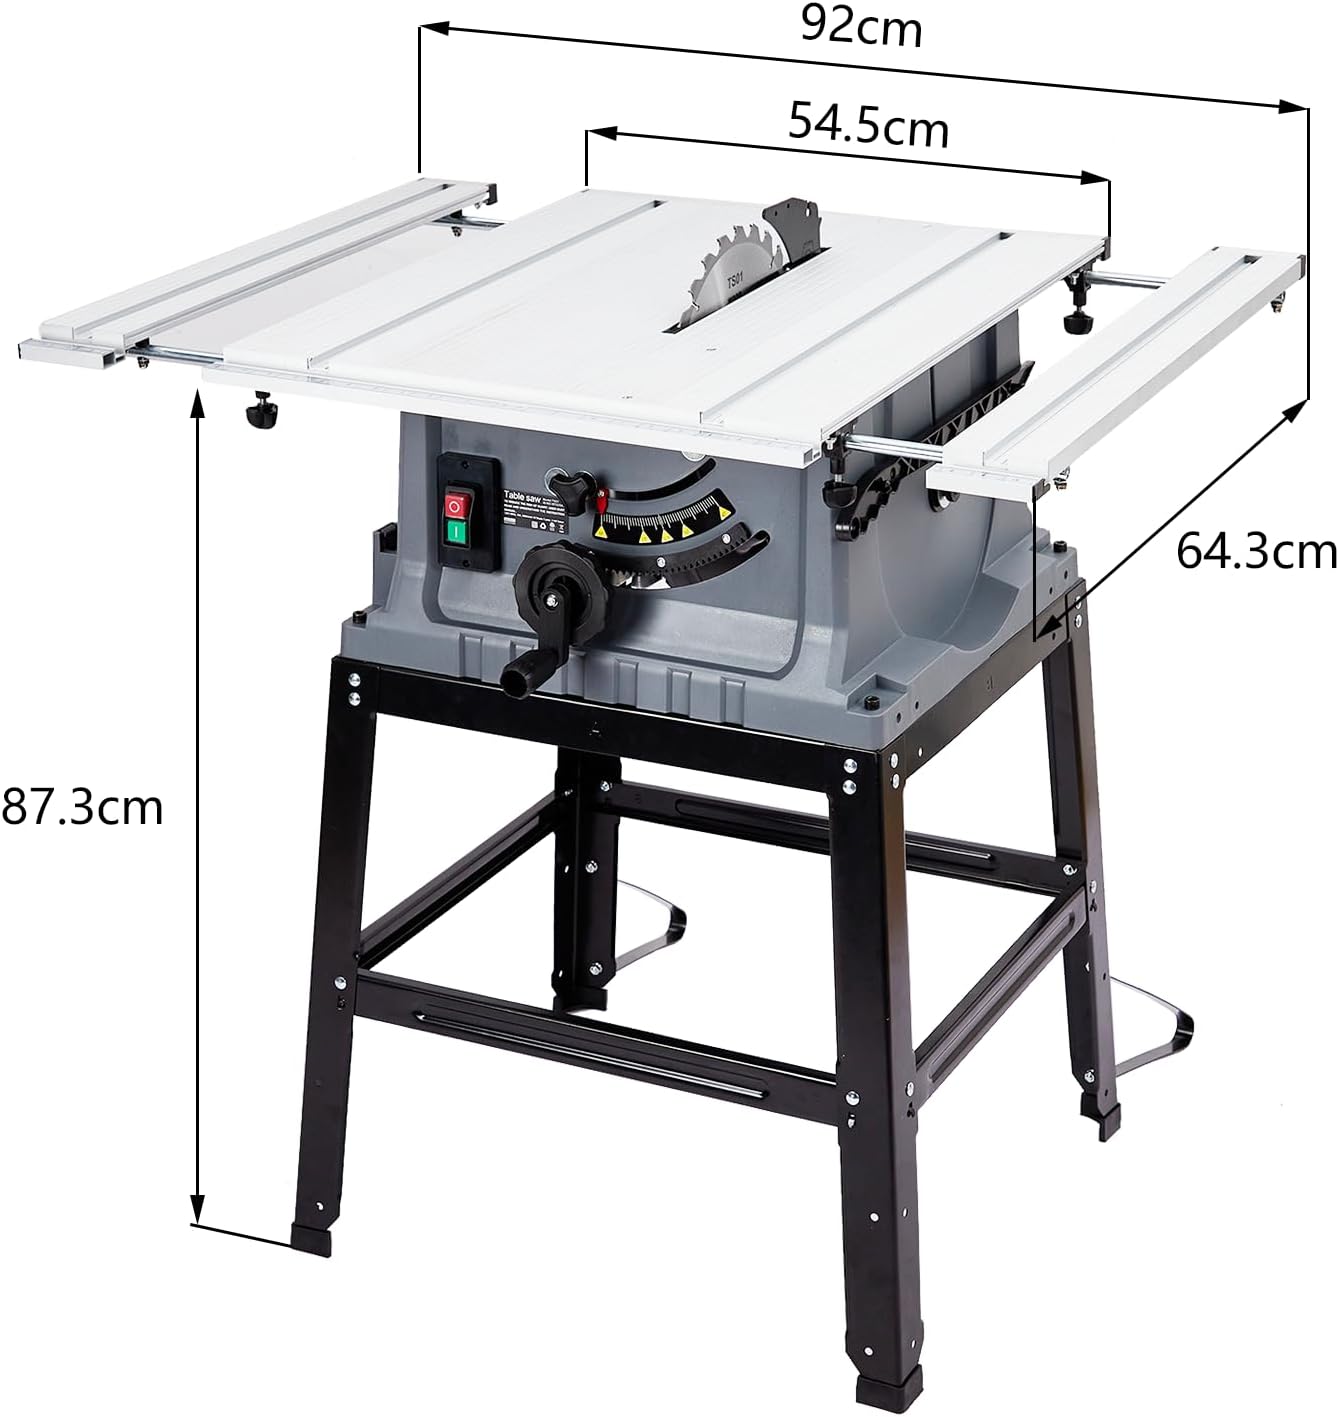
Onyonyo: Akụkụ n'ofeview of the Garvee Table Saw, useful for planning workspace and setup.
Ntuziaka ọrụ
1. Ịgbanye / gbanyụọ
Connect the saw to a suitable power outlet. Use the green button to turn the saw ON and the red button to turn it OFF. Always ensure the blade has come to a complete stop before leaving the saw unattended.
2. Blade Height Adjustment
The blade height can be adjusted using the hand wheel located on the front of the saw. Rotate the hand wheel to raise or lower the blade to the desired cutting depth. For optimal safety and cut quality, the blade should extend approximately 1/8 inch above the workpiece.

Image: Close-up of the hand wheel mechanism for adjusting the blade height on the Garvee Table Saw.
3. Bevel Angle Adjustment (0-45 degrees)
The Garvee Table Saw allows for bevel cuts from 0 to 45 degrees. Loosen the bevel lock knob, adjust the blade to the desired angle using the angle scale, and then securely tighten the lock knob. The rack and pinion system ensures precise angle settings.

Image: Visual comparison of cutting depths for 90-degree cross cuts (74mm) and 45-degree bevel cuts (52mm).
4. Using the Rip Fence and Miter Gauge
The rip fence is used for making straight cuts parallel to the blade. Position the fence to the desired width using the scale on the table and lock it securely. The miter gauge is used for making accurate cross cuts and angled cuts. Insert it into the miter slot and adjust to the required angle.

Image: Detail of the rip fence scale, indicating precise measurement for parallel cuts.

Image: Close-up of the miter gauge, used for accurate cross-cutting and angled cuts.
5. Dust Collection System
The table saw features a dust collection port at the rear. Connect a shop vacuum or dust collector to this port to maintain a cleaner work environment and improve visibility during operation.

Image: The dust collection port on the Garvee Table Saw, shown connected to an external vacuum system.
6. Cutting Various Materials
The Garvee Table Saw is designed for cutting various materials including wood, plastics, and aluminum. Always use the appropriate blade for the material being cut and ensure the workpiece is properly supported.

Image: The Garvee Table Saw demonstrating its capability to cut wood, plastics, and aluminum.
Vidiyo: Ofeview of the Garvee 10-inch Table Saw in operation, demonstrating its cutting capabilities and features.
Nlekọta
Nlekọta anya mgbe niile na-eme ka ogologo ndụ na ọrụ nchekwa nke tebụl tebụl gị dị.
- Nhicha: After each use, unplug the saw and clean off sawdust and debris from the table, blade guard, and motor vents. Use compressed air for hard-to-reach areas.
- Nyocha agụba: Regularly inspect the blade for sharpness, damage, or missing teeth. Replace dull or damaged blades immediately.
- mmanu mmanu: Periodically lubricate moving parts such as the blade height adjustment mechanism and bevel adjustment gears with a dry lubricant.
- Nyocha eriri: Check the power cord for any signs of damage, cuts, or fraying. Replace damaged cords immediately.
- Lelee ngwa ngwa: Periodically check all nuts, bolts, and screws for tightness and re-tighten as necessary.
Nchọpụta nsogbu
This section addresses common issues you might encounter with your Garvee Table Saw.
| Nsogbu | Ihe nwere ike ime | Ngwọta |
|---|---|---|
| Saw anaghị amalite | No power, tripped circuit breaker, faulty switch, activated overload protection. | Check power connection, reset circuit breaker, allow motor to cool if overloaded, contact support if switch is faulty. |
| Agụba na-ekekọta ma ọ bụ ụlọ ahịa n'oge ịkpụ | Dull blade, improper blade height, workpiece pinching, motor overload. | Replace or sharpen blade, adjust blade height, ensure workpiece is properly supported and guided, reduce feed rate. |
| Mbelata na-ezighi ezi | Rip fence not parallel, miter gauge not set correctly, loose blade. | Adjust rip fence for parallelism, verify miter gauge angle, check blade for tightness. |
| Oke ịma jijiji ma ọ bụ mkpọtụ | Loose blade, damaged blade, loose components, motor issues. | Check blade for tightness and damage, inspect all fasteners, contact support if motor issue is suspected. |
Nkọwapụta
| Njirimara | Nkọwapụta |
|---|---|
| Ụdị | Garvee |
| Nọmba nlereanya | 01 |
| Dayameta agụba | 10 sentimita asatọ |
| moto Ampoge | 15A |
| Ọsọ enweghị ibu | 5000 RPM |
| Max. Cross Cut (90°) | 74mm (2-7/8") |
| Max. Bevel Cut (45°) | 52mm (2-3/64") |
| Ike Bevel | 0-45 ogo |
| Ihe agụba | Stainless Steel (Carbide Tipped) |
| Isi Iyi Ike | Igwe ọkụ eletrik |
| Akụkụ ihe (L x W x H) | 35"L x 30"W x 40"H |
| Ngwa gụnyere | Table Saw, Blade, Stand, Push Stick, Rip Fence, Miter Gauge |
Akwụkwọ ikike na nkwado
Ozi akwụkwọ ikike
The Garvee 10-inch 15A Table Saw comes with a Limited Warranty. Please refer to the warranty card included in your package for specific terms and conditions, including coverage duration and claim procedures.
Atụmatụ Nchedo
Extended protection plans are available for purchase to provide additional coverage beyond the standard limited warranty. Options include:
- Atụmatụ Nchekwa afọ 3
- Atụmatụ Nchekwa afọ 4
- Complete Protect (monthly renewal)
Details regarding these plans, including pricing and coverage, can be found at the point of purchase or by contacting customer service.
Nkwado ndị ahịa
For technical assistance, parts, or warranty claims, please contact Garvee customer support. You can also visit the official Garvee Store for more information and resources: Garvee Store