
NXGKET 2AYV7YG-813
NXGKET Rechargeable Walkie-Talkie User Manual
Model: 2AYV7YG-813
Okwu mmalite
Thank you for choosing the NXGKET Rechargeable Walkie-Talkie. This manual provides detailed instructions for the safe and effective use of your new device. Designed for both children and adults, these walkie-talkies offer reliable communication with a long range, making them ideal for outdoor activities, camping, and general recreational use. Please read this manual thoroughly before operating the device and keep it for future reference.
Ozi nchekwa
Iji hụ na ọrụ nchekwa na gbochie mmebi, biko debe ihe ndị a:
- Do not disassemble or modify the walkie-talkie. Unauthorized modifications can void the warranty and pose safety risks.
- Keep the device away from water and moisture. It is water-resistant but not waterproof.
- Avoid exposing the walkie-talkie to extreme temperatures, direct sunlight, or open flames.
- Use only the provided USB Type-C charging cable and a compatible power adapter (not included) for charging.
- Na-elekọta ụmụaka mgbe a na-eji ha iji hụ na ejiri ha nke ọma ma chekwaa ha.
- Do not operate the walkie-talkie near medical devices or in areas where radio communication is restricted (e.g., hospitals, aircraft).
- Tụfuo batrị na akụrụngwa eletrọnịkị nke ọma dịka iwu obodo siri dị.
Ihe ngwugwu
Mgbe ịmepechara ngwugwu ahụ, biko chọpụta na ihe niile dị na ọ dị mma:
- 2 x NXGKET Rechargeable Walkie-Talkies (Blue)
- 2 x Built-in 1200mAh Lithium Polymer Batteries
- 1 x USB Type-C Charging Cable (for dual charging)
- Akwụkwọ ntuziaka onye ọrụ 1 x (akwụkwọ a)

Image: The NXGKET Walkie-Talkie package showing two blue walkie-talkies, a charging cable, and the product box, illustrating the typical contents.
Ngwaahịa gafereview
Familiarize yourself with the various components and controls of your walkie-talkie:

Image: A detailed diagram labeling the key components of the NXGKET Walkie-Talkie, including the antenna, PTT button, LCD display, lamp button, menu/lock button, sound speaker, power/scan button, up/down buttons, call/ring button, Type-C charging port, and removable belt clip.
- Antenna: Maka ịnyefe na ịnata akara.
- PTT (Push-to- Talk) bọtịnụ: Pịa ma jide ka ịnyefe olu gị.
- Bọtịnụ dị elu: Navigates menus upwards or increases values.
- Lamp Bọtịnụ: Na-arụ ọrụ ọkụ ọkụ ọkụ arụnyere n'ime ya.
- Menu/Lock Button: Enters menu settings or locks/unlocks the keypad.
- Sound Speaker: ewepụtara ọdịyo.
- Power/Scan Button: Turns the device on/off (long press) or initiates channel scanning (short press).
- Pịa bọtịnụ: Navigates menus downwards or decreases values.
- Call/Ring Button: Sends a call tone to other walkie-talkies on the same channel.
- Ụdị-C ọdụ ụgbọ mmiri: For connecting the USB Type-C charging cable.
- Remove Belt Clip: Point for attaching or detaching the belt clip.
- Ngosipụta LCD: Shows channel, volume, battery status, and other indicators.
Melite
1. Nchaji mbụ
Your walkie-talkie comes with a built-in 1200mAh lithium polymer battery. For optimal performance, fully charge the device before first use.
- Connect the provided USB Type-C charging cable to the charging port on the side of the walkie-talkie.
- Connect the other end of the USB cable to a compatible USB power source (e.g., wall adapter, computer USB port, power bank).
- The battery indicator on the LCD display will show charging status. A full charge typically takes approximately 2 hours.
- Once fully charged, the battery can provide up to 24 hours of work time and up to 3 days of standby time.

Image: An illustration demonstrating the 1200mAh lithium polymer battery and its charging time (2 hours for full charge) and work time (24 hours), alongside a diagram of the high-volume speaker.
2. Gbanyụọ / gbanyụọ
- To turn on the walkie-talkie, press and hold the bọtịnụ ike/nyocha until the LCD screen illuminates.
- To turn off the walkie-talkie, press and hold the bọtịnụ ike/nyocha ruo mgbe ihuenyo LCD gbanyụọ.
Ntuziaka ọrụ
1. Setting Channels and Privacy Codes
For two or more walkie-talkies to communicate, they must be set to the same channel and privacy code (CTCSS/DCS).
- The NXGKET walkie-talkie has 16 main channels and 121 privacy codes (38 CTCSS codes and 83 DCS codes).
- Pịa NchNhr/Mkpọchi bọtịnụ once to enter channel selection mode. Use the Up or bọtịnụ ala to select your desired channel (1-16). Press PTT iji kwado ma ọ bụ NchNhr again to move to privacy code setting.
- Pịa NchNhr/Mkpọchi bọtịnụ twice to enter privacy code selection mode. Use the Up or bọtịnụ ala to select your desired privacy code (0-121). Code 0 means no privacy code.
- Pịa Igodo PTT to confirm your selection and exit the menu.
- Ensure all walkie-talkies intended for communication are set to the identical channel and privacy code.
2. Na-ebufe na ịnata
- To transmit your voice, press and hold the Igodo PTT. Speak clearly into the microphone (located near the speaker). Release the Igodo PTT when you finish speaking to allow the other party to respond.
- Mgbe Igodo PTT is not pressed, the walkie-talkie is in receive mode. You will hear incoming transmissions through the speaker.
3. Na-agbanwe olu
Jiri ihe Up na bọtịnụ ala (when not in menu mode) to adjust the speaker volume. The volume level will be displayed on the LCD screen.
4. Kpọọ ụda
Pịa Call/Ring Button once to send an audible call tone to other walkie-talkies on the same channel and privacy code, alerting them to an incoming transmission.
5. VOX (Voice Operated Exchange) Function
VOX allows hands-free operation. When activated, the walkie-talkie will automatically transmit when it detects your voice.
- Pịa NchNhr/Mkpọchi bọtịnụ multiple times until "VOX" appears on the LCD display.
- Jiri ihe Up or bọtịnụ ala to select the VOX sensitivity level (e.g., 1-3, with 3 being most sensitive). Select "OFF" to disable VOX.
- Pịa Igodo PTT iji kwado wee pụọ.
6. Nyochaa ọwa
The scan function allows you to automatically scan through channels to find active conversations.
- Pịa nkenke bọtịnụ ike/nyocha (when the device is on) to initiate channel scanning. The walkie-talkie will cycle through channels until it detects a signal.
- It will pause on an active channel. To stop scanning, press the bọtịnụ ike/nyocha ọzọ ma ọ bụ Igodo PTT.
7. Ọkụ ọkụ ọkụ
The built-in LED flashlight can be used for illumination in low-light conditions.
- Pịa Lamp Bọtịnụ once to turn on the flashlight.
- Pịa Lamp Bọtịnụ ọzọ iji gbanyụọ ọkụ ọkụ.
8. Mkpọchi ahụ igodo
To prevent accidental button presses, you can lock the keypad.
- Pịa ma jide NchNhr/Mkpọchi bọtịnụ for a few seconds until a lock icon appears on the LCD display.
- Ka ịkpọghee, pịa ma jide NchNhr/Mkpọchi bọtịnụ again until the lock icon disappears.
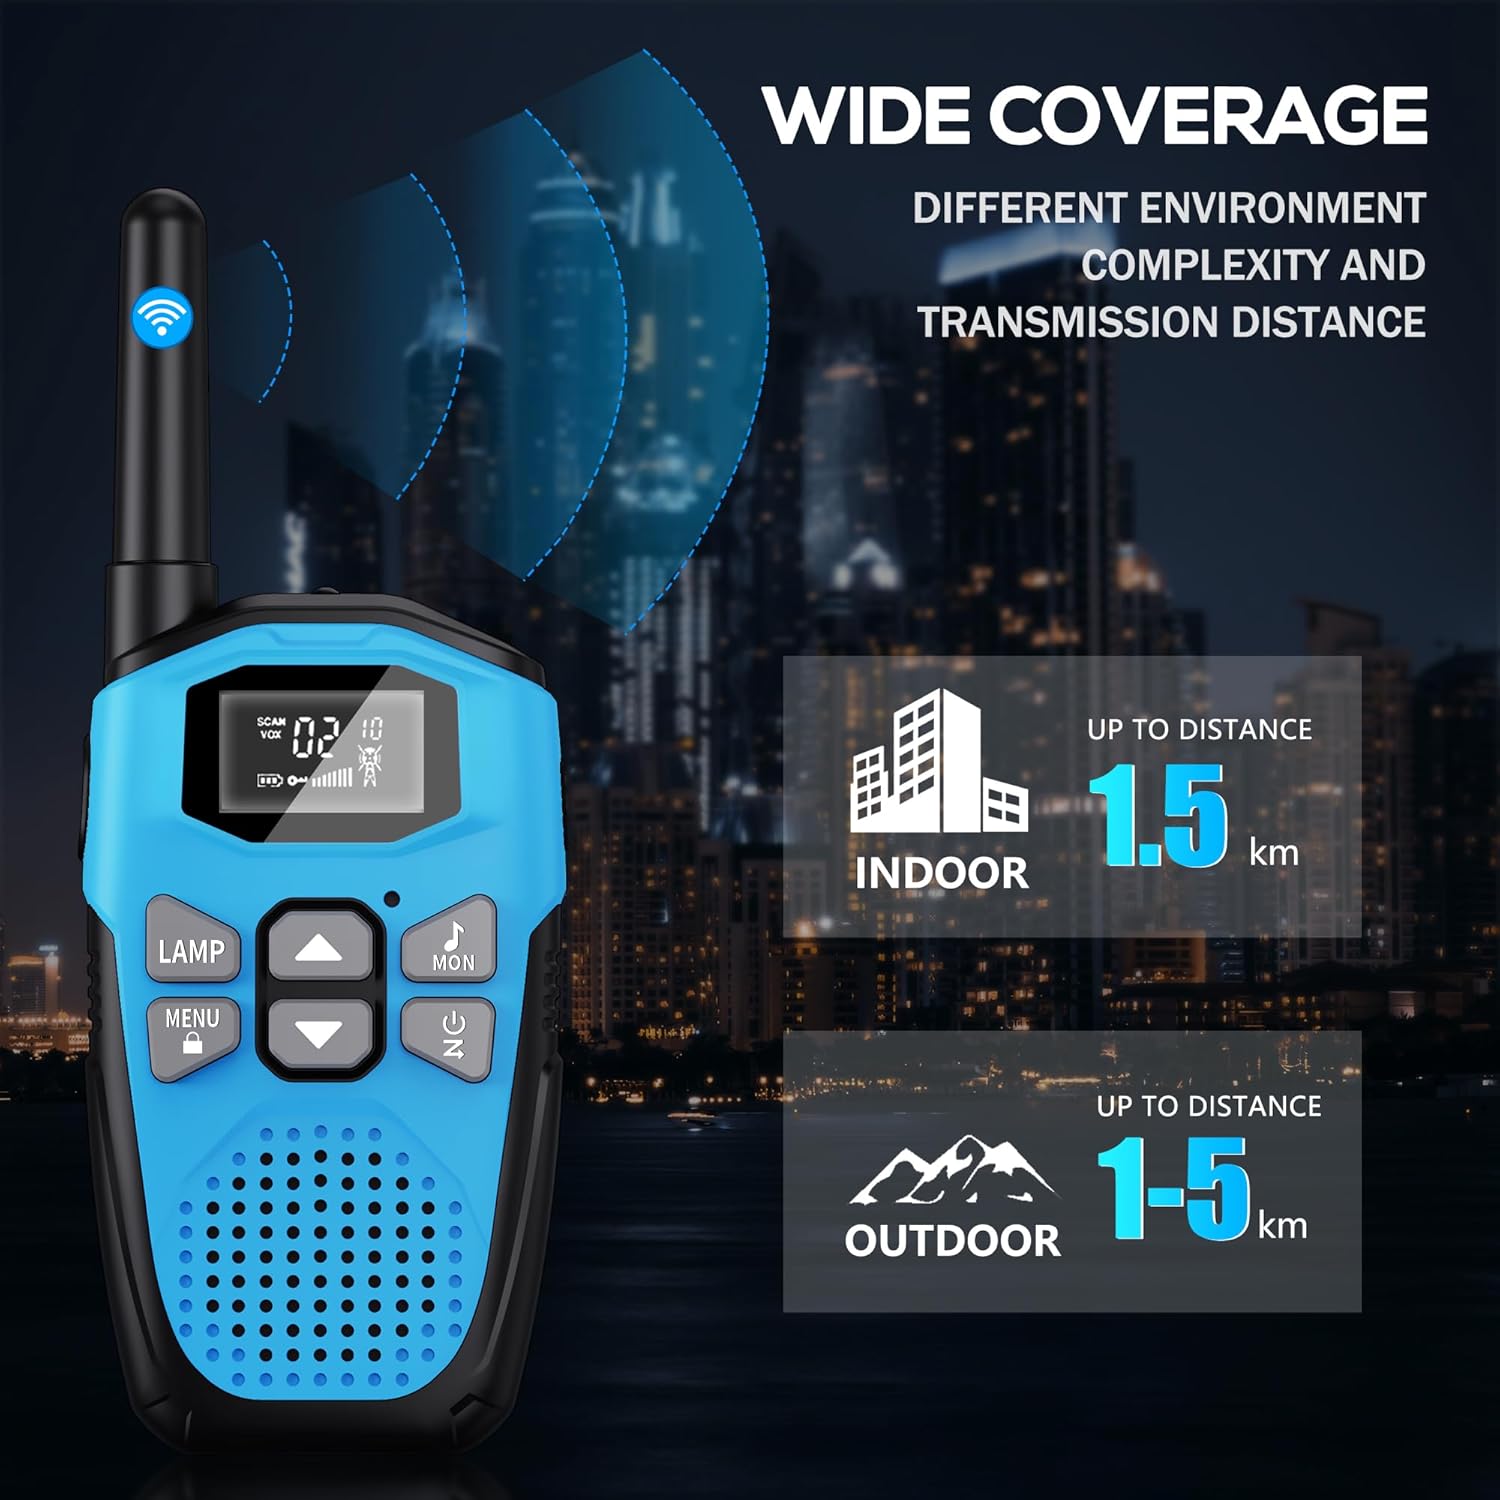
Image: An illustration showing the wide coverage capabilities of the walkie-talkie, indicating an indoor range of up to 1.5 km and an outdoor range of 1-5 km, depending on environmental complexity and transmission distance.
Nlekọta
- Nhicha: Wipe the walkie-talkie with a soft, damp akwa . Ejila kemịkalụ siri ike ma ọ bụ ihe mkpocha abrasive.
- Nchekwa: Debe ngwaọrụ ahụ n'ebe dị jụụ ma kpọọ nkụ, ebe anwụ na-anaghị apụta kpọmkwem, okpomọkụ na oke okpomọkụ mgbe a naghị eji ya.
- Nlekọta batrị: For long-term storage, it is recommended to charge the battery to about 50% every 3-6 months to maintain battery health.
- Wepu Nchekwa: The walkie-talkie features a hard shell and anti-drop design for environmental protection. However, avoid excessive drops or impacts to prevent damage.

Image: A visual representation highlighting the walkie-talkie's hard shell, anti-drop design, and key features such as VOX hands-free, keypad lock, clear sound, drop protection, noise reduction, and LED emergency light.
Nchọpụta nsogbu
| Nsogbu | Ihe nwere ike ime | Ngwọta |
|---|---|---|
| Enweghị ike | Batrị agwụla. | Charge the walkie-talkie fully. |
| Cannot communicate with other walkie-talkies | Different channels or privacy codes. | Ensure all walkie-talkies are on the same channel and privacy code. |
| Ogo ụda adịghị mma ma ọ bụ kwụ ọtọ | Out of range; low battery; interference. | Move closer to the other unit; charge battery; move away from sources of interference. |
| Ogologo nkwurịta okwu dị mkpirikpi | Obstacles (buildings, terrain); environmental factors. | Move to an open area; range is reduced in urban/dense environments. |
| Ahụigodo anaghị anabata | Akpọchiela ahụigodo. | Pịa ma jide NchNhr/Mkpọchi bọtịnụ imeghe. |
Nkọwapụta
| Njirimara | Nkọwa |
|---|---|
| Ụdị | NXGKET |
| Nọmba nlereanya | 2AYV7YG-813 |
| Agba | Acha anụnụ anụnụ |
| Ụdị batrị | Built-in 1200mAh Lithium Polymer (rechargeable) |
| Nchaji ọdụ ụgbọ mmiri | USB Ụdị-C |
| Ọnụọgụ nke ọwa | 16 |
| Koodu nzuzo | 121 (38 CTCSS, 83 DCS) |
| Oke ugboro ugboro | 446 MHz (UHF) |
| Maximum Range (Open Area) | Up to 5 Kilometers (approx. 3.1 miles) |
| Maximum Range (Urban Area) | Up to 1.5 Kilometers (approx. 0.9 miles) |
| Voltage | 3.7 volts |
| Ọkwa Nguzogide mmiri | Mmiri na-eguzogide (ọ bụghị mmiri anaghị egbochi ya) |
| Atụmatụ pụrụ iche | Rechargeable Battery, Volume Control, Long Range, Lightweight, Noise Reduction, VOX, LCD Display with Backlight, LED Flashlight, Keypad Lock, Low Battery Alert, Drop Protection. |
Akwụkwọ ikike na nkwado
The NXGKET walkie-talkie has been tested to meet CE certification standards.
- Akwụkwọ ikike: Ngwaahịa a na-abịa na akwụkwọ ikike afọ 1 site na ụbọchị azụrụ ya.
- Nkwado ndị ahịa: For any questions, issues, or warranty claims, please contact NXGKET customer service via email. Refer to your purchase documentation for specific contact details or visit the official NXGKET websaịtị.
Ask a question about this manual
Ask about setup, troubleshooting, compatibility, parts, safety, or missing instructions. Manuals+ will review the question and use this page’s manual context to help answer it.