
1. Okwu mmalite
Thank you for choosing the Crivit Auriol Radio-Controlled Projection Alarm Clock. This device combines a precise radio-controlled clock with a clear LCD display, dual alarms, and a convenient projection feature. This manual will guide you through the setup, operation, and maintenance of your new alarm clock.

N'ihu view of the alarm clock displaying time, date, and temperature.
2. Ntuziaka nchekwa
- Gụọ ntuziaka niile nke ọma tupu ejiri ya ma debe ha maka ntụnye aka n'ọdịnihu.
- Ewepụla ngwaọrụ ahụ na oke okpomọkụ, ìhè anyanwụ kpọmkwem, ma ọ bụ oke iru mmiri.
- Zere idobe ma ọ bụ idobe ngwaọrụ ahụ na mmetụta siri ike.
- Anwala ịkwasa ma ọ bụ rụkwaa ngwaọrụ n'onwe gị. Kpọtụrụ ndị ọrụ ruru eru.
- Debe batrị ebe ụmụaka na-agaghị eru ya aka. Tụfuo batrị ejirila mee ihe dịka iwu obodo si dị.
- Use only the provided AC adapter or one with identical specifications.
3. Ihe ngwugwu
Biko lelee ngwungwu maka ihe ndị a:
- Crivit Auriol Radio-Controlled Projection Alarm Clock (Model 373928)
- Ada Ada AC
- Batrị (etinyere ya ma ọ bụ kewapụrụ iche)
- Akwụkwọ ntuziaka (akwụkwọ a)

Included AC power adapter.
4. Akụrụngwa Ngwaahịa
- Radio-Controlled Time: Automatic time synchronization for precise timekeeping.
- Ọrụ amụma: Projects time, alarm times, or ambient temperature onto a wall or ceiling.
- Pivoting Projection Arm: Adjustable projection angle with easy focus adjustment.
- Ngosipụta LCD: Clear screen showing time, day, month, week number/day of the week, and indoor temperature.
- Mkpu abụọ: Two independent alarm settings with snooze function.
- Ihe mmetụta aka: Activates short-term projection and screen backlight.
- Nhọrọ ike: Operates via AC adapter or batteries.
- Ọdụ ụgbọ mmiri USB-A: Convenient 5V, 800mA output for charging external devices.
- Icha ọkụ nwere ike ịgbanwe: Customizable display brightness.
5. Njirimara akụrụngwa
N'ihu View:
N'ihu view with LCD display.
- Ngosipụta LCD: Shows time, date, temperature, alarm status, and radio control signal.
- Touch Sensor Area: Located above the display, for temporary backlight and projection.
- Projection Indicator: Icon indicating projection is active.
- Ihe ngosi mkpu: Icons for Alarm 1 and Alarm 2.
- Bọtị ntụgharị: Adjusts projection orientation.
Akụkụ View (Projection Arm):
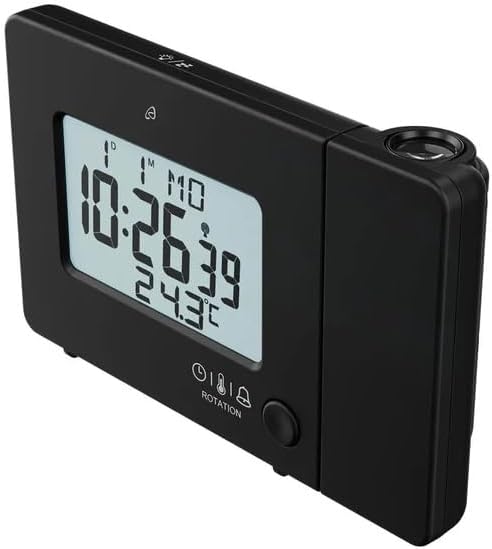
Akụkụ view with projection arm extended.
- Ogwe aka amụma: Pivots to direct the projection.
- Wheel lekwasịrị anya: Adjusts the clarity of the projected image.
- Okirikiri anya: Emits the time/temperature display.
N'azụ View:

N'azụ view with control buttons and ports.
- -/WEEK Button: Decreases values, sets week display.
- +/ZONE Button: Increases values, sets time zone.
- bọtịnụ Celsius C/F: Toggles temperature unit.
- LANG Button: Selects display language for day of the week.
- 12/24 bọtịnụ: Toggles 12/24 hour format.
- Bọtịnụ MODE: Cycles through settings modes (Time, Alarm 1, Alarm 2).
- Bọtịnụ SET: Enters setting mode for current display.
- Bọtịnụ Tọgharia: Resets the device to factory defaults (use a pointed object).
- Akụkụ batrị: For backup batteries.
- DC n'ọdụ ụgbọ mmiri: Maka ijikọ ihe nkwụnye ike AC.
- Ọdụ ụgbọ mmiri USB-A: Maka ịchaji ngwaọrụ mpụga.
6. Nhazi
6.1. Na-agbanye ike
The alarm clock can be powered by either the included AC adapter or batteries for backup.
- Nwụnye batrị: Open the battery compartment on the rear of the unit. Insert the included batteries, observing the correct polarity (+/-). Batteries primarily serve as backup in case of power outage.
- Njikọ ihe nkwụnye AC: Connect the small plug of the AC adapter into the DC IN port on the back of the alarm clock. Plug the AC adapter into a standard wall outlet. The display will light up.
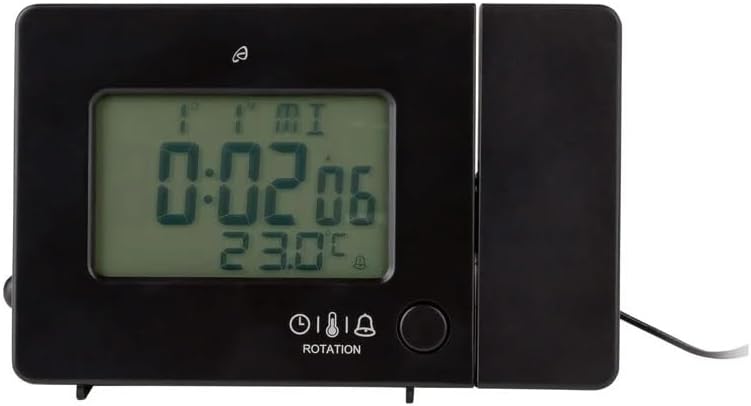
Alarm clock connected to power.
6.2. Initial Setup and Radio Control Synchronization
Upon first power-up or after a reset, the clock will automatically attempt to synchronize with the radio-controlled time signal (DCF77). This process can take several minutes to an hour, depending on your location and signal strength. During synchronization, a radio tower icon will flash on the display.
- Debe elekere n'akụkụ windo maka nnabata mgbaama ka mma.
- Avoid placing it near electronic devices that may cause interference.
- Once synchronized, the radio tower icon will appear solid on the display.
If the radio signal is not received, you may need to set the time manually (see Section 7.1).
6.3. Basic Settings (if not automatically set or for adjustment)
Pịa SET button to enter setting mode. Use the -/WEEK na +/ZONE buttons to adjust values, and SET iji kwado ma gaa na ntọala na-esote.
- Mpaghara Oge: Adjust if you are not in the standard time zone for the radio signal.
- Usoro elekere 12/24: Pịa 12/24 button to toggle between 12-hour (with AM/PM) and 24-hour formats.
- Ngalaba okpomọkụ: Pịa ° C/° F bọtịnụ ka ịgbanwee n'etiti Celsius na Fahrenheit.
- Gosipụta Asụsụ: Pịa LANG button to select the language for the day of the week display (5 languages available).
7. Ntuziaka ọrụ
7.1. Iji aka na-ahazi oge
If the radio-controlled time signal is weak or unavailable, you can set the time manually:
- Pịa ma jide SET bọtịnụ ruo mgbe ọnụọgụgụ awa ahụ na-enwu.
- Jiri ihe -/WEEK na +/ZONE bọtịnụ iji dozie elekere.
- Pịa SET to confirm and move to minutes, then year, month, and day.
- Pịa SET again to exit manual time setting.
7.2. Setting Alarms (Alarm 1 and Alarm 2)
Elekere ahụ nwere mkpu abụọ nọọrọ onwe ha.
- Pịa MODE button once to display Alarm 1 time, or twice for Alarm 2 time. The corresponding alarm icon (e.g., A1) will flash.
- While the alarm time is displayed, press and hold the SET bọtịnụ ruo mgbe ọnụọgụgụ awa ahụ na-enwu.
- Jiri ihe -/WEEK na +/ZONE bọtịnụ iji dozie elekere.
- Pịa SET to confirm and move to minutes. Adjust minutes using -/WEEK na +/ZONE.
- Pịa SET again to confirm and exit alarm setting.
- To activate/deactivate an alarm, press the MODE button to display the desired alarm, then press the +/ZONE button. The alarm icon (bell) will appear/disappear on the display.
7.3. Ọrụ snooze
When an alarm sounds, touch the Metụ ihe mmetụta Area ma ọ bụ pịa nwuo/Ìhè button (if available, otherwise use the touch sensor) to activate the snooze function. The alarm will pause for approximately 5 minutes and then sound again. To stop the alarm completely, press any other button.
7.4. Projection Function
The alarm clock can project the time, alarm times, or ambient temperature onto a wall or ceiling.
- Mee atụmatụ: The projection is continuously active when powered by the AC adapter. If running on batteries, touch the Metụ ihe mmetụta Area for short-term projection.
- Hazie akụkụ amụma: Pivot the projection arm to direct the image to your desired location.
- Hazie mgbado anya: Jiri ihe Lekwasị anya Wheel on the projection arm to sharpen the projected image.
- Change Projected Content: Pịa MODE button repeatedly to cycle through projecting Time, Alarm 1, Alarm 2, or Temperature.
- tụgharịa amụma: Pịa Nkọwa button to rotate the projected image by 90-degree increments (4 orientations available).

Time projected onto a surface.
7.5. Gosipụta ìhè azụ
When powered by the AC adapter, the display backlight is continuously on. When running on batteries, touch the Metụ ihe mmetụta Area to activate the backlight for a few seconds.
7.6. USB Charging Output
The USB-A port on the back of the unit provides a 5V, 800mA output for charging small electronic devices like smartphones or tablets. Connect your device's USB charging cable to this port.
8. Nlekọta
- Nhicha: Jiri ákwà dị nro ma kpọọ nkụ hichaa ngwaọrụ ahụ. Ejila ihe nhicha ma ọ bụ ihe mgbaze.
- Ngbanwe batrị: If using batteries for backup, replace them annually or when the display becomes dim during power outages. Ensure correct polarity.
- Nchekwa: Ọ bụrụ na ị na-echekwa ngwaọrụ ahụ ruo ogologo oge, wepụ batrị ndị ahụ iji gbochie mmiri ịpụ apụ.
9. Nchọpụta nsogbu
| Nsogbu | Ihe nwere ike ime | Ngwọta |
|---|---|---|
| Ngosipụta bụ oghere ma ọ bụ nchara nchara. | No power, dead batteries, or AC adapter not connected. | Ensure AC adapter is securely connected. Replace batteries if using for backup. |
| Oge redio na-achịkwa anaghị arụkọ ọrụ. | Weak signal, interference, or incorrect time zone. | Move the clock to a window or open area. Avoid electronic devices. Manually set time if necessary. Check time zone setting. |
| Projection is blurry. | Agbanwebeghị uche. | Hazie nke Lekwasị anya Wheel on the projection arm. |
| Oti mkpu anaghị ada ụda. | Agbaghị mkpu ma ọ bụ ahazighị ya nke ọma. | Ensure the alarm icon is visible on the display. Recheck alarm time settings. |
| Nchaji USB anaghị arụ ọrụ. | Device not properly connected, or device requires more power than 800mA. | Ensure the USB cable is securely connected. Check if your device's charging requirements exceed 5V/800mA. |
10. Nkọwapụta

Akụkụ ngwaahịa.
- Nọmba nlereanya: 373928
- Akụkụ (L x W x H): 15 x 3.81 x 9.5 cm (approx. 15l x 9.5H centimeters)
- Ihe: Plastic
- Ụdị ngosi: Dijitalụ LCD
- Isi mmalite ike: AC Adapter (included) or Batteries (included)
- USB mmepụta: 5V, 800mA
- Atụmatụ pụrụ iche: Adjustable brightness, Snooze, Projection, Radio-controlled time
- Ụdị mmegharị: Quartz
- Ụdị nkwụnye: N'elu tebụl
- Ime ụlọ/n'èzí: Ime ụlọ
11. Akwụkwọ ikike na nkwado
This Crivit Auriol Projection Alarm Clock comes with a standard manufacturer's warranty. Please refer to the warranty card included in your package or contact your retailer for specific warranty terms and conditions.
For technical support or inquiries, please contact the customer service department of your retailer or the Crivit support line as indicated on the product packaging or official websaịtị.