
1. Ozi nchekwa dị mkpa
Please read these instructions carefully before installation. If you do not understand these instructions or have doubts about the safety of the installation, please contact a qualified installer. The manufacturer is not responsible for damage or injury caused by incorrect mounting or operation.
- Ike ibu: This TV wall mount is designed for TVs weighing up to 110 lbs (50 n'arọ)Agafela oke ibu a.
- Ndakọrịta nha TV: Dakọtara na ọtụtụ 40-82 inch flat or curved TVs.
- Ndakọrịta VESA: Supports VESA mounting patterns from 200x100mm ruo 600x400mm. Verify your TV's VESA pattern before installation.
- Ụdị Mgbidi: This mount is designed for installation on osisi studs or solid concrete/brick walls. Awụnyela na drywall naanị.
- Edepụtara UL: This product is UL Listed, indicating it meets specific safety standards.
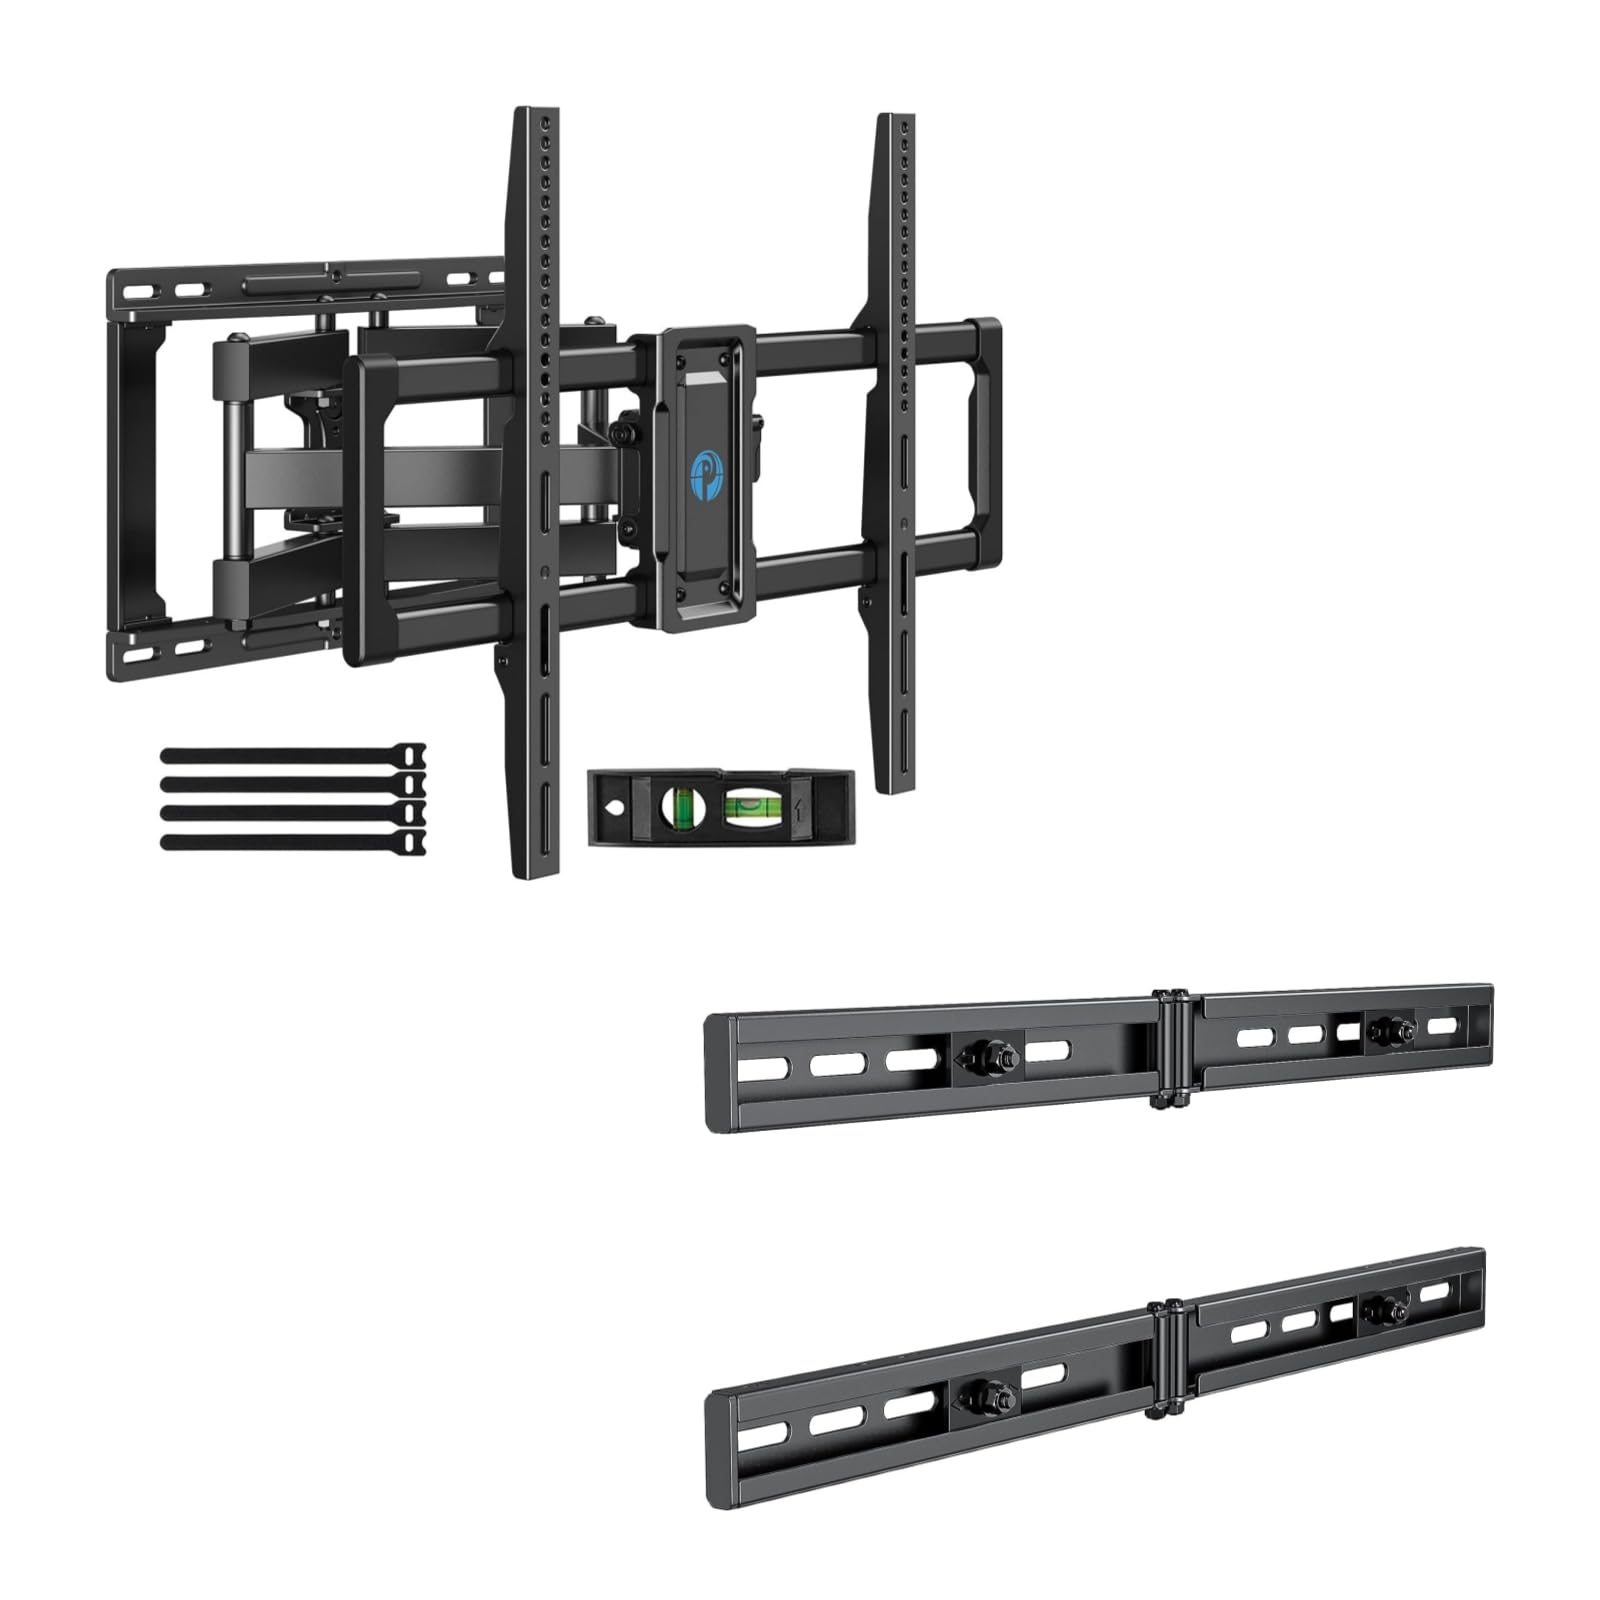
Image 1.1: Reinforced stability of the mount, highlighting heavy-duty steel arms and UL certification for safety and durability.
2. Ihe ngwugwu
Please check to ensure all components are present and undamaged before beginning installation. If any parts are missing or defective, contact Pipishell customer service.
2.1 Ngwa achọrọ (anaghị etinye ya)
- Pensụl
- Onye nchọta nchọta
- Drill with appropriate drill bits (e.g., 5/32" (4mm) for wood studs, 3/8" (10mm) for concrete)
- Ọkwa
- Ihe teepu
- Mgbawa Socket ma ọ bụ Mgbawa A Na-agbanwe Agbanwe
- Phillips Isi Ihe Nleghari
2.2 Hardware and Components (Included)
- Mgbakọ Mgbidi Efere
- Mpempe igwe onyonyo (2)
- Extension Brackets (2)
- Various TV Screws, Washers, and Spacers (M4, M6, M8)
- Lag Bolts and Concrete Anchors
- Ọkwa Afụ
- eriri USB
3. Ntọala na nwụnye
3.1 Nyochaa nwụnye tupu etinye ya
- Verify your TV's weight, size, and VESA pattern are within the mount's specifications.
- Determine the desired viewing height for your TV.
- Locate the wall studs using a stud finder. Mark the center of the studs.
3.2 Ịwụnye efere mgbidi
The extension bracket feature allows for installation on wood studs with spacing between 16 and 24 inches.
- Position the wall plate assembly on the wall at your desired height, ensuring it is level. Mark the drill holes.
- For wood stud installation, drill pilot holes (e.g., 5/32" or 4mm) into the center of the studs. For concrete/brick, drill pilot holes (e.g., 3/8" or 10mm) and insert concrete anchors.
- Attach the wall plate to the wall using the provided lag bolts. Tighten securely.

Image 3.1: The extended wall plate design provides a flexible solution for mounting on walls with stud spacing between 16 and 24 inches.

Image 3.2: This feature helps center your TV for optimal viewing, even when wall studs are not perfectly centered.
3.3 Ịtinye ihe nkwado TV na TV
- Jiri nlezianya tinye ihu TV gị n'elu ebe dị nro ma dị ọcha.
- Select the appropriate screws, washers, and spacers for your TV's VESA mounting holes.
- Attach the two TV brackets to the back of your TV. Ensure they are securely fastened and evenly spaced.
3.4 Ịwụnye TV na efere mgbidi
- With assistance, carefully lift the TV and hook the TV brackets onto the wall plate.
- Hụ na TV ahụ dị n'elu mgbidi ahụ nke ọma.
- Tighten the safety screws or locking mechanisms on the TV brackets to prevent accidental dislodgement.
4. Operating the TV Mount
This full motion mount allows for flexible adjustment to achieve the best viewakụkụ n'akuku.
4.1 Ndozigharị Swivel
The mount allows for a swivel range of +/-45°. Gently push or pull the TV to the desired left or right angle.

Image 4.1: The mount offers a smooth swivel motion of up to 45 degrees in either direction for flexible viewing.
4.2 Tilt mmezi
Adjust the tilt angle from +5° ruo -15° to reduce glare and optimize viewing. This adjustment is tool-free.

Image 4.2: Easily adjust the TV's vertical angle from +5° to -15° without tools to minimize glare and improve comfort.
4.3 Mgbatị na Nlaghachi
The mount allows the TV to extend from the wall by 2.89 sentimita asatọ ruo 16.3 sentimita asatọ. Gently pull the TV forward or push it back towards the wall to adjust the distance.

Image 4.3: Adjust the TV's distance from the wall, extending up to 16.3 inches or retracting to 2.89 inches for optimal viewoghere oghere.
5. Nlekọta
- Nlele anya mgbe niile: Lelee skru na njikọ niile iji hụ na ha kwụsiri ike na nchekwa.
- Nhicha: Jiri ákwà dị nro ma kpọọ nkụ hichaa ebe a na-etinye ihe n'elu ya. Zere ihe nhicha ma ọ bụ ihe mgbaze.
- mmanu mmanu: The moving parts are designed for smooth operation. No lubrication is typically required. If movement becomes stiff, check for debris or loose components.
6. Nchọpụta nsogbu
- TV abụghị ọkwa: Check the level of the wall plate during installation. Most mounts have a post-installation leveling adjustment. Refer to the specific mechanism on your mount.
- Difficulty adjusting swivel/tilt/extension: Ensure no cables are snagged or obstructing movement. Check if any adjustment knobs or screws are overtightened. The mount features improved torque accuracy for smoother movement.
- Mount feels loose on the wall: Immediately remove the TV from the mount. Re-check all wall plate fasteners and ensure they are securely anchored into the studs or concrete. If issues persist, consult a professional installer.
- TV brackets do not fit TV: Verify your TV's VESA pattern matches the mount's compatibility (200x100mm to 600x400mm). Ensure you are using the correct screws and spacers for your TV model.
7. Nkọwapụta
| Njirimara | Nkọwapụta |
|---|---|
| Ụdị nkwụnye | Ugwu mgbidi |
| Ụdị mmegharị | Na-ekwu okwu (Motion zuru ezu) |
| Ụdị | Pipishell |
| Ihe onwunwe | Alloy Steel |
| Ngwa dakọtara | Igwe onyonyo |
| Minimum Supported Screen Size | 40 sentimita asatọ |
| Maximum Supported Screen Size | 82 sentimita asatọ |
| Ikike ịdị arọ kacha | 110 lbs (50 n'arọ) |
| Ndakọrịta VESA | 200x100mm ruo 600x400mm |
| Ogologo Swivel | +/- 45 ogo |
| Tit Range | +5 / -15 Degrees (Tool-Free) |
| Mgbatị sitere na Mgbidi | 2.89 - 16.3 sentimita asatọ |
8. Akwụkwọ ikike na nkwado ndị ahịa
Pipishell products are designed for durability and performance. For warranty information or technical assistance, please contact Pipishell customer support through their official websaịtị ma ọ bụ onye na-ere ahịa ebe a zụrụ ngwaahịa ahụ.
Biko mee ka ụdị ngwaahịa gị na ụbọchị ịzụrụ ya dị mgbe ị na-akpọtụrụ ndị na-akwado ya.