
Okwu mmalite
Thank you for choosing the GEARSTONE Foldable Magnetic Exercise Bike. This manual provides essential information for the safe assembly, operation, and maintenance of your exercise bike. Please read this manual thoroughly before use and keep it for future reference.
Ozi nchekwa dị mkpa
- Kpọtụrụ dọkịta gị tupu ịmalite mmemme mmega ahụ ọ bụla.
- Na-ekpo ọkụ mgbe niile tupu ị mega ahụ ma jụọ oyi mgbe nke ahụ gasịrị.
- Gbaa mbọ hụ na agbachiela bolts na mkpụrụ niile nke ọma tupu ejiri nke ọ bụla.
- Debe igwe mmega ahụ n'elu ebe dị larịị ma kwụsie ike.
- Debe ụmụaka na anụ ụlọ n'ebe akụrụngwa nọ n'oge eji.
- The maximum user weight capacity for this bike is 120 kg (264 lbs).
- Kwụsị mgbatị ahụ ozugbo ma ọ bụrụ na ị na-ada mbà, isi ọwụwa, ma ọ bụ nwee mgbu.
- Yiri uwe na akpụkpọ ụkwụ kwesịrị ekwesị maka mmega ahụ.
Ihe ngwugwu
Carefully unpack the box and ensure all parts are present. Refer to the diagram below for a visual representation of the components.

Foto 1: Package Contents. This image displays the various components and tools included with your exercise bike, such as the main frame, pedals, seat, backrest, and assembly tools.
ngwugwu kwesịrị ịgụnye:
- Mgbakọ isi Frame
- Pedal aka ekpe na akanri
- Seat and Backrest
- Handlebar with LCD Monitor
- Ogwe ndị na-eme ka ihe sie ike (n'ihu na n'azụ)
- Hardware Kit (bolts, nuts, washers)
- Assembly Tools (wrench, Allen key)
- Akwụkwọ ntuziaka onye ọrụ
Ntọala na Mgbakọ
Follow these steps to assemble your GEARSTONE Foldable Magnetic Exercise Bike. It is recommended to have two people for assembly.
- Tinye Ogwe Nkwụsi Ike: Secure the front and rear stabilizer bars to the main frame using the provided bolts and nuts. Ensure they are firmly tightened for stability.
- Wụnye pedals: Identify the left (L) and right (R) pedals. The left pedal screws counter-clockwise, and the right pedal screws clockwise. Thread them into the crank arms and tighten securely.
- Mount Seat and Backrest: Insert the seat post into the main frame and adjust to your desired height. Secure it with the locking pin. Attach the backrest to the seat support.
- Attach Handlebar and Monitor: Connect the handlebar assembly to the main frame. Ensure all cables for the LCD monitor and pulse sensors are properly connected. Secure the handlebar with the designated bolts.
- Nyocha ikpeazụ: Before first use, double-check all connections and ensure all bolts and nuts are tightened.

Foto 2: Assembly Steps. This diagram illustrates the key stages of assembling the exercise bike, from attaching the base supports to installing the seat and pedals.
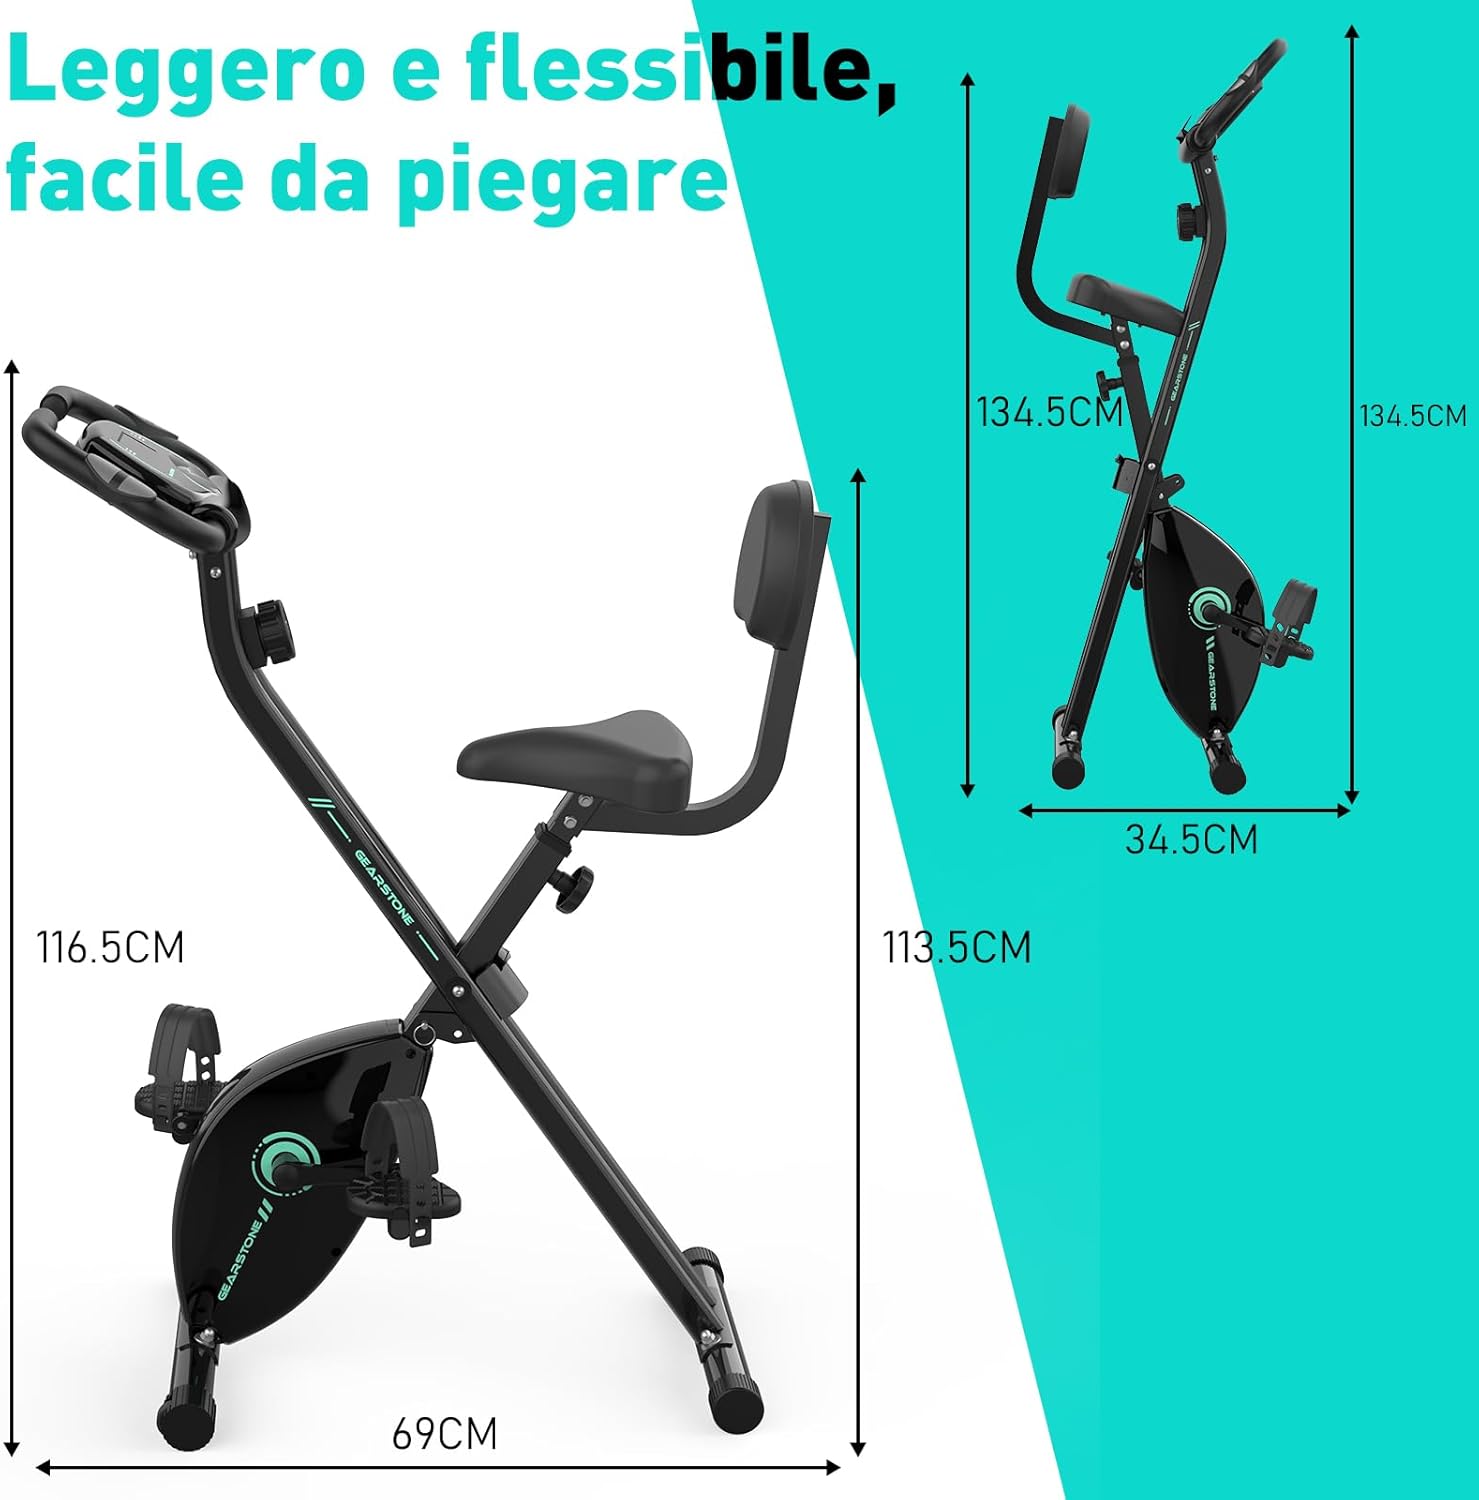
Foto 3: Assembled Bike Dimensions. This image shows the fully assembled exercise bike with its dimensions, highlighting its compact and foldable nature.
Ntuziaka ọrụ
Na-edozi Ogologo oche
The seat height can be adjusted to five different levels to accommodate various user heights. Loosen the adjustment knob located on the seat post, slide the seat to the desired height, and then tighten the knob securely. Ensure your knees have a slight bend at the bottom of the pedal stroke.

Foto 4: Seat and Resistance Adjustment. This image highlights the knob for adjusting magnetic resistance and the mechanism for adjusting seat height.
Na-edozi Nguzogide
The bike features 8 levels of magnetic resistance. Turn the resistance knob, located below the LCD monitor, clockwise to increase resistance and counter-clockwise to decrease it. Start with a lower resistance and gradually increase as your fitness improves.
Iji LCD Monitor
The LCD monitor displays key workout data. It is battery-powered. The monitor automatically turns on when you start pedaling or press a button.
- Nyochaa: Automatically cycles through all display functions every few seconds.
- OGE: Na-egosiputa oge mgbatị ahụ gị.
- Ọsọ: Na-egosi ọsọ ịgba ígwè gị ugbu a.
- Dị anya: Na-egosi anya e kpuchiri n'oge mmega ahụ gị ugbu a.
- Ahịa: Na-eme atụmatụ kalori ndị ị gbara n'oge mmega ahụ.
- ODOMETER (ODO): Na-egosiputa mkpokọta akwakọba anya.
- ỤSỤ: Shows your heart rate when holding the pulse sensors on the handlebars.
To reset the monitor, press and hold the button for a few seconds, or remove and reinsert the batteries.

Foto 5: LCD Monitor Display. This image provides a detailed view of the LCD monitor and its various data display functions.

Foto 6: Resistance Control and Monitor Interaction. This image illustrates how to adjust the resistance level and interact with the LCD monitor's buttons.
Iji njide ekwentị
A phone holder is integrated into the LCD monitor panel. Place your smartphone or tablet securely in the holder to enjoy videos or music during your workout.
Folding the Bike for Storage
To fold the bike, loosen the main folding knob (usually located near the base of the frame). Carefully fold the frame inwards until it locks into its compact position. This design allows for easy storage and space-saving.
Nlekọta
- Nhicha: Jiri mgbasa ozi hichapụ igwe kwụ otu ebeamp ákwà mgbe ọ bụla iji wepụ ọsụsọ na ájá. Ejila ihe nhicha abrasive.
- Nyocha: Regularly inspect all bolts, nuts, and moving parts for tightness and wear. Tighten any loose fasteners.
- mmanu mmanu: The magnetic resistance system and belt drive are generally maintenance-free. Do not lubricate internal components unless specifically instructed by customer support.
- Nchekwa: Debe igwe kwụ otu ebe ahụ n'ebe dị jụụ ma kpọọ nkụ, ebe anwụ na-anaghị anwụ kpọmkwem na oke okpomọkụ dị oke njọ.
- Ngbanwe batrị: Replace the LCD monitor batteries when the display becomes dim or unresponsive.
Nchọpụta nsogbu
| Nsogbu | Ihe nwere ike ime | Ngwọta |
|---|---|---|
| No display on LCD monitor | Batrị anwụọla ma ọ bụ etinyeghị ya nke ọma. | Dochie batrị ma ọ bụ hụ na etinyere ha na polarity ziri ezi. |
| Ọgụgụ mkpụrụ obi na-ezighi ezi | Hands not firmly on sensors; sensors are dirty. | Ensure firm contact with both pulse sensors. Clean sensors with a dry cloth. |
| Igwe kwụ otu ebe anaghị akwụsi ike ma ọ bụ na-ama jijiji | Mkpọchi tọgbọrọ cha; elu na-enweghị isi. | Check and tighten all assembly bolts. Move the bike to a flat, level surface. |
| Nguzogide anaghị agbanwe | E wepụrụ ma ọ bụ mebie eriri mgbochi ahụ. | Inspect the resistance cable connection. If damaged, contact customer support. |
| Mkpọtụ na-adịghị ahụkebe n'oge arụ ọrụ | Loose parts; friction from moving components. | Check all bolts and nuts for tightness. Ensure no foreign objects are caught in moving parts. If noise persists, contact customer support. |
Nkọwapụta
| Njirimara | Nkọwa |
|---|---|
| Aha Nlereanya | cyclette pieghevole |
| Ụdị | GE nkume |
| Usoro mgbochi | Magnetik |
| Ọkwa mgbochi | 8 nhazi ọkwa |
| Sistemụ mbanye | Belt |
| Isi ihe | Steel, Metal, Foam/Leather |
| Ikike ịdị arọ kacha | 120 Kilogram (264 lbs) |
| Akụkụ ngwaahịa (L x W x H) | 69 x 39 x 116.5 cm (27.2 x 15.4 x 45.9 inch) |
| Ibu Ibu | 15.6 Kilogram (34.4 lbs) |
| Power Source (Monitor) | Akwadoro batrị (Batiri anaghị etinye ya) |
| Atụmatụ pụrụ iche | Foldable design, LCD monitor, Pulse sensors, Phone holder, Adjustable seat (5 levels) |
Akwụkwọ ikike na nkwado
GEARSTONE provides a akwụkwọ ikike otu afọ for this product from the date of purchase. This warranty covers manufacturing defects and material faults under normal use.
If you encounter any issues with your exercise bike or have questions regarding its operation or maintenance, please do not hesitate to contact our customer support team. Provide your purchase details and a description of the issue for prompt assistance.
Nkwado kọntaktị: Biko rụtụ aka na akwụkwọ ịzụrụ ihe ma ọ bụ nke onye na-ere ahịa website for the most up-to-date contact information (e.g., email address or support portal).
Ozi Mgbakwunye
For more information about GEARSTONE products and fitness tips, visit our official websaịtị ma ọ bụ ọwa mgbasa ozi ọha.