PARKSIDE PHET 15 C2
PARKSIDE PHET 15 C2 Electric Stapler Instruction Manual
Model: PHET 15 C2
Okwu mmalite
Thank you for choosing the PARKSIDE PHET 15 C2 Electric Stapler. This manual provides important information regarding the safe operation, setup, maintenance, and troubleshooting of your new tool. Please read this manual thoroughly before first use and keep it for future reference.
Ntuziaka nchekwa
Na-agbaso ihe ndị a dị mkpa mgbe niile iji belata ihe egwu nke ọkụ eletrik, ọkụ, na mmerụ ahụ dị njọ.
- Nchekwa mpaghara ọrụ: Debe ebe a na-arụ ọrụ ọcha na ọkụ nke ọma. Ebe mgbagwoju anya ma ọ bụ ọchịchịrị na-akpọ ihe mberede. Ejila ngwaọrụ ike rụọ ọrụ n'ime ikuku mgbawa, dị ka n'ihu mmiri ọkụ, gas, ma ọ bụ uzuzu.
- Nchekwa Eletriki: Ngwaọrụ ike ga-adakọrịrị ihe nkwụnye ọkụ. Agbanwela plọg ahụ n'ụzọ ọ bụla. Ejila eriri ahụ mee ihe n'ụzọ na-ezighị ezi. Ejila eriri ahụ ebu, dọpụta, ma ọ bụ wepụ ngwaọrụ ike ahụ. Debe eriri ahụ ka ọ ghara ịpụ n'ọkụ, mmanụ, nsọtụ dị nkọ, ma ọ bụ akụkụ ndị na-agagharị agagharị.
- Nchekwa nkeonwe: Yiri nchedo anya mgbe niile. Jiri nchedo ntị mgbe ị na-arụ ọrụ ruo ogologo oge. Yi uwe nke ọma; zere uwe na-adịghị mma ma ọ bụ ọla. Mee ka ntutu, uwe, na uwe aka pụọ na akụkụ ndị na-akpụ akpụ.
- Iji na Nlekọta Ngwa: Amanyela ngwá ọrụ ike. Jiri ngwa ike ziri ezi maka ngwa gị. Kwụpụ plọg na isi iyi ọkụ tupu ime mgbanwe ọ bụla, ịgbanwe ngwa ma ọ bụ ichekwa ngwa ike.
- Specific Stapler Safety: Always assume the tool contains fasteners. Do not point the tool at yourself or others. Keep hands and body parts away from the discharge area. Ensure the workpiece is stable before fastening.
Ngwaahịa gafereview
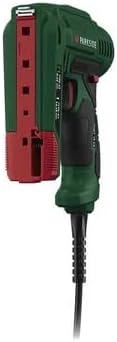
The PARKSIDE PHET 15 C2 is a lightweight and compact electric stapler designed for quick and comfortable fastening tasks. It features a non-slip soft grip for comfortable one-handed operation.

Foto 1: Akụkụ view of the PARKSIDE PHET 15 C2 Electric Stapler, highlighting its compact design and ergonomic grip. The power cord is visible at the rear.

Figure 2: The PARKSIDE PHET 15 C2 Electric Stapler displayed with a selection of compatible staples and nails, ready for use.
Isi ihe:
- Mkpali: Activates the stapling mechanism.
- Magazin: Holds staples or nails. Features a level indicator.
- Nose/Discharge Area: Where fasteners exit the tool.
- Aka Jide Dị nro: Provides comfort and control during operation.
- eriri ike: Na-ejikọta ngwá ọrụ na oghere eletrik.
Melite
1. Na-ebunye ihe nkwụnye
Ensure the tool is unplugged from the power source before loading fasteners.
- Chọta usoro mwepụta akwụkwọ akụkọ, nke dị na ala ma ọ bụ n'azụ nke ngwaọrụ ahụ.
- Slide open the magazine.
- Insert the appropriate staples (6-14 mm) or nails (14-15 mm) into the magazine. Ensure they are oriented correctly, with the points facing forward.
- Close the magazine securely until it clicks into place. The level indicator on both sides of the magazine will show the remaining fastener quantity.
Ọgụgụ 3: N'azụ view of the stapler with the magazine open, illustrating how to load staples or nails. The red tab indicates the magazine release.
2. Ijikọ Ike
Once fasteners are loaded, plug the power cord into a suitable electrical outlet (230V AC, 50Hz).
Ntuziaka ọrụ
The PARKSIDE PHET 15 C2 is designed for comfortable one-handed operation with its soft grip.
- Kwadebe mpempe ọrụ: Ensure the material you are fastening is clean, dry, and free from obstructions.
- Ngwa ọnọdụ: Place the nose of the stapler firmly against the workpiece at the desired fastening point. Ensure the tool is held perpendicular to the surface for optimal penetration.
- Mee ọrụ: Press the trigger to drive a fastener into the material. Release the trigger to stop.
- Check Fastening: Inspect the driven fastener to ensure it is properly seated. Adjust pressure or position if necessary for subsequent fastenings.
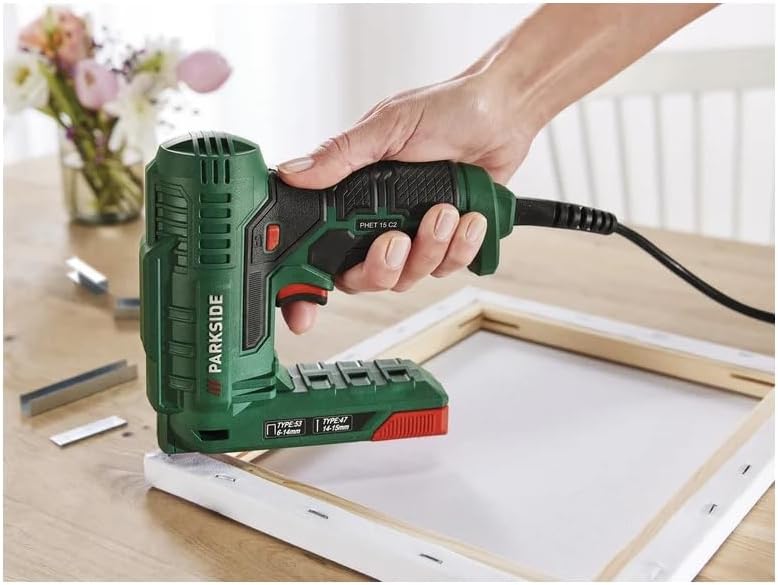
Figure 4: The electric stapler in action, securing fabric to a canvas frame. This illustrates the tool's ease of use for upholstery and crafting projects.
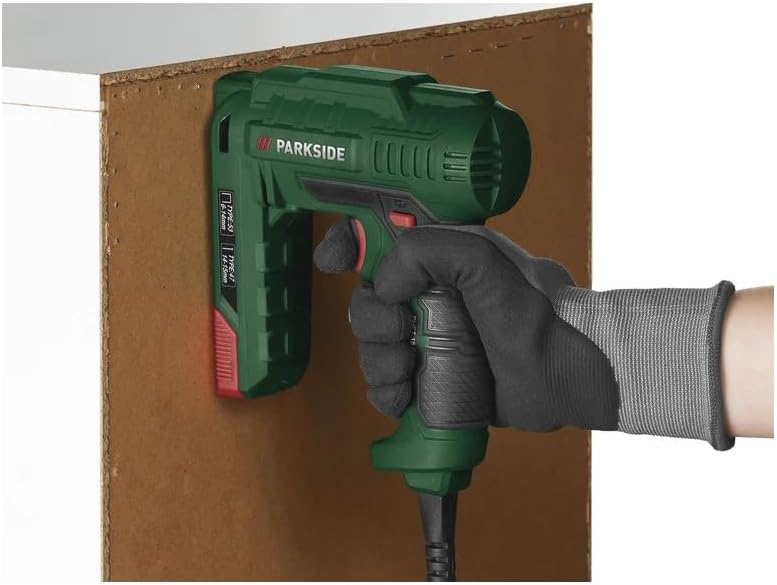
Figure 5: The stapler being used to attach a board, showcasing its application in general DIY and construction tasks.
Ngwa:
This electric stapler is suitable for various tasks including:
- Decoration projects
- DIY crafts
- Ihe mkpuchi ọkụ
- Home repairs and fastening tasks

Figure 6: Detail of fabric securely fastened to a wooden chair frame using staples, demonstrating a typical upholstery application.
Nlekọta
Regular maintenance ensures the longevity and safe operation of your electric stapler.
- Nhicha: Disconnect the tool from the power supply. Use a dry cloth to wipe down the exterior. Do not use harsh chemicals or abrasive cleaners. Periodically clear any dust or debris from the magazine and discharge area.
- Nchekwa: Store the tool in a dry, secure location out of reach of children. Ensure the power cord is neatly coiled and not kinked.
- Nyocha: Before each use, inspect the power cord for damage. Check the tool for any loose parts or signs of wear. Do not use a damaged tool.
Nchọpụta nsogbu
Lee tebụl na-esonụ maka nsogbu ndị a na-enwekarị na ngwọta ha.
| Nsogbu | Ihe nwere ike ime | Ngwọta |
|---|---|---|
| Ngwa anaghị arụ ọrụ. | Enweghị ọkụ. | Lelee ma ọ bụrụ na etinyere eriri ọkụ na ebe nchekwa na-arụ ọrụ. |
| Fasteners do not drive properly. | Incorrect fastener size or type. Magazine empty. Akụgideghị ngwá ọrụ ike megide workpiece. | Ensure correct staples/nails (6-14mm staples, 14-15mm nails) are used. Reload magazine. Apply firm, even pressure to the tool. |
| Ngwa ngwa jam. | Debris in magazine or discharge area. Bent fasteners. | Kwupu ngwa ọrụ. Open the magazine and carefully remove any jammed fasteners or debris. Use only undamaged fasteners. |
Ọ bụrụ na nsogbu na-adịgide mgbe ị nwara azịza ndị a, biko kpọtụrụ nkwado ndị ahịa.
Nkọwapụta
- Ụdị: PHET 15 C2
- Ike: 70 W
- Ntinye Voltage: 230V AC, 50 Hz
- Compatible Staples: Ụdị 53, 6-14 mm
- Compatible Nails: Ụdị 47, 14-15 mm
- Ụdị ọrụ: Akpaaka
- Atụmatụ: Lightweight, compact, soft grip, double-sided level indicator.
- Ngwa gụnyere: 400 x 10 mm staples, 100 x 14 mm nails.
Akwụkwọ ikike na nkwado
For warranty information or technical support, please refer to the documentation provided with your purchase or contact the manufacturer directly. Keep your proof of purchase for any warranty claims.
Ask a question about this manual
Ask about setup, troubleshooting, compatibility, parts, safety, or missing instructions. Manuals+ will review the question and use this page’s manual context to help answer it.