
1. Okwu mmalite
This manual provides essential information for the installation, operation, and maintenance of your HTBCCHB 8.5x3.0 pneumatic tire and inner tube. Designed for specific electric scooter models, this tire offers enhanced performance and ride comfort. Please read this manual thoroughly before installation and use to ensure proper function and safety.
2. Ngwaahịa gafereview
2.1 Atụmatụ
- Arụmọrụ kachasị elu: The 8.5x3.0 scooter tire and inner tube are designed for durability and performance.
- Ntinye Ujo Dị Elu: Provides a comfortable and stable riding experience, even on varied terrain.
- Owuwu dị oke mma: Manufactured from durable rubber to resist wear and tear, ensuring reliable performance.
2.2 ndakọrịta
This 8.5x3.0 tire and inner tube are compatible with the following electric scooter models:
- VSETT 8
- VSETT 9
- Macury Zero 8
- Zero 9 PRO
- Inokim Light 2
2.3 Nkọwapụta
| Nkọwapụta | Uru |
|---|---|
| Ụdị | HTBCCHB |
| Nlereanya | 8.5x3.0 Tire |
| Obosara nke ngalaba | 3 sentimita asatọ |
| Ibu Ibu | Pound 2425 (1100 n'arọ) |
| Ụdị Ụkwụ | Na-abụghị ntụziaka |
| Oke nrụgide | 50 PSI (340 kPa) |
| Ogologo rim | 0.5 sentimita asatọ |
| Dayameta taya | 8.46 sentimita (21.5 cm) |
| Ibu Ibu | Pound 2.03 (0.92 n'arọ) |
| Ụdị ihe owuwu | Pneumatic Tire with Inner Tube |
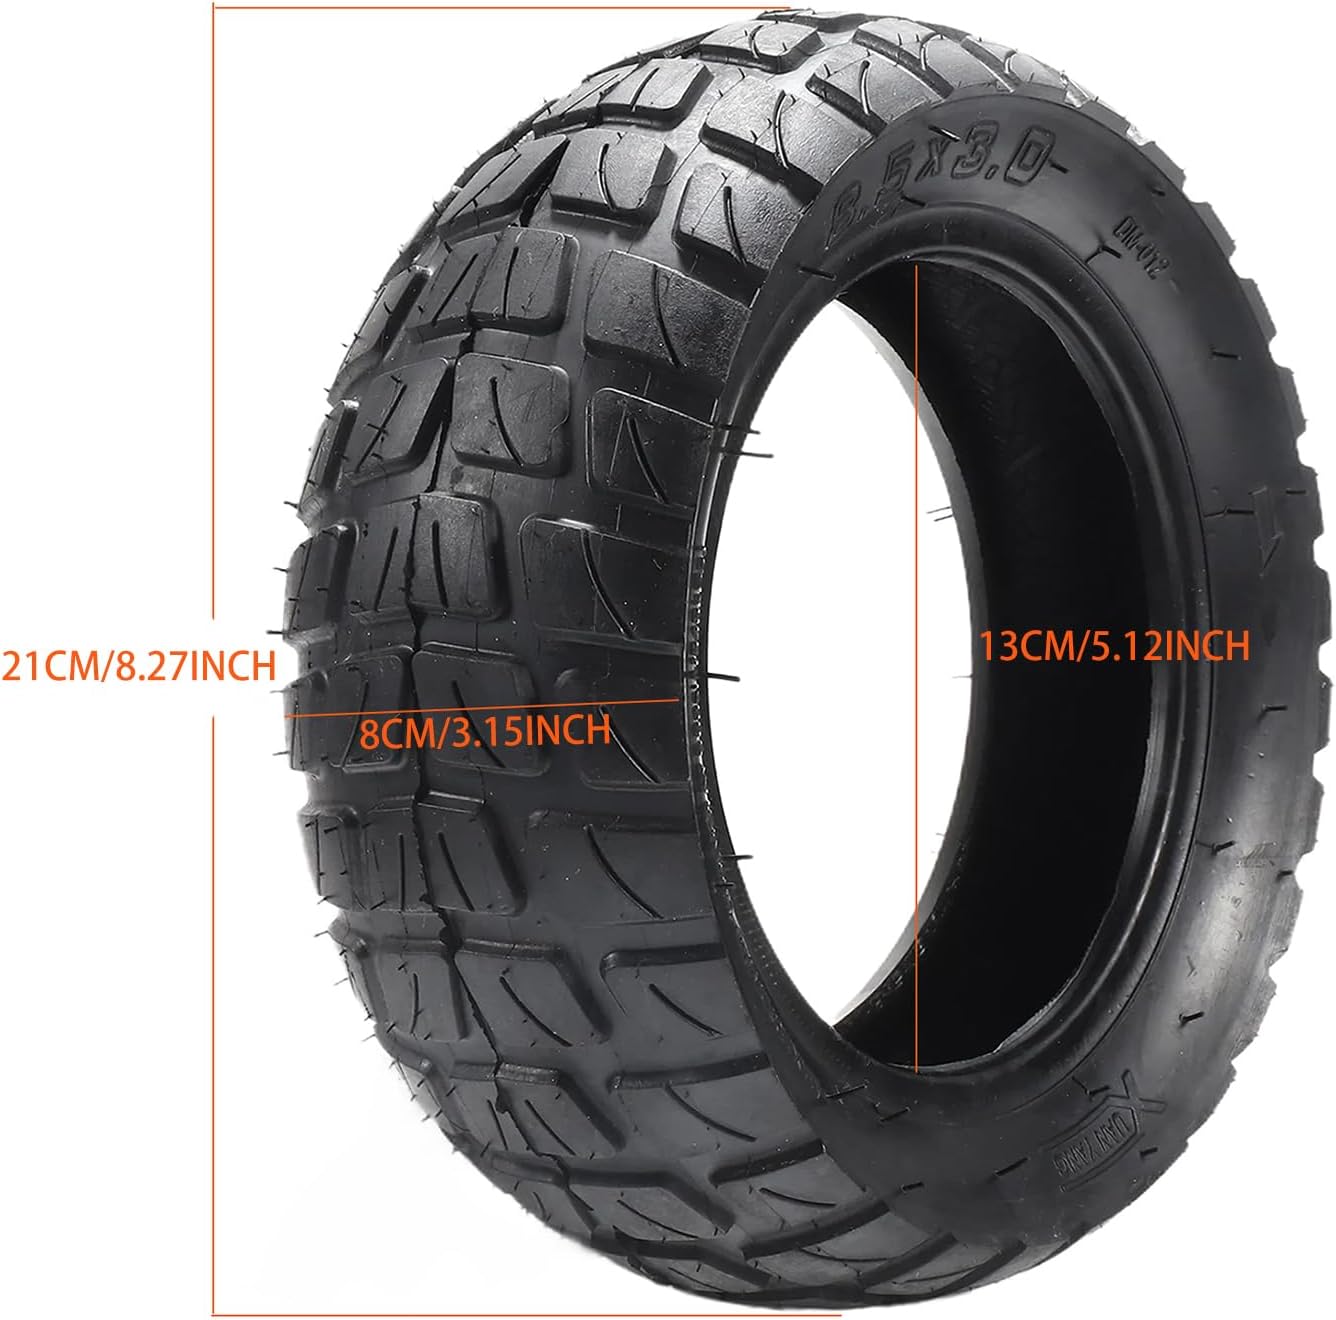
Figure 1: Tire Dimensions. This image illustrates the key measurements of the 8.5x3.0 tire, including its outer diameter, width, and inner diameter.

Figure 2: Maximum Load and Pressure Markings. This image displays the maximum load capacity (75 kg / 165 lbs) and recommended inflation pressure (50 psi / 340 kPa) printed on the tire's sidewall.

Figure 3: Tire Size Marking. This image highlights the "8.5X3.0" size designation on the tire's sidewall, confirming its dimensions.
3. Ozi nchekwa
- Always ensure the tire is correctly installed and inflated to the recommended pressure before riding.
- Regularly inspect tires for wear, cuts, or punctures. Replace damaged tires immediately.
- Improper installation or maintenance can lead to tire failure and potential injury. If unsure, seek professional assistance.
- Do not exceed the maximum load capacity or inflation pressure specified on the tire sidewall.
4. Ntọala na nwụnye
Replacing an electric scooter tire and inner tube can be challenging. It is highly recommended to have this procedure performed by a qualified technician or an experienced individual. The following steps are a general guide and may vary depending on your specific scooter model.
4.1 Ngwa achọrọ
- Tire levers (often included with the tire, as shown in Figure 4)
- Wrenches or sockets (for wheel removal)
- Air pump with pressure gauge
- Soapy water (for lubrication)

Figure 4: HTBCCHB 8.5x3.0 Tire and Inner Tube. This image shows the pneumatic tire, inner tube, and included tire levers, which are essential tools for installation.
4.2 Nzọụkwụ Nwụnye (Nduzi Izugbe)
- Kwadebe skuta ahụ: Ensure the scooter is powered off and stable. Remove the wheel assembly from the scooter frame.
- Deflate the Old Tire: If replacing an existing tire, completely deflate the old inner tube.
- Remove the Old Tire: Use tire levers to carefully pry the old tire bead off the rim. Remove the old inner tube.
- Inspect the Rim: Check the rim for any sharp edges or debris that could damage the new inner tube. Clean if necessary.
- Install the New Inner Tube: Lightly inflate the new inner tube (just enough to give it shape). Insert it into the new tire.
- Debe Taya ahụ: Place one bead of the new tire onto the rim. Apply soapy water to the second bead and use tire levers to carefully work it onto the rim. Be cautious not to pinch the inner tube.
- Tinye Taya: Slowly inflate the tire to the recommended pressure (refer to Section 5.1). Ensure the tire beads are properly seated on the rim.
- Reinstall the Wheel: Mount the wheel assembly back onto the scooter, ensuring all fasteners are securely tightened.
5. Ntuziaka ọrụ
5.1 Recommended Tire Pressure
Maintain the tire pressure at the recommended level for optimal performance, safety, and tire longevity. The maximum recommended pressure for this tire is 50 PSI (340 kPa). Check tire pressure regularly, at least once a week, as it can fluctuate due to temperature changes and normal air loss.
- Ọnụ ego efu: Can lead to increased rolling resistance, reduced range, poor handling, and premature tire wear.
- Oke ọnụ ahịa: Can result in a harsher ride, reduced grip, and increased risk of punctures or tire damage from impacts.
6. Nlekọta
- Nyocha oge niile: Visually inspect the tires before each ride for any signs of damage, such as cuts, cracks, bulges, or embedded objects.
- Tread Wear: Monitor the tread depth. Replace tires when the tread is significantly worn to maintain grip and safety.
- Nhicha: Keep tires clean from dirt, mud, and debris. Use a damp cloth to wipe them down. Avoid harsh chemicals that could degrade the rubber.
- Nchekwa: If storing the scooter for an extended period, ensure tires are properly inflated and stored in a cool, dry place away from direct sunlight and ozone-producing equipment.
7. Nchọpụta nsogbu
| Nsogbu | Ihe nwere ike ime | Ngwọta |
|---|---|---|
| Frequent Punctures | Low tire pressure, sharp objects on riding surface, damaged rim strip, pinched inner tube during installation. | Maintain correct tire pressure. Inspect riding path. Check rim for sharp edges. Ensure proper installation. Replace inner tube if damaged. |
| Tire Loses Air Quickly | Puncture in inner tube, faulty valve stem, improper bead seating. | Locate and repair/replace inner tube. Check valve stem for leaks. Re-seat tire beads by deflating and reinflating. |
| Uwe Taya Na-adịghị Eru Eru | Incorrect tire pressure, wheel misalignment, riding habits. | Ensure correct tire pressure. Check wheel alignment (may require professional service). Adjust riding style. |
| Difficulty Installing Tire | Tire is stiff, inner tube pinched, insufficient lubrication. | Warm the tire slightly. Use plenty of soapy water as lubricant. Ensure inner tube is not pinched. Use proper tire levers. |
8. Akwụkwọ ikike na nkwado
For any questions regarding your HTBCCHB 8.5x3.0 pneumatic tire and inner tube, or for warranty inquiries, please contact the manufacturer or your point of purchase. Keep your purchase receipt as proof of purchase.
Manufacturer: HTBCCHB
Maka enyemaka ọzọ, biko gaa na HTBCCHB brand store on Amazon.


