
Makeid L1
Makeid L1 Label Maker Machine User Manual
Model: L1 | Brand: Makeid
Okwu mmalite
This manual provides detailed instructions for the setup, operation, maintenance, and troubleshooting of your Makeid L1 Portable Wireless Sticker Label Maker Machine. Please read this manual thoroughly before using the device to ensure proper function and longevity.
Kedu ihe dị na Igbe ahụ
Chọpụta na akụrụngwa niile dị na ngwugwu:
- Makeid L1 Label Maker Machine
- 4-meter roll of label tape
- USB nchaji eriri
- Akwụkwọ ntuziaka (akwụkwọ a)
Ngwaahịa gafereview
Familiarize yourself with the key components of your Makeid L1 Label Maker.

Foto: gafereview of the Makeid L1 Label Maker, highlighting the power button, the lid for tape replacement, and the integrated cutter for crisp labels.
- Bọtịnụ ike: Located on the side, used to turn the device on/off.
- Ihe mkpuchi: Opens to access the tape compartment for loading and replacing label rolls.
- Cutter arụnyere n'ime ya: Ensures clean and precise cuts of printed labels.
- Label Output Slot: Ebe akara e biri ebi pụtara.
- Nchaji ọdụ ụgbọ mmiri: USB port for recharging the device.
Melite
1. Ịchaji ngwaọrụ
Before first use, ensure the label maker is fully charged. Connect the provided USB charging cable to the device's charging port and a compatible USB power source (e.g., computer USB port, USB wall adapter). The indicator light will show charging status (refer to device specific light indicators for full/charging status).
2. Loading Label Tape
The Makeid L1 supports various label tape widths (9mm, 12mm, 16mm) and types (continuous, die-cut, transparent, white, colored, pattern). Ensure the tape is correctly oriented.
- Open the lid of the label maker.
- Insert the label roll into the compartment, ensuring the tape feeds out from the bottom and through the output slot.
- Mechie mkpuchi ahụ nke ọma.
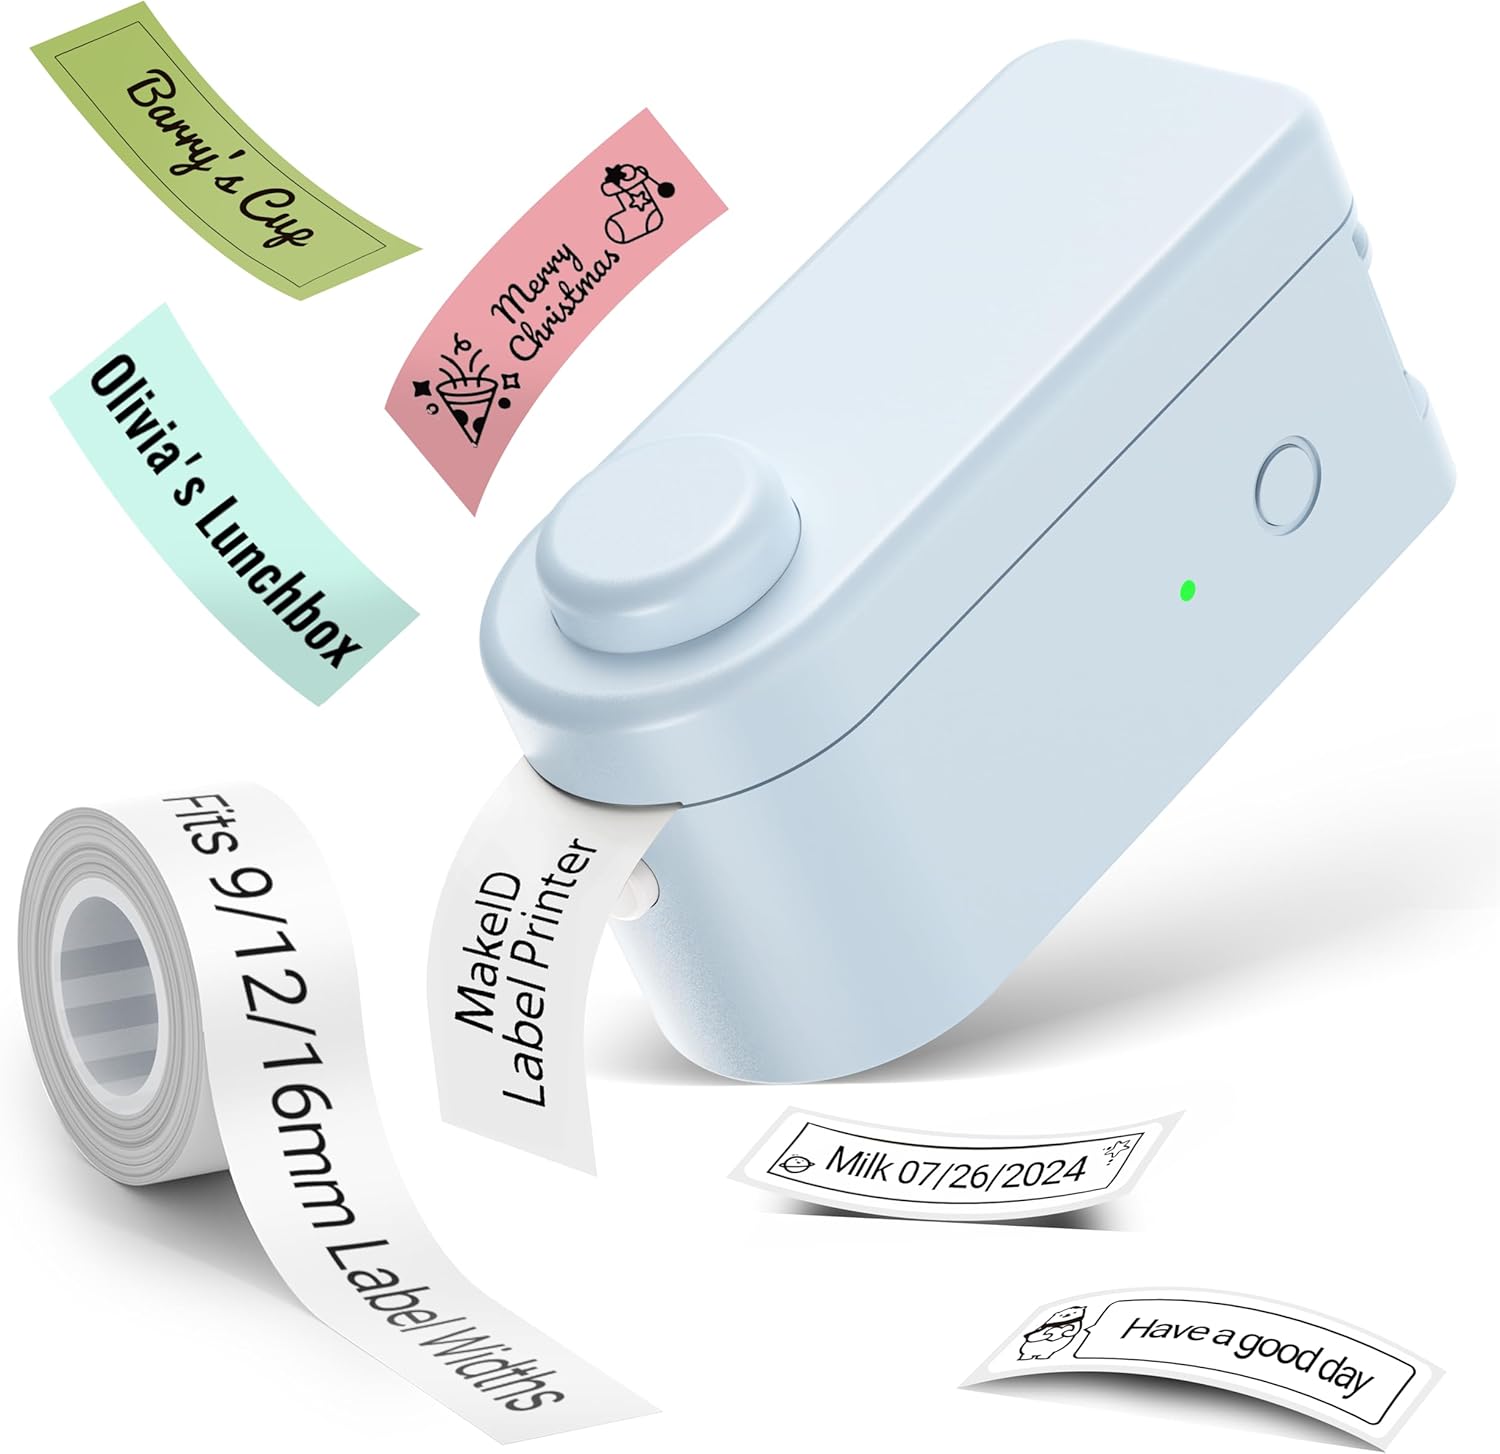
Foto: The Makeid L1 Label Maker demonstrating the label tape roll and examples of printed labels, including continuous and die-cut types.
3. Nbudata na wụnye ngwa
The Makeid L1 operates via a dedicated mobile application. Chọọ maka "MakeID-Life" on your device's app store.

Foto: Screenshots showing the "Get it on Google Play" and "Download on the App Store" buttons, indicating where to find the MakeID-Life application.
4. Njikọ Bluetooth
The label maker connects to your smartphone via Bluetooth.
- Gbaa mbọ hụ na agbanyere Bluetooth na ekwentị gị.
- Turn on the Makeid L1 Label Maker by pressing the power button. The indicator light will flash, indicating it's ready for pairing.
- Open the "MakeID-Life" app. The app will automatically search for nearby devices.
- Select "L1" from the list of available devices to connect. Once connected, the indicator light on the label maker will become solid.

Foto: A visual guide demonstrating the three steps for Bluetooth connection: turning on Bluetooth, selecting the L1 model within the app, and confirming the device connection.
Ntuziaka ọrụ
1. Designing Your Label
The "MakeID-Life" app offers extensive customization options:
- Ntinye ederede: Type your desired text.
- Ụdị mkpụrụedemede: Choose from 88 different font styles.
- Akara na akara: Access over 600 icons and various symbols.
- Ndebiri: Utilize over 400 pre-designed templates for various purposes (e.g., kitchen, office, school).
- Borders & Frames: Tinye ókèala ịchọ mma.
- Ọrụ ndị ọzọ: Create barcodes, QR codes, tables, dates, and patterns.
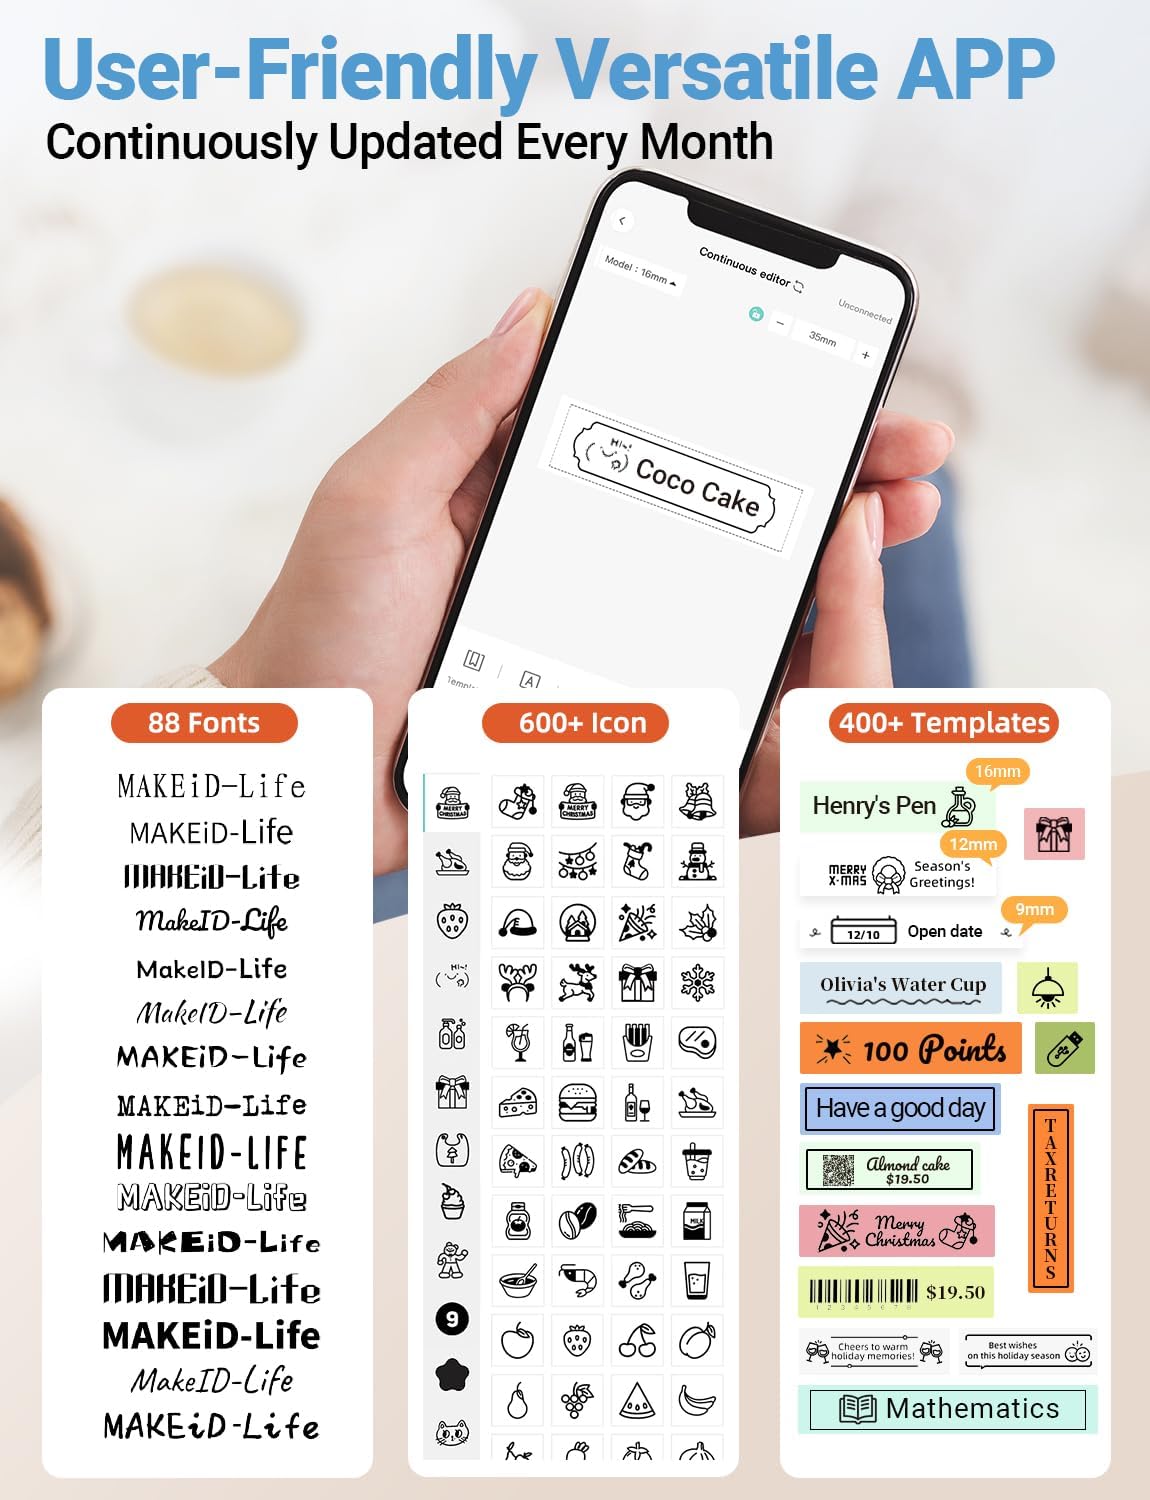
Foto: A zuru ezu view of the MakeID-Life app interface, showcasing the wide selection of 88 fonts, over 600 icons, and more than 400 templates available for label customization.
2. Akara Ebipụta
Once your design is complete in the app:
- Review your label design on the app screen.
- Tap the "Print" button within the app.
- The label will be thermally printed and emerge from the output slot.
3. Cutting Labels
The Makeid L1 features a built-in cutter for clean edges.
- After printing, gently pull the label forward slightly.
- Press the cutting button (refer to the Product Overview image for location) to cleanly cut the label.

Foto: Illustration of the Makeid L1's built-in cutter, demonstrating how it provides professional and safe cutting of labels, eliminating messy torn edges.
4. Types of Label Printing
The L1 supports two primary types of label printing:
- Continuous Labels: Ideal for custom lengths, allowing you to print text of any length and cut it precisely.
- Die-Cut Labels: Pre-sized labels with specific shapes, perfect for consistent labeling of items like jars or files.

Foto: Visual representation of continuous labels, which can be cut to any length, and die-cut labels, which are pre-shaped for specific applications.
Nlekọta
Na-ehicha Isi Mbipụta
To ensure optimal print quality, periodically clean the thermal print head.
- Turn off the label maker and disconnect it from the power source.
- Open the lid and remove the label tape.
- Gently wipe the print head with a soft, lint-free cloth dampened with isopropyl alcohol. Do not use water or abrasive cleaners.
- Allow the print head to dry completely before reinserting the tape and closing the lid.
Nchekwa
Store the label maker in a cool, dry place away from direct sunlight and extreme temperatures. Remove the label tape if storing for extended periods.
Nchọpụta nsogbu
Rụtụ aka na tebụl dị n'okpuru maka okwu nkịtị na azịza ha.
| Nsogbu | Ihe nwere ike ime | Ngwọta |
|---|---|---|
| Ngwaọrụ anaghị agbanwu. | Batrị dị ala. | Jiri eriri USB chajie ngwaọrụ ahụ. |
| Enweghị ike ijikọ site na Bluetooth. | Bluetooth is off on phone; device not in pairing mode; app issue. | Ensure Bluetooth is enabled on your phone. Turn the label maker off and on again to re-enter pairing mode. Restart the "MakeID-Life" app. |
| Poor print quality / Faded prints. | Print head dirty; incorrect label tape; low battery. | Clean the print head. Ensure you are using Makeid compatible thermal label tape. Charge the device. |
| Label tape not feeding. | Tape incorrectly loaded; tape jammed. | Open the lid and re-insert the label tape correctly, ensuring it's not jammed. |
| Labels are not cutting cleanly. | Cutter blade dull or obstructed. | Ensure no debris is obstructing the cutter. If issues persist, contact customer support. |
Nkọwapụta
Detailed technical specifications for the Makeid L1 Label Maker Machine:
| Njirimara | Nkọwa |
|---|---|
| Ụdị | Makeid |
| Aha Nlereanya | L1 |
| Teknụzụ Njikọta | Bluetooth |
| Teknụzụ obibi akwụkwọ | Thermal |
| Mmepụta ngwa nbipute | Monochrome |
| Mkpebi | 203 x 203 DPI (also 300 x 300 DPI for other variants) |
| Ogo mgbasa ozi kacha | 0.63 sentimita (16mm) |
| Ngwa dakọtara | Smartphones (Android & iOS) |
| Usoro njikwa | Ngwa |
| Ngwaọrụ Akụrụngwa | USB |
| Isi Iyi Ike | 1 batrị lithium ion (gụnyere) |
| Akụkụ ngwaahịa | 3.93"D x 1.6"W x 1.96"H (10 x 4.06 x 4.98 cm) |
| Ibu Ibu | 4.4 ounce (gram 126) |
| Atụmatụ pụrụ iche | Continuous & Pre-cut Label Tapes, Waterproof, Oil-proof, Friction Resistant, Light Resistant, No Fading, Rich Font Icon Pattern, Portable, Inkless, Wireless, Rechargeable, Creative Print Functions (Barcode, Text, Picture, QR 2D Code, Table, Date, Border, Icon, Shape, Pattern, Template) |
Akwụkwọ ikike na nkwado
The Makeid L1 Label Maker comes with a Akwụkwọ ikike ndụ. For technical support, warranty claims, or further assistance, please contact Makeid customer service through the official Makeid websaịtị ma ọ bụ ozi kọntaktị enyere na nkwakọ ngwaahịa gị.
Maka akụrụngwa na ajụjụ ndị ọzọ, gaa na ebe a na-ajụkarị ajụjụ gbasara Makeid Store on Amazon.
Ozi nchekwa
- Akwụsịla ma ọ bụ nwaa ịrụkwa ngwaọrụ n'onwe gị.
- Debe ngwaọrụ ahụ pụọ na mmiri na oke iru mmiri.
- Use only original or certified compatible label tapes and charging cables.
- Debe ebe ụmụaka na-apụghị iru.
- Zere ikpughe ngwaọrụ ahụ na oke okpomọkụ ma ọ bụ ìhè anyanwụ kpọmkwem.
Ask a question about this manual
Ask about setup, troubleshooting, compatibility, parts, safety, or missing instructions. Manuals+ will review the question and use this page’s manual context to help answer it.