
1. Okwu mmalite
This manual provides comprehensive instructions for the installation, operation, and maintenance of your Splenssy 433MHz WiFi GSM Wireless Home Security Alarm System. Please read this manual thoroughly before installation and use to ensure proper functionality and safety. Keep this manual for future reference.
2. Ihe ngwugwu
Chọpụta na ihe niile edepụtara n'okpuru dị na ngwugwu gị:
- 1 x Wireless Alarm Panel
- 1 x Wireless PIR Motion Sensor
- 3 x Wireless Door/Window Sensors
- 2 x Njikwa anya
- 2 x RFID kaadị
- 1 x Wired Siren
- 1 x PIR Sensor Holder
- 1 x Nhazi nke skru na-arị elu
- 1 x eriri USB
- 1 x DC 5V/1A nkwụnye ọkụ
- Batteries for sensors and remote controls (pre-installed or included separately)
- Akwụkwọ ntuziaka onye ọrụ 1 x (Bekee)
3. Nkọwapụta
| Njirimara | Nkọwapụta |
|---|---|
| Ihe nkwụnye ọkụ | DC 5V/1A |
| Na-arụ ọrụ ugbu a | <120mA |
| Njikere Ugbu a | <80uA |
| Ugboro ikuku | 433Mhz |
| Coded Mode | 1527 |
| Ikuku Standard | IEEE802.11b/g/n 2.4G |
| Alarm Panel Battery | Li-ion DC 3.7V 500mAh |
| PIR Sensor Battery | 3 x 1.5V batrị AAA |
| Door Sensor Battery | 1 x CR2450 3V |
| Batrị njikwa anya | 2 x CR2025 3V |
| Siren olu | 110dB |
| Oke okpomọkụ | 0 ℃ ~ 55 ℃ |
| Oke iru mmiri | <80% RH (na-adịghị ekpokọta) |
| Usoro njikwa | Remote, Smartphone App, RFID |
| Oke ikuku ikuku kacha | 100 Metres (open area) |
| Battery Average Life (Panel) | 72 Hours (standby) |
| Ngosipụta | 2.4" TFT LCD Screen |
4. Ozi nchekwa
- Ensure the power adapter is connected to a suitable power outlet.
- Do not expose the alarm panel to water or extreme temperatures.
- Debe ngwaọrụ ahụ ka ọ ghara inwe nnukwu nsogbu elektrọnik.
- Replace batteries in sensors and remote controls as needed to maintain optimal performance.
- Anwala ịkwasa ma ọ bụ rụkwaa ngwaọrụ n'onwe gị. Kpọtụrụ nkwado ndị ahịa maka enyemaka.
5. Nhazi
5.1 Alarm Panel Installation
The alarm panel can be installed in two ways: wall-mounted or desktop placement.

Image: The alarm panel can be placed on a desktop using its integrated stand or mounted on a wall. The image shows both side and rear views of the panel's versatile placement options.
- Nwụnye Desktop: Simply unfold the stand at the back of the panel and place it on a flat, stable surface.
- Nwụnye mgbidi: Use the provided mounting screws and the PIR sensor holder (which can also be used for the panel) to secure the panel to a wall at a suitable height. Ensure the location allows for good Wi-Fi and GSM signal reception.
5.2 Ntinye ihe mmetụta
Sensọ ngagharị PIR: Install the PIR sensor in a corner or on a wall where it can cover the desired area without obstructions. Avoid placing it directly facing heat sources or windows where direct sunlight or drafts might cause false alarms. Insert 3 x 1.5V AAA batteries.
Ihe mmetụta ọnụ ụzọ/ime windo: Install the two parts of the door/window sensor on the frame and the movable part of a door or window. Ensure the two parts are aligned and within 1cm of each other when the door/window is closed. Insert 1 x CR2450 3V battery.
5.3 Wired Siren Connection
Connect the wired siren to the designated siren port on the alarm panel. Ensure the connection is secure.
5.4 Ịgbanye na Mbido Mbụ
- Connect the alarm panel to power using the USB charging cable and DC 5V/1A power adapter.
- The panel will power on automatically. Follow the on-screen prompts for initial setup.
- Insert a valid GSM SIM card (if using GSM features) into the designated slot on the panel.
- Njikọ Wi-Fi: Access the system settings on the LCD screen to connect the panel to your 2.4GHz Wi-Fi network. This enables app control and smart home integration.
5.5 App Connection and Smart Home Integration
Download the dedicated mobile application (available for Android and iOS) from your device's app store. Follow the in-app instructions to add your alarm system. This allows for remote control, parameter configuration, and accessory management.

Image: The alarm system can link to various smart home products, including smart speakers, cameras, and smart bulbs, all controllable via a smartphone application.
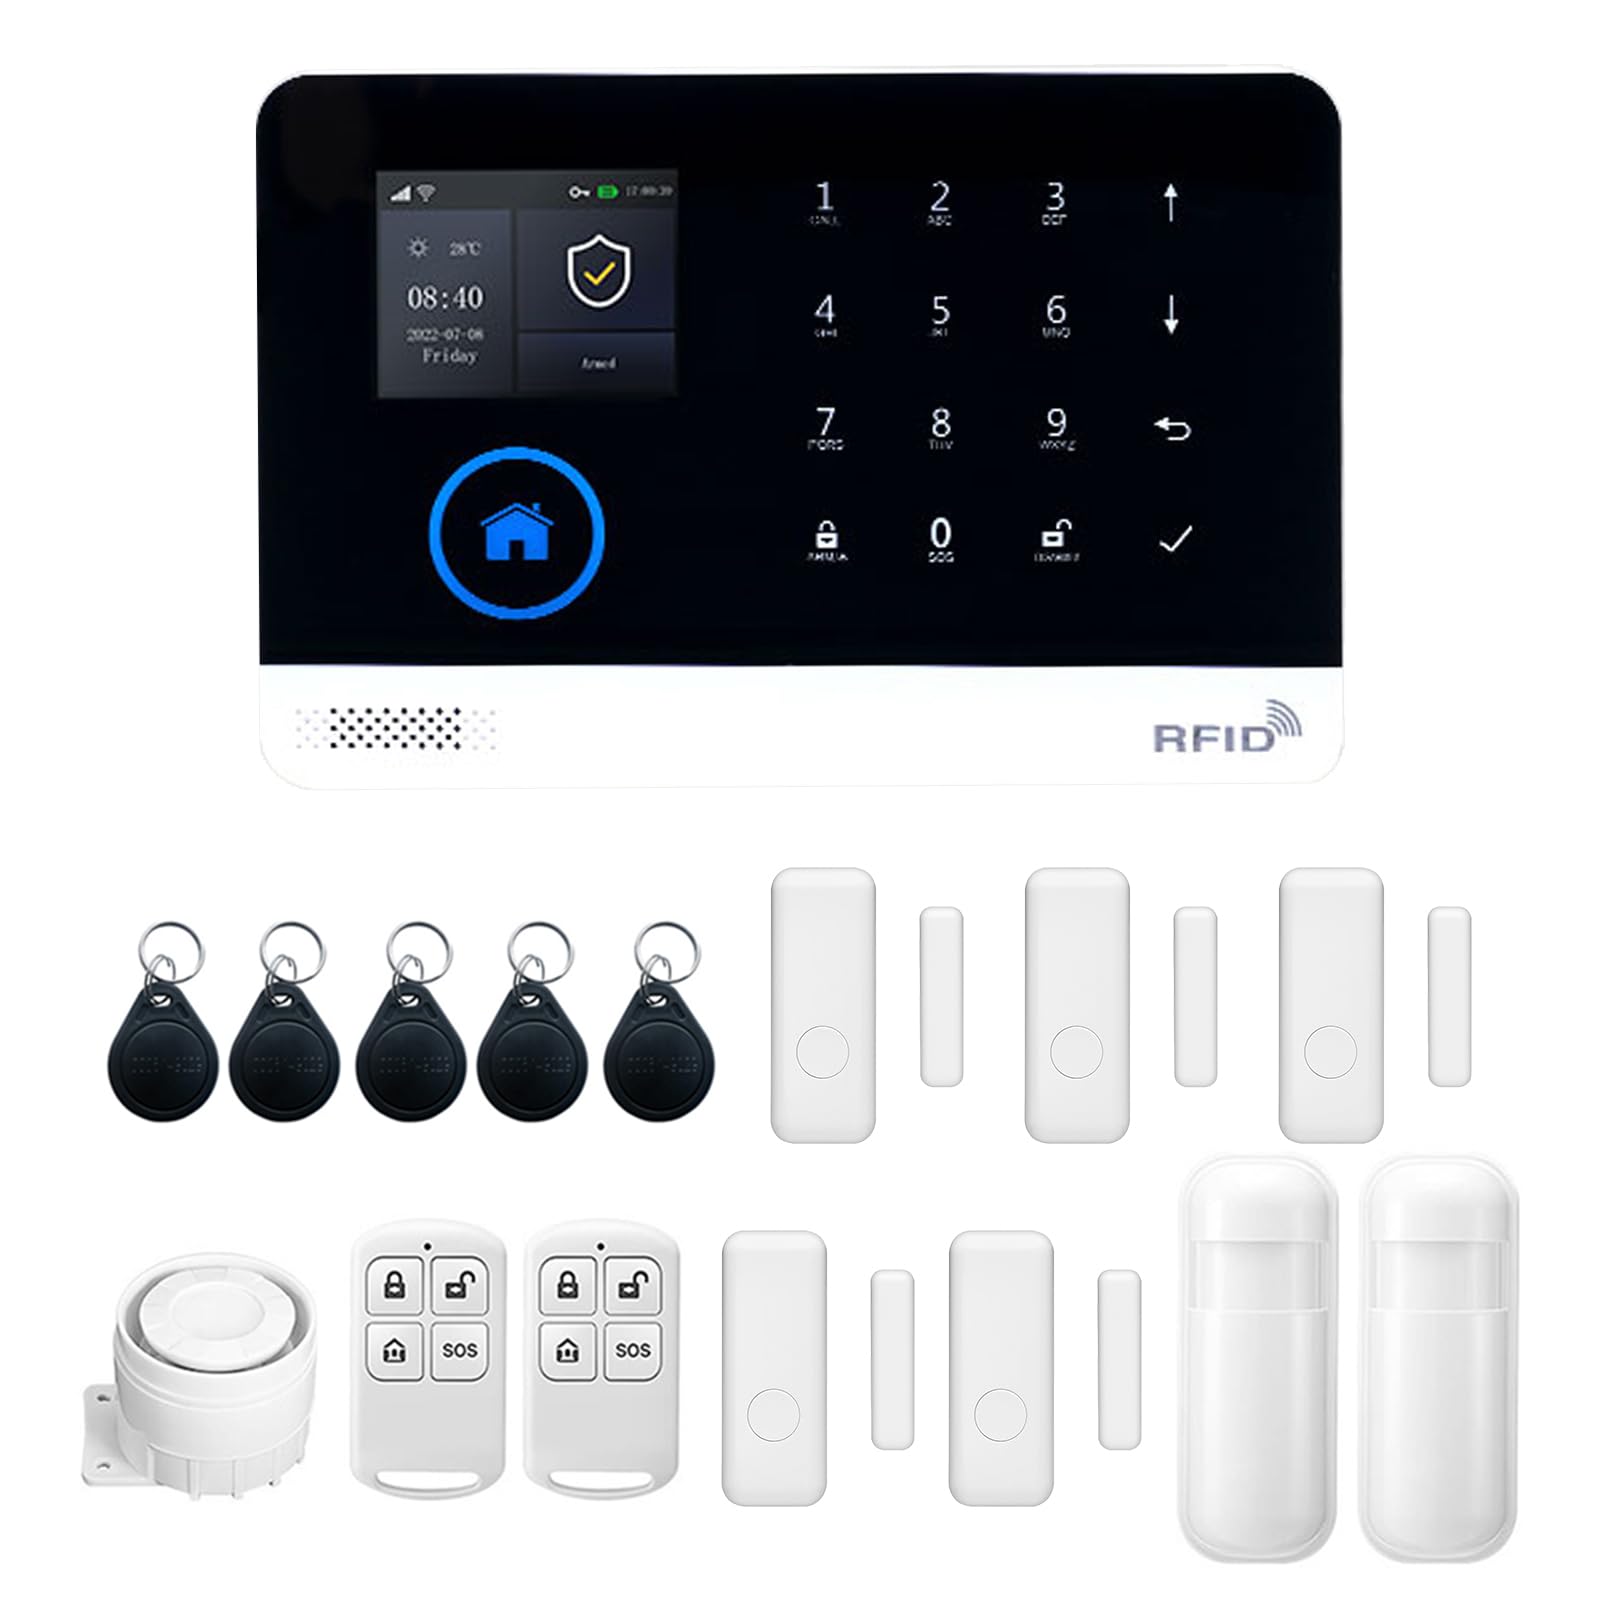
Image: The alarm panel supports eight defense areas and can link to a number of other wireless devices, offering various functions like intelligent prevention, ordinary zone, doorbell mode, and SOS.
6. Ntuziaka ọrụ
6.1 Na-eji ngwa agha na mwepu
The system can be armed or disarmed using multiple methods:
- Njikwa anya: Press the arm/disarm buttons on the provided remote controls.
- Kaadị RFID: Tap an authorized RFID card on the panel's RFID reader.
- Ngwa mkpanaaka: Use the dedicated smartphone application for remote arming/disarming.
- Ọrụ ngụ oge: Set scheduled arming and disarming times through the panel settings or mobile app.

Image: The alarm panel features a timer function for automatic arming and disarming, allowing users to set specific schedules, such as arming at 21:15 and disarming at 06:00.
6.2 Two-Way Voice Intercom
The alarm panel supports two-way voice communication. When an alarm is triggered or a call is initiated, you can communicate through the panel using your smartphone app.

Image: The system offers a two-way voice intercom feature, enabling communication between the alarm panel and a smartphone, useful for family members to stay connected.
6.3 Voice Control (Alexa Support)
The system supports voice control integration with compatible smart assistants like Amazon Alexa. Once configured through the mobile app, you can use voice commands to arm or disarm your system.

Image: The anti-theft alarm host supports Alexa voice control, allowing users to arm or disarm the system using voice commands through a smart speaker.
6.4 Ntọala asụsụ
The alarm panel supports multiple languages. You can switch the display language through the system settings menu on the LCD screen. No restart is required after changing the language.

Image: The alarm panel supports 9 languages, including Chinese, English, German, Russian, Spanish, Polish, Greek, French, and Portuguese, allowing users to switch freely without restarting the device.
6.5 Adding/Managing Accessories
New wireless sensors, remote controls, or RFID cards can be added to the system via the mobile app or the alarm panel's settings menu. Refer to the on-screen instructions for pairing new devices.
6.6 Alarm Functions and Zones
The system features various defense areas and alarm types:
- Intelligent Prevention Area: For critical areas requiring immediate alerts.
- Mpaghara nkịtị: Standard detection zone.
- Ụdị mgbịrịgba ọnụ ụzọ: Configures a sensor to act as a doorbell.
- Welcome Mode Prevention Area: For entry points with a welcome chime.
- Emergency Prevention Area: For specific emergency sensors.
- Left-behind Prevention Area: For monitoring items left behind.
- SOS Distress Function: Activates an emergency alarm.
Configure these zones and their behaviors through the system settings.
7. Nlekọta
7.1 nnọchi batrị
Regularly check the battery status of your wireless sensors and remote controls. Replace batteries promptly when low battery indicators appear on the alarm panel or app.
- PIR Sensọ: Replace with 3 x 1.5V AAA batteries.
- Door mmetụta: Replace with 1 x CR2450 3V battery.
- Njikwa anya: Replace with 2 x CR2025 3V batteries.
The alarm panel has a built-in Li-ion battery for backup power during outages. This battery is designed for long endurance.

Image: The alarm panel features a low power consumption main board and a super long endurance built-in lithium battery, allowing it to dial phone calls and send SMS even during power outages.
7.2 Nhicha
Wipe the alarm panel and sensors with a soft, dry cloth. Do not use abrasive cleaners or solvents, as these can damage the device surfaces.
8. Nchọpụta nsogbu
- Sistemụ anaghị arụ ọrụ: Ensure the power adapter is correctly connected and the power outlet is functional. Check the USB cable for damage.
- Sensors not responding: Check the batteries in the sensors and replace if necessary. Ensure sensors are within the wireless range of the alarm panel. Re-pair the sensor if needed.
- Enweghị njikọ Wi-Fi: Verify your Wi-Fi network is 2.4GHz. Ensure the Wi-Fi password is entered correctly. Check your router for issues.
- No GSM signal: Ensure the SIM card is correctly inserted and has an active plan. Check for network coverage in your area.
- Mkpu ụgha: Review sensor placement to avoid environmental triggers (e.g., direct sunlight, drafts, pets). Adjust sensor sensitivity if applicable.
- Nsogbu njikọ ngwa: Ensure your smartphone has an active internet connection. Restart the app and the alarm panel.
9. Akwụkwọ ikike na nkwado
This product comes with a standard manufacturer's warranty. Please refer to the warranty card included in your package or contact your retailer for specific warranty terms and conditions.
For technical support, troubleshooting assistance, or inquiries regarding your Splenssy Home Security Alarm System, please contact the retailer or manufacturer's customer service. Contact details are typically provided on the product packaging or the manufacturer's official websaịtị.