
1. N'eluview
The BIGTREETECH 5-inch HDMI Touch Screen Display is a versatile monitor designed for various applications, offering an 800x480 resolution with a 160° IPS viewing angle. It features 5-point capacitive touch functionality and includes audio output capabilities. This display is compatible with devices such as Raspberry Pi, Sovol-SV08 3D printers, and Windows PCs.

Figure 1: BIGTREETECH 5-inch HDMI Touch Screen Display
Foto a na-egosi ihu view of the BIGTREETECH 5-inch HDMI Touch Screen Display, highlighting its compact design and touch interface.

Foto 2: Obosara Viewing Angle Demonstration
This image illustrates the 160-degree wide viewing angle of the IPS display, showing consistent image quality from various perspectives.
2. Nkọwapụta ngwaahịa
| Oke | Uru |
|---|---|
| Akụkụ ngwaahịa | 121 x 76 mm |
| Ntinye ike | DC 5V |
| Logic Voltage | DC 3.3V |
| Nha ihuenyo | Ngosipụta IPS 5-inch |
| Mkpebi ihuenyo | 800x480 |
| Ihuenyo Viewna n'akuku | 160° |
| Ụdị mmetụ | Capacitive, 5-point touch |
| Mmepụta ọdịyo | 3.5mm earphone/speaker jack |
3. Ihe ngwugwu
Ngwugwu a na-agụnyekarị ihe ndị a:
- BIGTREETECH 5-inch HDMI Touch Screen Display
- HDMI USB
- USB Cable (for touch and power)
- Mounting hardware (e.g., screws, standoffs, brackets)
4. Ntọala na nwụnye
4.1 Connecting to a Display Output Device (e.g., Raspberry Pi, Sovol-SV08, PC)
- Connect the display to your device using the provided HDMI cable. Ensure a secure connection.
- Connect the display to your device using the Type-C data cable. This cable provides power and enables touch functionality.
- For PC connections, the operating system will typically load the necessary drivers automatically. Once drivers are loaded, the touch device should be recognized.
- After connecting the HDMI cable, the LCD should display content within approximately 5 seconds.
Video 1: Hosyond 5-inch Touchscreen IPS Display Driver-Free Interface
This video demonstrates the physical connection of the 5-inch display to a Raspberry Pi board, including securing it with screws and connecting the DSI ribbon cable (if applicable, though the product description mentions HDMI and Type-C for this model). It shows the display booting up with the Raspberry Pi desktop and basic touch interaction.
Video 2: ELECROW 5-inch Raspberry Pi Screen 800x480 LCD Display Setup
This video illustrates the connection process of a 5-inch 800x480 LCD display to a Raspberry Pi, demonstrating how to connect the HDMI and USB cables for display and touch functionality. It also shows the display working with a Raspberry Pi operating system.
4.2 Mmepụta ọdịyo
To enable audio output, plug a 3.5mm earphone or speaker into the AUDIO interface located on the display.

Figure 3: Audio Output Interface
This image highlights the 3.5mm audio jack on the display, indicating where to connect external headphones or speakers for audio output.
5. Ntuziaka ọrụ
5.1 Ihe ngosi ọkụ
- D6 (Red Light): The power indicator. Lights up when the motherboard is powered on, indicating normal power supply.
- D7 (Green Light): The working status indicator. Flashes when the screen is operating normally.
5.2 Ndozi ihie ihuenyo
The BIGTREETECH HDMI5 V1.0 supports brightness adjustment:
- Pịa Ks1 button iwelie nchapụta.
- Pịa Ks3 button ibelata nchapụta.

Figure 4: Brightness Adjustment Feature
This image visually represents the adjustable brightness feature of the display, showing a slider for control.
5.3 Ngosipụta Ndozi ntuziaka
The BIGTREETECH HDMI5 V1.0 supports horizontal display direction adjustment:
- Pịa Ks2 button to adjust the display orientation horizontally.
5.4 Mmetụ Aka
The display features a 5-point capacitive touch screen, allowing for intuitive interaction with compatible operating systems.
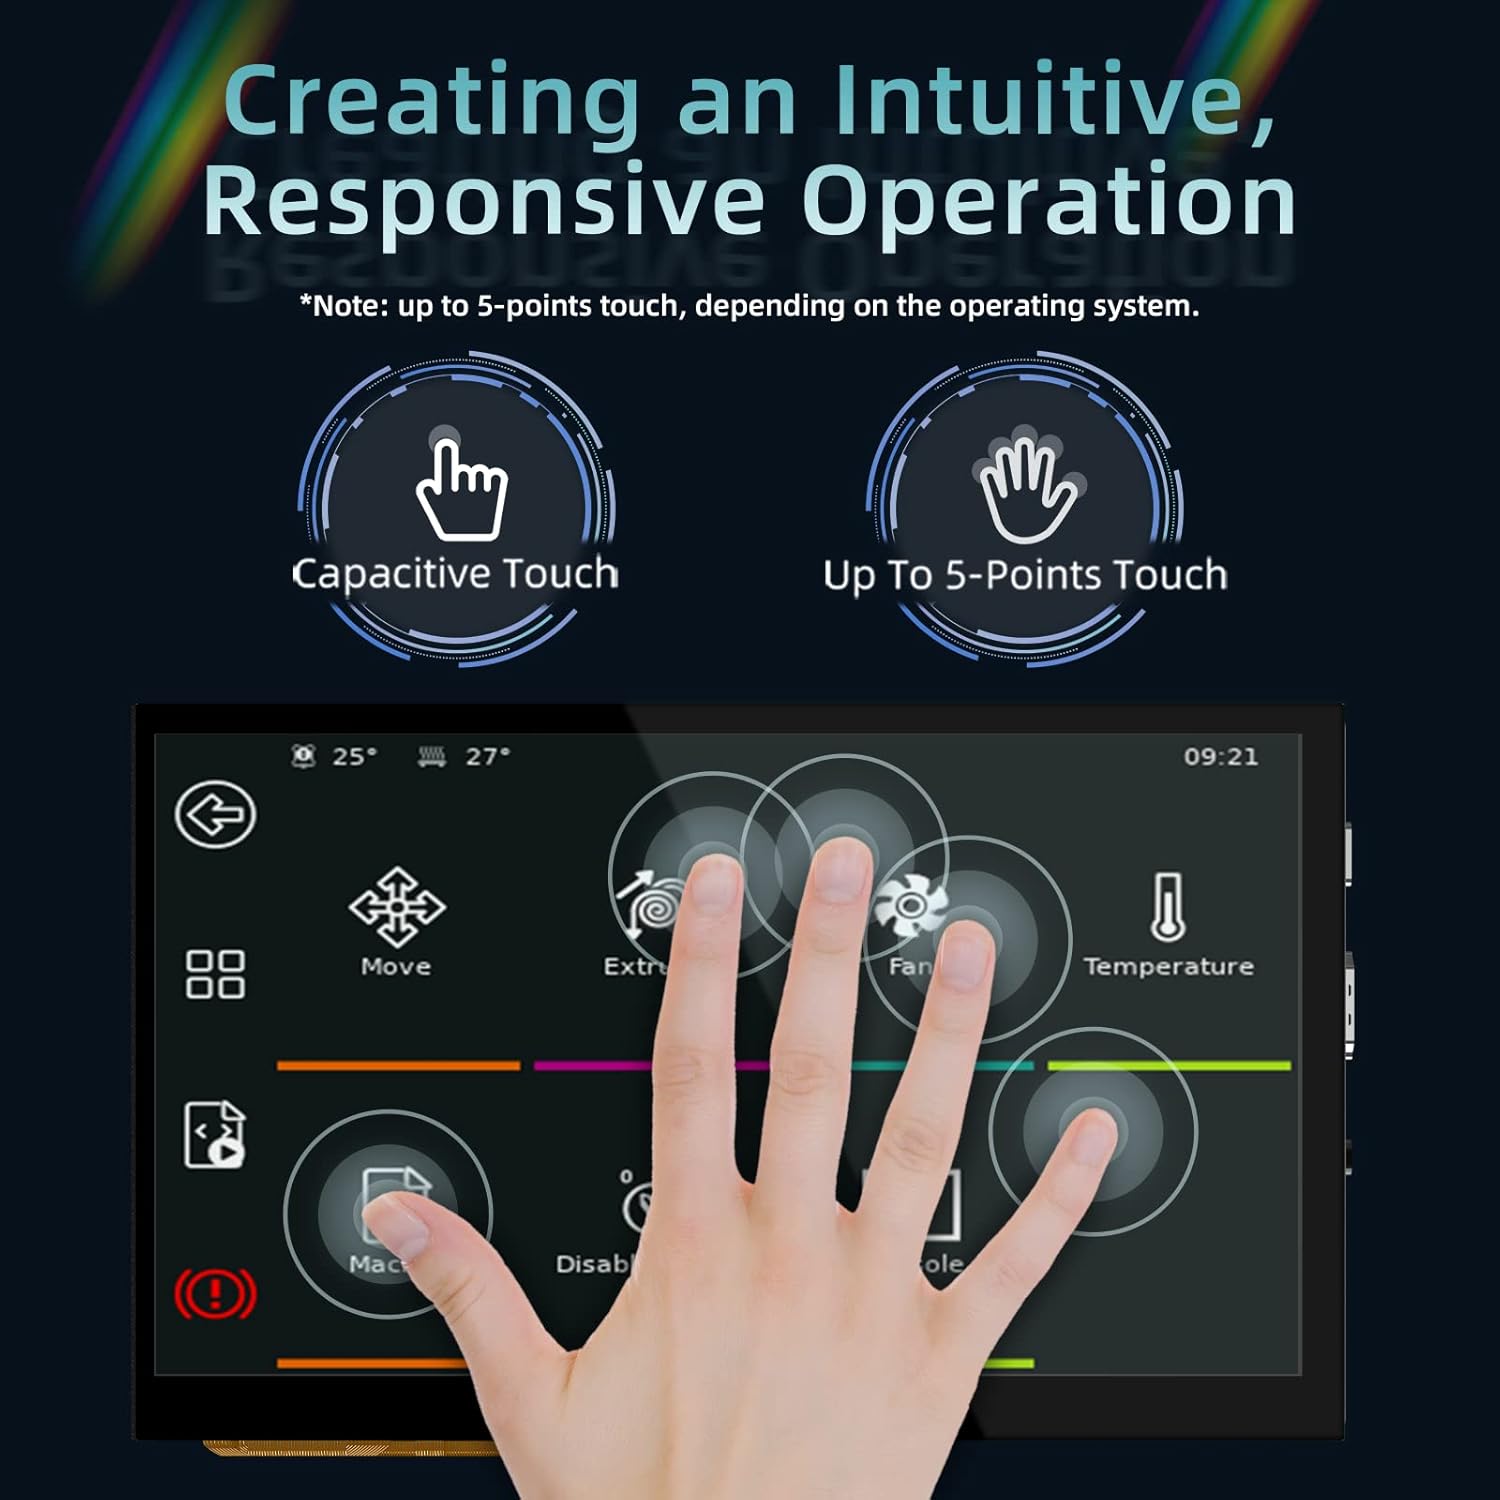
Figure 5: 5-Point Capacitive Touch
This image demonstrates the 5-point capacitive touch capability of the display, showing multiple finger touches recognized simultaneously.
Video 3: LESOWN 5-inch IPS Small HDMI LCD Screen Portable Monitor Usage
This video showcases the 5-inch display connected to a computer, demonstrating its use as a secondary screen and highlighting the touch functionality for navigating the operating system interface.
6. Nchọpụta nsogbu
- Enweghị Ngosipụta: Ensure both the HDMI cable and the Type-C data cable are securely connected. Verify that the power indicator (D6 red light) is on.
- Ọnweghị mmetụ aka: For PC connections, confirm that the operating system has successfully loaded the touch screen drivers. Reconnect the Type-C data cable.
- Incorrect Display Orientation: Use the Ks2 button to adjust the display direction.
- Ngosipụta nhụsianya: Adjust the brightness using the Ks1 and Ks3 buttons.
7. Nlekọta
- Debe ihuenyo ahụ ka ọ dị ọcha site na iji akwa dị nro na-enweghị ntụpọ. Zenarị ndị na-ehicha ihe abrasive.
- Protect the display from extreme temperatures and humidity.
- Avoid applying excessive force to the screen or connections.
8. Akwụkwọ ikike na nkwado
For warranty information and technical support, please refer to the official BIGTREETECH websaịtị ma ọ bụ kpọtụrụ ndị ahịa ha ozugbo. Debe akwụkwọ nnata ịzụrụ maka akwụkwọ ikike.
Ndị ọchịchị Websaịtị: BIGTREETECH Store on Amazon