
1. Ozi nchekwa
Read all instructions carefully before assembling, installing, or operating this appliance. Failure to follow these instructions could result in property damage, bodily injury, or death.
- This pizza oven is for outdoor use only. Do not operate indoors or in an enclosed area.
- Maintain a minimum clearance of 3 feet (0.9 meters) from the back and sides of the oven to any combustible materials.
- Always use heat-resistant gloves when handling hot surfaces or tools.
- Debe ụmụaka na anụ ụlọ n'ebe dị anya n'ime oven mgbe a na-arụ ọrụ na mgbe ọ na-ajụ oyi.
- Never leave the oven unattended while in use.
- Ensure the oven is placed on a stable, level, non-combustible surface.
- Only use recommended wood types for firing. Avoid treated wood or trash.
- Do not store flammable materials near the oven.
2. Ihe ngwugwu
Nyochaa na akụrụngwa niile dị tupu ịmalite mgbakọ.
- Pizza Oven Main Body
- Oven Stand with Wheels
- Chimney with Damper
- Side Panel/Shelf
- Ọnụ ụzọ oven Pizza
- Refractory Bricks (for cooking surface)
- 4x S-shape pothooks
- Onye na-egbu nri Pizza
- Pizza wheel
- Pizza oven ahịhịa
- Nnukwu shọvel pizza
- Ngwa Mgbakọ (skru, mkpụrụ, wdg)

Figure 2.1: Included accessories for the Empava pizza oven.
3. Ntọala na Mgbakọ
Follow these steps to assemble your Empava Commercial-Style Wood-Fired Outdoor Pizza Oven. It is recommended to have two people for certain assembly steps.
3.1 Nduzi Vidiyo Mgbakọ
Video 3.1: Detailed assembly instructions for the Empava pizza oven.
3.2 Mgbakọ nzọụkwụ site na nzọụkwụ
- Assemble the Oven Stand: Attach the legs to the base of the oven stand using the provided screws. Ensure all connections are secure.
- Wụnye wiil: Secure the four wheels to the bottom of the oven stand. Two wheels are swivel and two are fixed, allowing for easy movement and locking. Use a screwdriver to tighten the screws.
- Mount the Oven Body: Carefully lift the main oven body and place it onto the assembled stand. Align the pre-drilled holes and secure the oven body to the stand with screws.
- Attach Side Panel/Shelf: Install the side panel/shelf to the designated mounting points on the oven stand. This provides additional workspace. Secure it firmly with screws.
- Wụnye Chimney: Place the chimney onto the top opening of the oven body. Secure it using the provided screws. Ensure the chimney damper is correctly oriented for easy access.
- Attach Tool Hooks and Bar: Mount the accessory bar and S-hooks to the side of the oven stand. This allows for convenient storage of your pizza tools.
- Insert Refractory Bricks: Carefully place the refractory bricks onto the cooking surface inside the oven. Arrange them to form a solid, even base.

Figure 3.1: Dimensional drawing of the Empava pizza oven.

Figure 3.2: Assembled Empava pizza oven, front view.
4. Ntuziaka ọrụ
This section details how to operate your wood-fired pizza oven for optimal cooking results.
4.1 Ịkwanye Ọkụ n'ime Oven
- Use only dry, seasoned hardwood such as oak, maple, or fruitwoods. Avoid softwoods, treated wood, or charcoal.
- Place small pieces of kindling and paper in the rear of the oven, on the refractory bricks.
- Light the kindling and gradually add larger pieces of wood as the fire establishes.
- Maintain a consistent fire to heat the oven to the desired temperature.

Figure 4.1: Convenient wood storage beneath the oven.
4.2 Njikwa okpomọkụ
- The built-in thermometer on the front of the oven displays the internal temperature.
- Adjust the chimney damper to control airflow and heat retention. Opening the damper increases airflow and temperature, while closing it reduces airflow and retains heat.
- The half-spherical dome design helps circulate heat evenly, cooking pizzas quickly in minutes.

Figure 4.2: Integrated thermometer for monitoring oven temperature.
4.3 Cooking with the Oven
- Once the oven reaches the desired temperature (typically 700-900°F / 370-480°C for pizza), push the embers to one side to create a cooking zone.
- Use the pizza peel to slide your pizza into the oven. The large mouth allows for easy placement and retrieval of various food items.
- Rotate the pizza periodically for even cooking. Pizzas typically cook in 1-3 minutes.
- The refractory tiles store heat, ensuring a crispy crust and evenly cooked toppings.
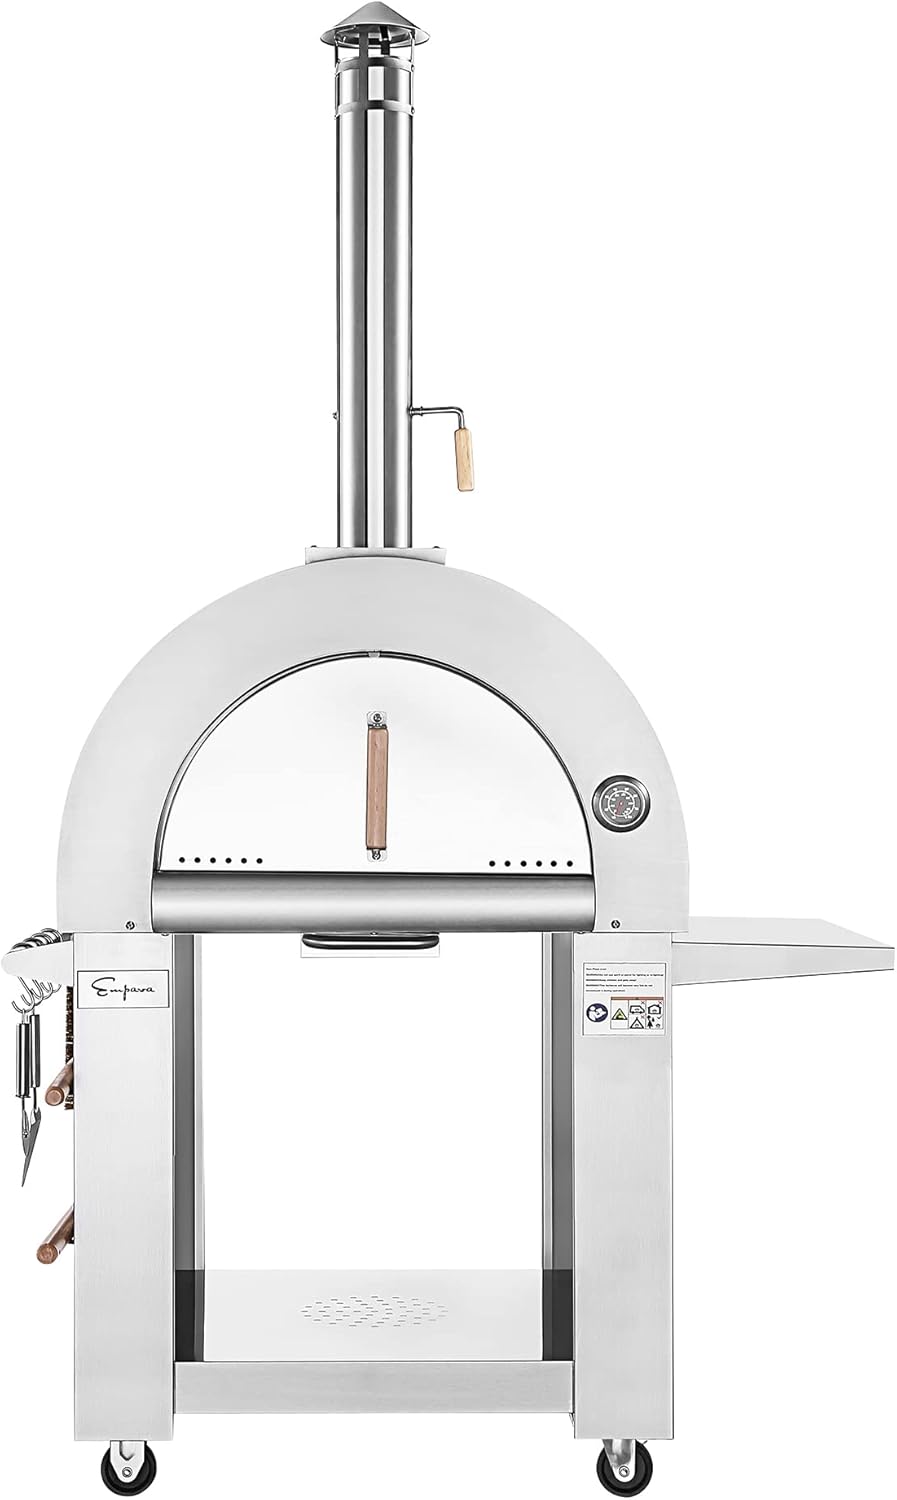
Figure 4.3: Oven interior with door open, ready for cooking.
5. Nlekọta
Nlekọta anya mgbe niile na-achọpụta ogologo ndụ yana ịrụ ọrụ kacha mma nke oven pizza gị.
- Ihicha ime ụlọ: After the oven has completely cooled, use the provided pizza oven brush to sweep out ash and debris from the cooking surface.
- Na-ehicha Mpụga: Jiri mgbasa ozi hichapụ elu igwe anaghị agba ncharaamp akwa na ncha dị nro. Zere ihe nchacha abrasive nke nwere ike ịcha elu.
- Chimney Maintenance: Periodically check the chimney for creosote buildup. Clean as necessary to ensure proper ventilation.
- Refractory Bricks: The bricks may darken over time, which is normal. If any bricks become cracked or damaged, they should be replaced.
- Nchekwa: When not in use, especially during inclement weather, it is recommended to cover the oven or move it to a sheltered location. The wheels allow for easy portability.
6. Nchọpụta nsogbu
This section addresses common issues you might encounter with your pizza oven.
| Nsogbu | Ihe nwere ike ime | Ngwọta |
|---|---|---|
| Oven not reaching high temperatures | Insufficient fuel, wet wood, closed damper, poor airflow. | Ensure adequate dry hardwood. Open chimney damper fully. Clear any obstructions. |
| Nnukwu anwụrụ ọkụ | Wet wood, improper fire starting, chimney obstruction. | Use dry wood. Start fire with small kindling. Check and clean chimney. |
| A na-ere Pizza n'otu akụkụ | Uneven heat distribution, pizza too close to flames. | Rotate pizza frequently. Ensure embers are evenly distributed or to one side away from direct cooking area. |
| Pizza crust not crispy | Oven not hot enough, insufficient preheating of bricks. | Allow oven to preheat longer until bricks are very hot. Ensure proper oven temperature. |
7. Nkọwapụta
| Njirimara | Nkọwa |
|---|---|
| Ụdị | Empava |
| Nọmba nlereanya | PG05 |
| Nha | 33 inch |
| Agba | Igwe anaghị agba nchara |
| Usoro kpo oku | Osisi |
| Ụdị mmanụ ụgbọala | Osisi |
| Ụdị mmecha | Igwe anaghị agba nchara |
| Ụdị nwụnye | Ntighari |
| Atụmatụ ndị ọzọ | Portable (with 4 wheels) |
| Akụkụ ihe (D x W x H) | 32.3"D x 46.3"W x 79.8"H |
| Ike nri | 30-inch x 25-inch |
| Ụdị ihe | 18-gauge Stainless Steel |
| Ngwa gụnyere | 4x s-shape pothooks, pizza cutter, pizza wheel, pizza oven brush, large pizza oven shovel |
8. Akwụkwọ ikike na nkwado
Empava provides a limited manufacturer warranty for this product.
- Oge ikike: Akwụkwọ ikike mmepụta ihe dị afọ 2.
- For warranty claims or technical assistance, please contact Empava customer support. Refer to the contact information provided in your purchase documentation or on the official Empava websaịtị.