
Okwu mmalite
This manual provides detailed instructions for the safe and effective use of your pxton PX-8S-01 two-way radio. Please read this manual thoroughly before operating the device to ensure optimal performance and longevity.
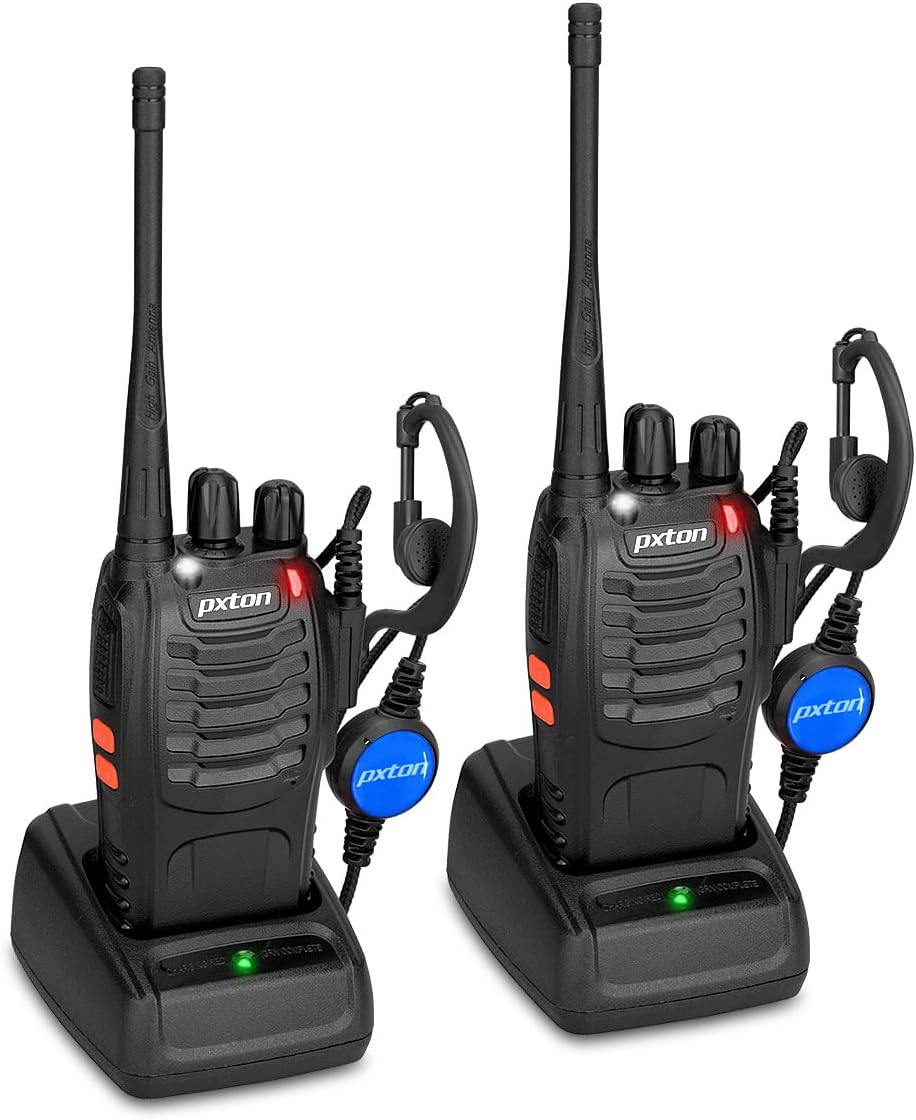
Image: Two pxton PX-8S-01 two-way radios with charging bases and earpieces.
Ihe ngwugwu
Chọpụta na ihe niile dị na ngwugwu gị:
- pxton PX-8S-01 Two-Way Radio (2 units)
- Lithium-Ion Battery (2 units)
- USB Charger (2 units)
- Upgraded Earpiece (2 units)
- Mpempe eriri eriri (nkeji 2)
- Wrist Strap (2 units)
- Antenna (2 units)
- Akwụkwọ ntuziaka onye ọrụ (1 nkeji)

Image: Contents of the pxton PX-8S-01 package.
Ngwaahịa gafereview
Familiarize yourself with the components of your pxton PX-8S-01 two-way radio:

Image: Labeled diagram of the pxton PX-8S-01 two-way radio components.
- Integrated Sensitive Antenna: Maka ịnyefe na ịnata akara.
- Mgbanwe ọwa: Rotary knob to select one of the 16 available channels.
- Mgbanwe ọkụ/ Njikwa olu: Rotary knob to turn the radio on/off and adjust the volume.
- Igwe ọkụ: Built-in LED light for illumination.
- Ihe ngosi LED: Na-egosi ọnọdụ redio (dịka ọmụmaatụ, izipu ozi, ịnata ozi, ịchaji).
- Bọtịnụ PTT (Push-to- Talk): Pịa ma jide ka ịnyefe, hapụ ka ịnata.
- MONI Button (Monitor): Press to temporarily disable squelch and listen for weak signals.
- Bọtịnụ ọkụ ọkụ: Na-eme ka ọkụ ọkụ arụnyere n'ime ya rụọ ọrụ.
- SP/MIC Jacks: Ports for connecting external audio accessories like earpieces or speaker microphones.
- Clear Speaker: ewepụtara ọdịyo.
- Igwe okwu arụnyere n'ime ya: Na-ejide olu gị maka mbufe.
Melite
1. Ntinye batrị
- Gbaa mbọ hụ na agbanyụrụ redio.
- Hazie ngwugwu batrị ahụ na oghere dị n'azụ redio.
- Malite ngwungwu batrị elu ruo mgbe ọ pịrị na ya.
- To remove, press the release latch (if present) and slide the battery downwards.
2. Ịchaji batrị
- Connect the USB charger to a power source.
- Place the radio with the battery installed into the charging cradle.
- The LED indicator on the charger will show the charging status (e.g., red for charging, green for fully charged).
- A full charge from 0 capacity typically takes 3-4 hours.
3. Na-agbakwunye Ngwa
- Antenna: Screw the antenna clockwise onto the connector on top of the radio until it is finger-tight. Do not overtighten.
- Mpempe eriri: Attach the belt clip to the designated slot on the back of the radio using the provided screws.
- Ihe nti: Insert the earpiece plug into the SP/MIC jacks on the side of the radio. Ensure it is fully inserted for proper connection.
Ntuziaka ọrụ
1. Gbanyụọ / Gbanyụọ na Mgbanwe olu
- To power on the radio, rotate the Power Switch/Volume Control knob clockwise. You will hear a "click" and a voice prompt indicating the current channel.
- Gaa n'ihu na-atụgharị mkpịsị aka n'akụkụ aka elekere ka iwelie olu, yana n'akụkụ elekere ka ibelata ya.
- To power off, rotate the knob counter-clockwise until you hear a "click."
2. Nhọrọ ọwa
- Tụgharịa mkpịsị ugodi ọwa ka ịhọrọ otu n'ime ọwa iri na isii dị.
- The radio will announce the selected channel number.
- Gbaa mbọ hụ na edobere redio niile dị n'otu gị n'otu ọwa maka nkwukọrịta.
3. Na-ebufe na ịnata
- Ka ịnyefe, pịa ma jide PTT (Push-to- Talk) button. Speak clearly into the microphone. The LED indicator will illuminate red.
- Release the PTT button to stop transmitting and return to receive mode. The LED indicator will turn green when receiving a signal.
4. VOX (Voice Operated Exchange) Function
The VOX function allows hands-free operation. When activated, the radio will automatically transmit when it detects your voice, without needing to press the PTT button.
- VOX settings are typically programmed via software. Refer to advanced programming instructions if available.
- When using VOX, ensure the microphone is positioned correctly to pick up your voice effectively.
Image: VOX/Handfree function icon.
5. Ọrụ ọkụ ọkụ
- Pịa raara onwe ya nye Bọtịnụ ọkụ ọkụ to turn the built-in LED flashlight on or off.
Image: Flashlight function icon.
6. Nyocha ọrụ
The scan function allows the radio to automatically scan through channels to find active transmissions.
- To activate the scan function, typically this is done via a programmed side key or by selecting a specific channel. Refer to your radio's programming guide for details.
- When scanning, the radio will stop on an active channel until the transmission ends, then resume scanning.
7. Mkpu ihe mberede
The radio features an emergency alarm function for critical situations.
- To activate the emergency alarm, press the designated Emergency Alarm button (if programmed) or a specific key combination. This will typically emit a loud siren sound and/or transmit an alert signal.

Image: Emergency Alarm function icon.
8. Squelch Adjustment
Squelch suppresses background noise when no signal is being received. The PX-8S-01 has an adjustable squelch feature.
- Squelch levels are typically set via programming software. A higher squelch level requires a stronger signal to open the receiver, reducing static but potentially missing weak signals.
- The MONI button can be used to temporarily override the squelch and listen to all signals, including weak ones or background noise.
Image: Squelch adjustment icon.
9. Privacy Codes (CTCSS/DCS)
The radio supports 165 privacy codes (50 CTCSS / 210 DCS) per programmable channel to help filter out unwanted conversations.
- When a CTCSS/DCS code is set, you will only hear transmissions from other radios using the same channel and the same CTCSS/DCS code.
- Similarly, other radios will only hear your transmissions if they are on the same channel and using the same code.
- These codes are typically programmed using specialized software.
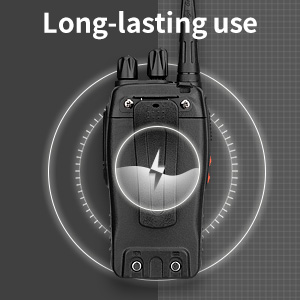
Image: CTCSS/DCS privacy codes icon.
Nlekọta
- Nhicha: Jiri nwayọọ, damp akwa iji hichaa mputa redio. Ejila kemịkalụ siri ike ma ọ bụ ihe mgbaze.
- Nlekọta batrị:
- Zenarị chaja karịa ma ọ bụ ịchaji batrị kpamkpam.
- Chekwaa batrị n'ebe dị jụụ, kpọrọ nkụ mgbe anaghị eji ya.
- Ọ bụrụ na agaghị eji redio ruo ogologo oge, wepụ batrị ahụ.
- Nchekwa: Store the radio in a dry, dust-free environment away from extreme temperatures.
- Antenna: Ehulata ma ọ bụ gbanwee antenna, n'ihi na nke a nwere ike imetụta arụmọrụ.
Nchọpụta nsogbu
| Nsogbu | Ihe nwere ike ime | Ngwọta |
|---|---|---|
| Redio anaghị agbanye ọkụ. | Batrị agwụla ma ọ bụ etinyeghị ya nke ọma. | Chajie batrị ahụ. Hụ na etinyere batrị ahụ nke ọma. |
| Enweghị ike ịnyefe ma ọ bụ nata. | Incorrect channel selected. Battery low. Radio out of range. | Verify both radios are on the same channel. Charge battery. Move closer to the other radio. |
| Ogo ọdịyo adịghị mma ma ọ bụ kwụ ọtọ. | Weak signal. Squelch level too low/high. Interference. | Move to an area with fewer obstructions. Adjust squelch level (if programmable). Check for sources of interference. |
| Short communication range. | Obstructions (buildings, terrain). Low battery. | Gaa na mpaghara mepere emepe. Gbaa mbọ hụ na chajịrị batrị zuru oke. |
| Earpiece not working. | Earpiece not fully inserted. Faulty earpiece. | Ensure earpiece plug is fully inserted into the SP/MIC jack. Try a different earpiece if available. |
Nkọwapụta
- Ụdị: PX-8S-01
- NJ FCC: 2AX68PX-888S
- Ọnụọgụ ọwa: 16
- Oke ugboro: UHF
- Oke Okwu Kachasị: Up to 5 miles (unobstructed)
- Koodu nzuzo: 165 (50 CTCSS / 210 DCS)
- Ụdị batrị: Lithium ion (gụnyere)
- Batrị Voltage: 3.7 volts (DC)
- Ndụ batrị: 8-96 hours standby, 8-12 hours continuous use (actual time varies with usage)
- Oge nchaji: 3-4 hours (from 0 capacity)
- Ọkwa Nguzogide mmiri: Mmiri na-eguzogide
- Akụkụ ngwaahịa: 1.1"D x 1.89"W x 8.34"H
- Ibu ihe: 1.34 pounds (for the pair)
- Atụmatụ pụrụ iche: Rechargeable, VOX, TOT, Emergency Alarm, Battery Low Alert, Flashlight, Scan Function

Image: Size comparison of the pxton PX-8S-01 radio.
Ozi nchekwa
Your pxton PX-8S-01 walkie-talkie has been granted FCC transmission and reception certification and authorization (FCC ID: 2AX68PX-888S). This device is intended for use only within the frequency points authorized by the FCC certification range.
Biko debe ụkpụrụ nchekwa ndị a:
- Ejila redio rụọ ọrụ n'ime ikuku mgbawa (dịka ọmụmaatụ, gas na-ere ọkụ, ụmụ irighiri uzuzu, ntụ ntụ ọla).
- Do not modify the radio or its accessories. Unauthorized modifications can void your warranty and violate FCC regulations.
- Keep the radio and its accessories out of reach of children.
- Use only pxton-approved batteries and chargers. Using unapproved accessories can cause damage or injury.
- Avoid exposing the radio to extreme temperatures, direct sunlight, or moisture for prolonged periods.
- Ọ bụrụ na redio ahụ na-ekupụ anwụrụ ọkụ ma ọ bụ isi na-adịghị ahụkebe, gbanyụọ ọkụ ozugbo ma wepụ batrị ahụ. Kpọtụrụ ndị ọrụ nkwado ndị ahịa.
Akwụkwọ ikike na nkwado
pxton provides lifetime customer service for its walkie-talkies. If you encounter any questions or issues with your PX-8S-01 radio, please contact pxton customer support through the platform where you purchased the product. Our professional team is available to assist you with troubleshooting and support.
For further assistance, please refer to the official pxton websaịtị ma ọ bụ kpọtụrụ ndị ahịa ha ozugbo.