1. Ngwaahịa gafereview
This manual provides detailed instructions for the installation, maintenance, and troubleshooting of the BOXI Front Suspension Sway Bar Stabilizer Bar Link Kit. This kit is designed to replace worn or damaged front sway bar links, restoring proper suspension function and vehicle stability.
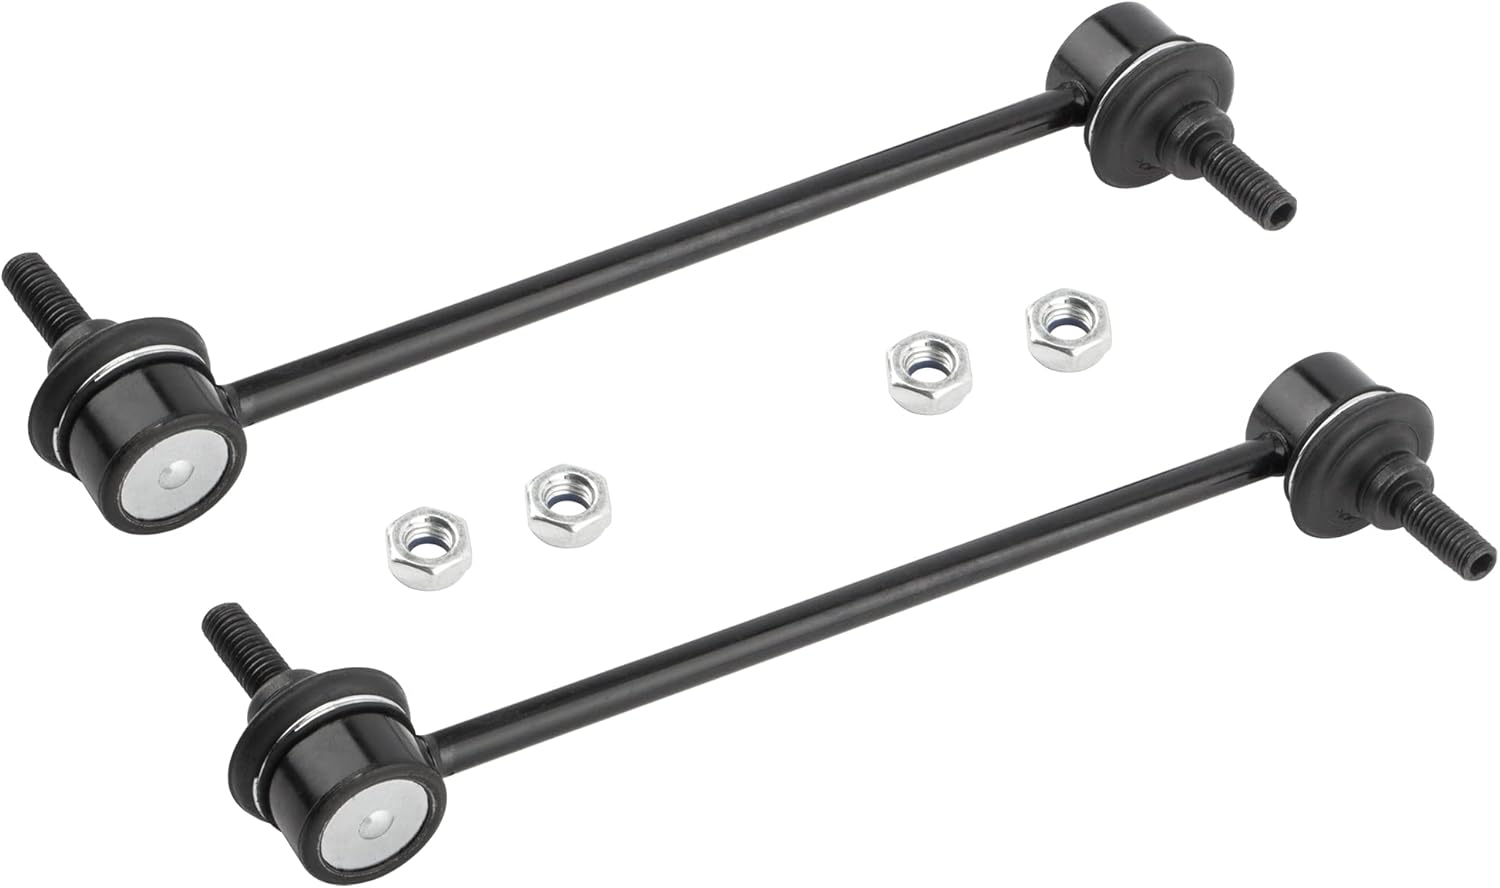
Image 1.1: The BOXI Front Suspension Sway Bar Stabilizer Bar Link Kit, including two links and four nuts.
The stabilizer bar links play a crucial role in your vehicle's suspension system by connecting the sway bar to the suspension components. They help reduce body roll during turns, improving handling and ride comfort.
2. Ndakọrịta
This BOXI Front Suspension Sway Bar Stabilizer Bar Link Kit (Model BX02400041-2) is compatible with the following vehicle:
- Ford Focus: 2000, 2001, 2002, 2003, 2004, 2005, 2006, 2007, 2008, 2009, 2010
Replaces OEM Part Numbers: K80066, YS4Z5K484, 5S4Z5K484AA, AS4Z5K484A
Important: Always verify compatibility with your specific vehicle's year, make, and model before installation.
3. Ihe ngwugwu
Mgbe imepechara ngwugwu ahụ, biko hụ na akụrụngwa niile dị na enweghị mmebi:
- 2 x Front Suspension Sway Bar Stabilizer Bar Links
- 4 x Nuts (for installation)

Image 3.1: Contents of the BOXI Stabilizer Bar Link Kit.
4. Ozi nchekwa
Working on vehicle suspension components requires caution. Please adhere to the following safety guidelines:
- Na-eyi ihe nchekwa onwe onye kwesịrị ekwesị mgbe niile (PPE), gụnyere ugogbe anya nchekwa na uwe aka.
- Hụ na e ji ihe nkwado siri ike kwado ụgbọala ahụ n'elu ebe a na-adọba ụgbọala n'elu ala dị larịị tupu ịmalite ọrụ ọ bụla. Atụkwasịla obi naanị na jaak.
- Disconnect the vehicle's battery if working near electrical components.
- Use the correct tools for each task.
- Ọ bụrụ na obi adịghị gị mma maka nzọụkwụ ọ bụla ị ga-eme, gakwuru onye ọkachamara n'ihe gbasara mekaniki.
5. Ntuziaka nwụnye
The following steps outline the general procedure for replacing front sway bar stabilizer links. Specific vehicle configurations may vary. Refer to your vehicle's service manual for detailed torque specifications.

Image 5.1: A mechanic performing suspension work. Professional installation is recommended if you are not experienced.
- Kwadebe ụgbọ ala:
- Dọba ụgbọala n'elu ala dị larịị.
- Tinye breeki ebe a na-adọba ụgbọala.
- Loosen the lug nuts on the front wheels.
- Jack up the front of the vehicle and support it securely with jack stands.
- Wepu wiil ndị dị n'ihu.
- Locate Old Sway Bar Links:
Identify the existing front sway bar stabilizer links. They connect the sway bar to the strut or lower control arm.
- Remove Old Sway Bar Links:
- Using a wrench or socket, loosen and remove the nuts securing the old sway bar links at both ends.
- If the stud spins, you may need to use an Allen key or Torx bit to hold the stud while loosening the nut.
- Remove the old links from the vehicle.
- Install New Sway Bar Links:
- Position the new BOXI sway bar link in place, aligning the studs with the mounting holes.
- Install the new nuts provided with the kit onto the studs.
- Hand-tighten the nuts initially.
- Torque Nuts to Specification:
- Lower the vehicle slightly so that the suspension is under load (or place a jack under the lower control arm to simulate load). This helps ensure proper alignment and prevents premature wear.
- Using a torque wrench, tighten the nuts to the manufacturer's specified torque. Refer to your vehicle's service manual for exact values.
- Mara: Some users have reported issues with nuts stripping if over-torqued or if low-quality nuts are used. Ensure proper torque and inspect nuts for quality.
- Nzọụkwụ ikpeazụ:
- Reinstall the front wheels and tighten lug nuts to specification.
- Wetuo ụgbọ ala ahụ kpamkpam.
- Test drive the vehicle to ensure proper function and check for any unusual noises or handling characteristics.
6. Operating Principles and Effects
The sway bar links connect the anti-roll bar (sway bar) to the wheel hub or suspension arm. Their primary function is to transfer forces from one side of the suspension to the other, resisting body roll during cornering. When a vehicle turns, the centrifugal force causes the body to lean. The sway bar, through the links, twists to counteract this lean, keeping the vehicle flatter and improving stability and handling.
Replacing worn sway bar links with new BOXI units can lead to:
- Reduced vehicle body roll during turns.
- Improved steering response and control.
- Elimination of clunking or rattling noises from the front suspension.
- Enhanced overall driving safety and comfort.

Image 6.1: Improved vehicle control and driving experience after proper installation.
7. Nlekọta
Sway bar links are wear items and do not typically require routine maintenance beyond periodic inspection. However, to maximize their lifespan and ensure continued performance:
- Nyocha oge niile: During routine vehicle maintenance (e.g., oil changes, tire rotations), visually inspect the sway bar links for signs of wear, such as torn boots, excessive play in the joints, or corrosion.
- Address Noises Promptly: If you hear clunking, rattling, or knocking noises from the front suspension, especially over bumps or during turns, have the sway bar links inspected immediately.
- Ịdị ọcha: Keep the suspension area relatively clean to prevent excessive buildup of dirt and debris around the joints.
8. Nchọpụta nsogbu
If you experience issues after installing the sway bar links, consider the following:
| Mgbaàmà | Ihe nwere ike ime | Ngwọta |
|---|---|---|
| Clunking/Rattling Noise | Loose nuts, damaged link, incorrect installation, other worn suspension components. | Check torque on all nuts. Inspect links for damage. Verify correct installation. Inspect other suspension parts (bushings, ball joints, tie rods). |
| Excessive Body Roll | Link not properly installed, incorrect part, or other suspension issues. | Re-check installation. Confirm part compatibility. Have a mechanic inspect the entire suspension system. |
| Nuts stripping during installation | Over-torquing, cross-threading, or material defect. | Ensure proper torque specifications are followed. Start nuts by hand to avoid cross-threading. If nuts are defective, contact customer support for replacements. |
9. Nkọwapụta
| Njirimara | Nkọwa |
|---|---|
| Ụdị | BOXI |
| Ọnọdụ Akụkụ akpaaka | N'ihu |
| Servicedị Ọrụ hicgbọ | Ụgbọ ala |
| Emecha mpụta | Nwa |
| Nọmba nlereanya | BX02400041-2 |
| Dochie ọnụọgụ akụkụ OEM | 5S4Z5K484AA, YS4Z5K484, AS4Z5K484A, K80066 |
| Ibu Ibu | 1.66 pound (kwa otu set) |
| Akụkụ ngwugwu | 12.28 x 2.87 x 2.4 sentimita asatọ |
10. Akwụkwọ ikike na nkwado ndị ahịa
BOXI provides a Akwụkwọ ikike nke afọ 1 for this product. This warranty covers manufacturing defects and ensures the product performs as intended under normal use.
If you encounter any quality issues, damage, or have questions regarding the compatibility or installation of this product, please contact BOXI customer support. Provide your purchase details and a description of the issue for prompt assistance.
For further information or support, please visit the official BOXI store or contact their customer service department.


