
NC USB Programming Cable 3.5MM Pin
USB Programming Cable User Manual
Model: USB Programming Cable 3.5MM Pin
Okwu mmalite
This manual provides essential information for the proper use and maintenance of your USB Programming Cable. This cable is designed to connect your compatible radio to a personal computer, enabling you to program settings and frequencies using appropriate software.
Nkọwapụta ngwaahịa
| Ụdị | NC |
| Ogologo | 100 cm (39.37 sentimita) |
| Ibu | 30g (1.06 ounces) |
| Omimi pin | 3.5 mm |
| Ụdị interface | USB 2.0 |
| Ụdị njikọ | Auxiliary, USB 2.0 |
| Ụdị USB | USB |
| Agba | Nwa |
| Njirimara Pụrụ Iche | Tangle efu |
| Njikọ okike | Nwoke-na-nwoke |
| Ụdị | Gburugburu |
| Ngwa dakọtara | PC |
| Ojiji ime ime/n'èzí | N'èzí, ime ụlọ |
Ihe ngwugwu
- 1 × USB Programming Cable for YAESU & VERTEX Radio
Compatible Radio Models
This programming cable is compatible with the following YAESU & VERTEX radio models:
- VX-1R
- VX-2R
- VX-3R
- VX-5R
- VX-168
- VX-160
- FT-60R
- ...and other single-hole series YAESU & VERTEX radios.
Ntuziaka nhazi
- Wụnye akụrụngwa ọkwọ ụgbọala: Before connecting the cable, ensure you have installed the necessary USB driver software for the programming cable on your computer. This software is typically provided with the cable or available for download from the manufacturer's websaịtị.
- Install Radio Programming Software: Obtain and install the specific programming software for your radio model (e.g., YAESU or VERTEX programming software). This software is essential for configuring your radio.
- Connect Cable to PC: Insert the USB end of the programming cable into an available USB port on your computer.
- Connect Cable to Radio: Carefully insert the 3.5mm pin end of the cable into the programming port of your compatible radio. Ensure a secure connection.
- Redio Ike: Gbanwuo redio gị.
- Mwepụta Software Programming: Open the radio programming software on your computer.
- Configure Software Port: Within the programming software, navigate to the communication settings or port settings. Select the correct COM port that corresponds to the newly connected USB programming cable. This port number can usually be found in your computer's Device Manager under "Ports (COM & LPT)".
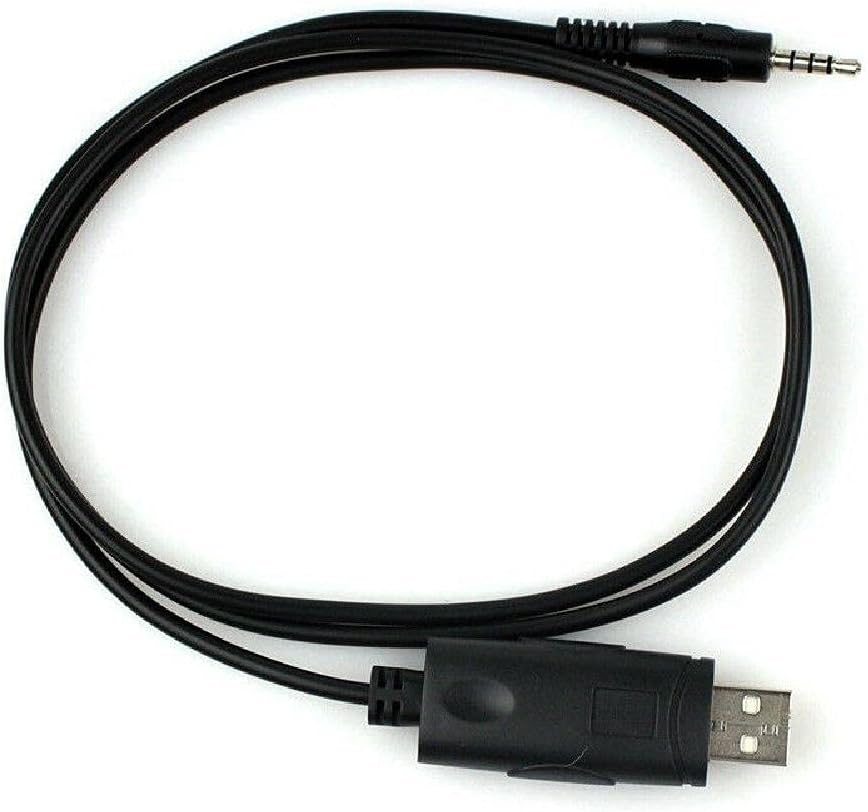
Image: The USB Programming Cable, showing both the USB and 3.5mm pin connectors.
Ntuziaka ọrụ
Once the cable is connected and the software is configured, you can proceed with programming your radio:
- Gụọ Data Redio: In the programming software, locate the option to "Read from Radio" or "Download from Radio." This will transfer the current settings from your radio to the software.
- Megharịa ntọala: Make the desired changes to frequencies, channels, tones, and other settings within the software interface.
- Dee data na Redio: After making modifications, use the "Write to Radio" or "Upload to Radio" function to transfer the new settings from the software back to your radio.
- Nyochaa: After writing, it is recommended to read the data from the radio again to confirm that the new settings have been successfully applied.

Image: The programming cable in a coiled state, highlighting its flexibility and compact design.
Nlekọta
- Nchekwa: Chekwaa eriri ahụ n'ebe dị jụụ, kpọrọ nkụ na-adịghị na ìhè anyanwụ kpọmkwem na oke okpomọkụ.
- Nhicha: Use a soft, dry cloth to clean the cable and connectors. Do not use liquid cleaners or solvents.
- Ijikwa: Avoid bending the cable sharply or pulling on the connectors to disconnect. Always grasp the connector housing when plugging or unplugging.
- Nyocha: Periodically inspect the cable for any signs of damage, such as frayed wires or bent pins. Do not use a damaged cable.
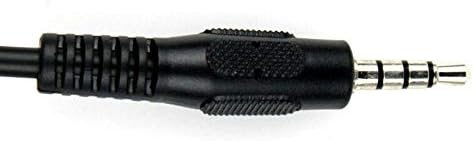
Foto: nkọwa zuru ezu view of the 3.5mm pin connector, showing its structure.
Nchọpụta nsogbu
- Cable Not Recognized by PC:
- Ensure USB drivers are correctly installed. Check Device Manager for any yellow exclamation marks next to the USB device.
- Gbalịa ọdụ ụgbọ USB dị iche na kọmputa gị.
- Malitegharịa ekwentị gị na kọmputa.
- Verify the cable is securely connected to both the PC and the radio.
- Programming Software Cannot Connect to Radio:
- Confirm the correct COM port is selected in the programming software.
- Ensure the radio is powered on and in programming mode (if applicable for your radio model).
- Check that the cable is fully inserted into the radio's programming jack.
- Verify that the programming software is the correct version for your radio model.
- Programming Errors:
- Ensure the radio's battery is sufficiently charged.
- Avoid disconnecting the cable during a read or write operation.
- Consult your radio's specific programming guide for any unique requirements or procedures.
Ihe ndetu dị mkpa
- This cable is designed for data transfer between a radio and a PC for programming purposes only.
- Always use the appropriate and official programming software for your specific radio model.
- Unauthorized modifications to the cable or radio may void warranties and could lead to malfunction.
Vidiyo ngwaahịa ngwaahịa
No official product videos are available for this item at this time.
Akwụkwọ ikike na nkwado
For warranty information or technical support, please refer to the documentation provided with your purchase or contact the manufacturer directly. Keep your proof of purchase for warranty claims.
Ask a question about this manual
Ask about setup, troubleshooting, compatibility, parts, safety, or missing instructions. Manuals+ will review the question and use this page’s manual context to help answer it.