
Okwu mmalite
The Keychron Q2 is a fully customizable wired mechanical keyboard featuring a compact 65% layout. Constructed with a solid full aluminum frame, the Q2 is designed for easy assembly and offers a premium typing experience. It supports full QMK and VIA programming for extensive customization and features hot-swappable switches for personalized tactile feedback.

Image: The Keychron Q2 Wired Custom Mechanical Keyboard, showcasing its compact 65% layout and blue color scheme.
Ntuziaka nhazi
1. Ihe ngwugwu
Tupu ịmalite, hụ na ihe niile dị na ya dị:
- Keychron Q2 Keyboard Kit (Aluminum Case, PCB, Steel Plate, Sound Absorbing Foam, Case Foam, Gaskets)
- USB Ụdị-C ruo Ụdị-C
- Ụdị USB Ụdị-A ruo Ụdị-C nkwụnye
- Gbanwee Puller
- Onye na-adọkpụ igodo
- Screwdriver
- Igodo Hex
- Stabilizers (4 sets)
Note: All tools are typically located at the bottom of the packaging.

Image: Diagram illustrating the contents of the Keychron Q2 package, including the keyboard, cables, and tools.
2. Jikọọ ahụigodo
- Locate the USB Type-C port on the back of the Keychron Q2 keyboard.
- Connect one end of the provided USB Type-C to Type-C cable to the keyboard.
- Connect the other end of the cable to your computer's USB Type-C port. If your computer only has USB Type-A ports, use the included USB Type-A to Type-C adapter.
- Ensure the operating system switch (located on the back edge of the keyboard) is set to the correct position for your system (Mac or Windows).
- Sistemu eji arụ ọrụ gị ga-amata ahụigodo ahụ ozugbo.

Foto: A nso nso view of the Keychron Q2 keyboard with a USB-C cable connected, showing the Mac/Win switch.
Ntuziaka ọrụ
1. QMK/VIA nhazi
The Keychron Q2 supports full QMK and VIA programming, allowing you to remap keys, create macros, and customize lighting effects. To use VIA software:
- Budata ngwanrọ VIA site na Keychron gọọmentị websaịtị (keychron.com/pages/qmk-via).
- Connect your Q2 keyboard to your computer via the USB cable.
- Launch the VIA software. The software should automatically detect your Q2 keyboard. If not, you may need to import the Q2 keymap JSON file, also available on the Keychron websaịtị.
- Use the graphical interface to drag and drop functions, assign macros, and configure lighting for each key. Changes are applied in real-time.

Image: Screenshot of the VIA software interface, demonstrating how to remap keys on the Keychron Q2 keyboard.
2. Mgbanwe Ndị A Na-agbanwe n'Ọkụ
The Q2's PCB supports both 3-pin and 5-pin MX style mechanical switches, allowing for easy switch replacement without soldering.
- Iji mkpịsị mkpịsị ugodi enyere, jiri nlezianya wepụ okpu igodo na mgba ọkụ nke ịchọrọ dochie.
- Use the provided switch puller to gently grip the top and bottom clips of the switch. Pull the switch straight up to remove it from the PCB.
- Dozie ntụtụ nke mgba ọkụ ọhụrụ ahụ na oghere dị na PCB. Gbaa mbọ hụ na ntụtụ ahụ kwụ ọtọ ka ịzena-ehulata.
- Pịa mgba ọkụ ọhụrụ ahụ nke ọma n'ime ebe ruo mgbe ọ pịrị.
- Re-attach the keycap.

Foto: A nso nso view of the Keychron Q2's PCB with several switches removed, demonstrating the hot-swappable feature.
3. Keycaps and RGB Lighting
The Q2 comes with premium non-shine-through PBT keycaps, known for their durability and oil resistance. The keyboard features south-facing RGB LEDs, designed to provide better illumination of the backlight from the typist's perspective.
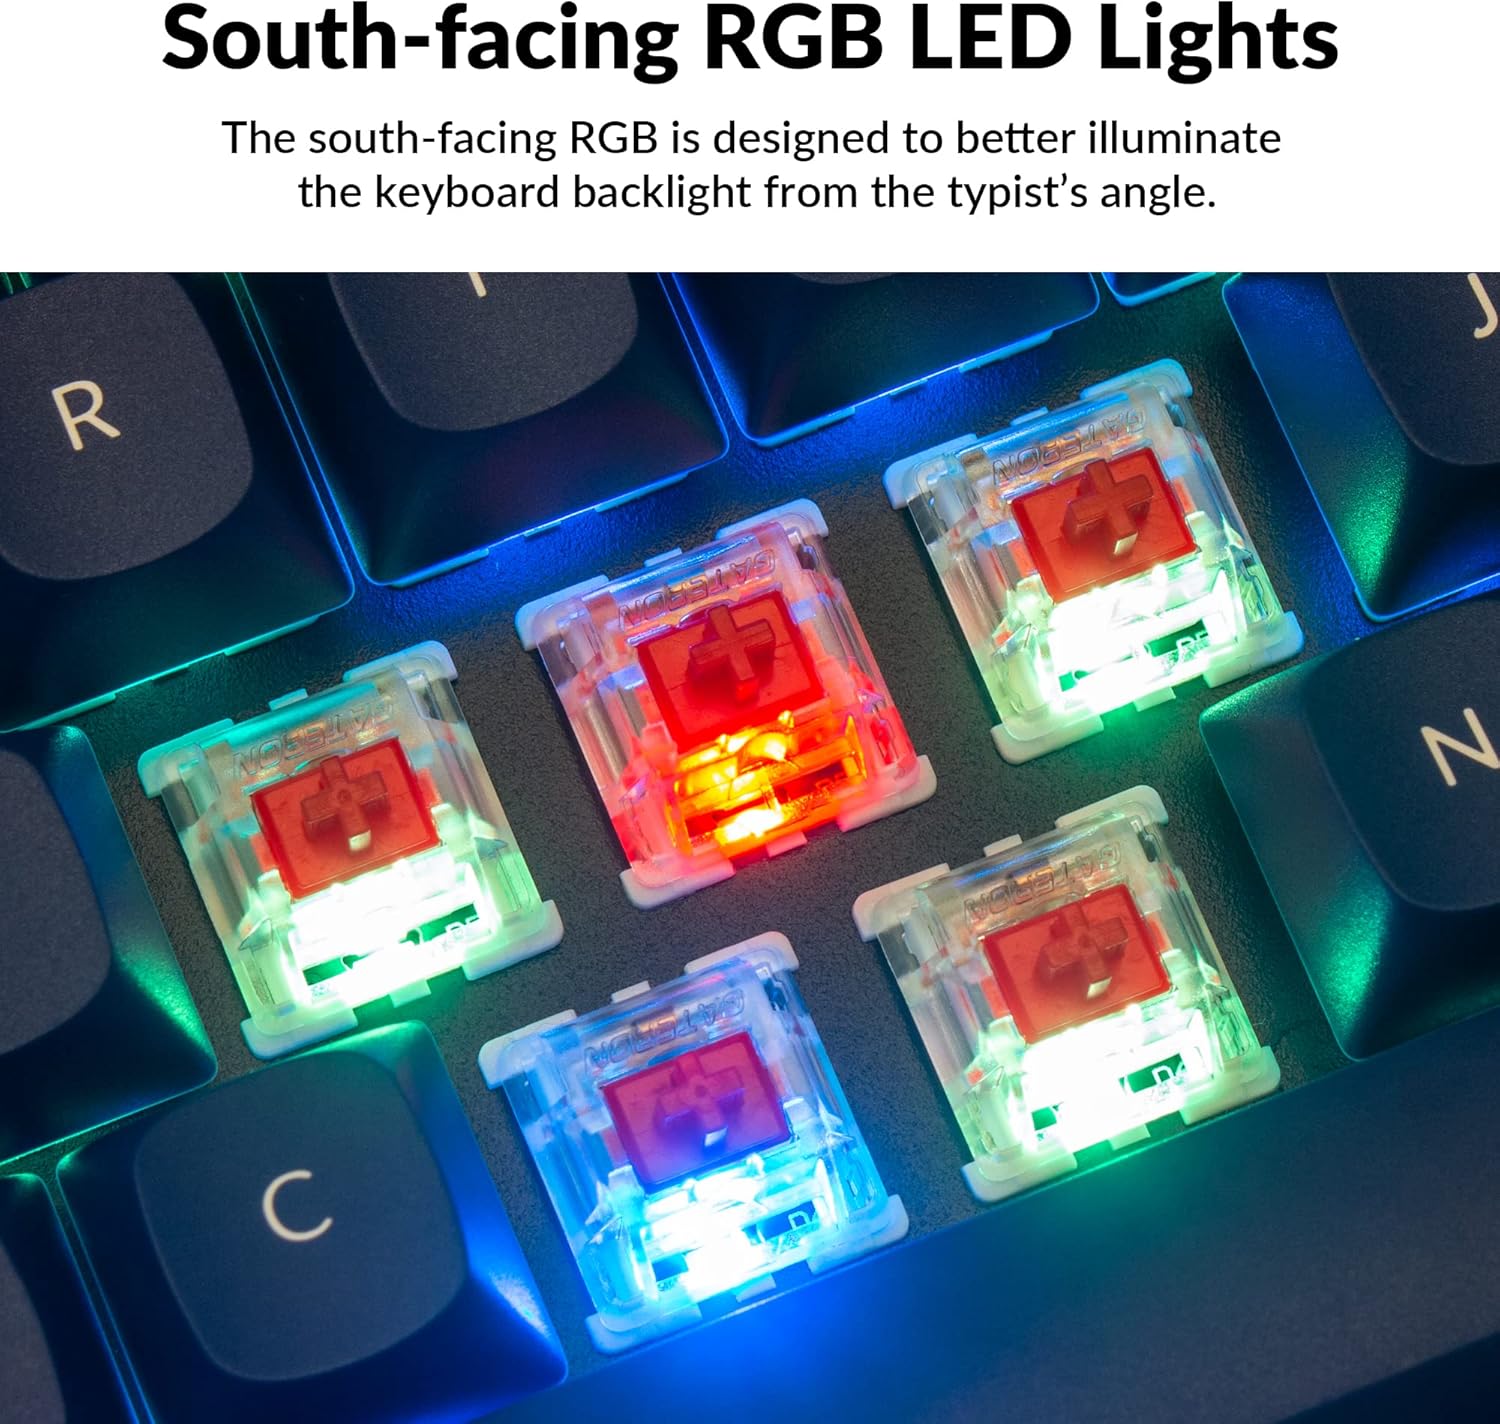
Foto: nkọwa zuru ezu view of the Keychron Q2's double-shot PBT keycaps, highlighting their texture and legends.

Image: A close-up of the Keychron Q2's south-facing RGB LEDs illuminating the switches from below.
Nlekọta
1. Na-ehicha ahụigodo
ihicha mgbe niile na-enyere aka ịnọgide na-arụ ọrụ na ọdịdị ahụigodo.
- Mwepụ uzuzu: Jiri mkpọ ikuku amịkọrọ ekpochapụ uzuzu na irighiri ihe dị n'etiti igodo igodo.
- Nchacha igodo igodo: For deeper cleaning, remove the keycaps using the provided keycap puller. Wash them with mild soap and water, then ensure they are completely dry before reattaching.
- Nhicha ikpe: Wipe the aluminum case with a soft, damp akwa . Zere kemịkalụ siri ike nke nwere ike imebi njedebe.
2. Switch and Stabilizer Maintenance
The hot-swappable design allows for easy maintenance of switches and stabilizers.
- Ndochi Mgbanwe: If a switch becomes faulty, replace it using the hot-swapping procedure described in the Operating Instructions.
- Stabilizer Lubrication: For optimal performance and reduced wobbliness on larger keys (space bar, shift, enter), the PCB-mounted screw-in stabilizers can be lubricated. This typically involves disassembling the keyboard to access the stabilizers.

Image: An exploded diagram of the Keychron Q2, showing its various components like keycaps, switches, top case, gaskets, plate, PCB, sound absorbing foam, case foam, bottom case, and silicone gaskets, illustrating ease of disassembly.
Nchọpụta nsogbu
Okwu na azịza ndị nkịtị:
- Ahụigodo Anaghị aza:
- Gbaa mbọ hụ na ejikọrọ eriri USB na nchekwa na ma ahụigodo ma kọmputa.
- Verify the Mac/Windows switch on the back of the keyboard is set to the correct operating system.
- Try connecting the keyboard to a different USB port or a different computer to rule out port issues.
- Malitegharịa ekwentị gị na kọmputa.
- Igodo ndị a kapịrị ọnụ anaghị arụ ọrụ:
- Remove the keycap and switch for the non-functional key. Inspect the switch pins for bends or damage. Straighten bent pins carefully or replace the switch if damaged.
- Ensure the switch is fully seated in the PCB.
- Check VIA software to ensure the key has not been accidentally remapped or disabled.
- Okwu ọkụ RGB:
- Gbaa mbọ hụ na ejikọrọ ahụigodo nke ọma.
- Use the VIA software to check and adjust lighting settings.
- Perform a factory reset if lighting issues persist (refer to Keychron's official support for specific reset procedures).
- Keyboard Disconnecting Randomly:
- Gbalịa eriri USB dị iche.
- Ensure the USB port on your computer is stable and providing sufficient power.
- Melite ọkwọ ụgbọala USB nke kọmputa gị.
If you encounter issues not covered here, please refer to the official Keychron support resources.
Nkọwapụta
| Njirimara | Nkọwa |
|---|---|
| Ụdị | Keychron |
| Aha Nlereanya | Q2 |
| Nọmba nlereanya | Q2-J1 |
| Nhazi ahụigodo | 65% (68 Keys), QWERTY |
| Teknụzụ Njikọta | Wired (USB-A, USB-C) |
| Ngwa dakọtara | PC (Linux, MacOS, Windows) |
| Ngbanwe Ụdị | Gateron G Pro Red (Linear), Hot-swappable |
| Ịkụ azụ azụ | RGB ( chere ihu na ndịda) |
| Ihe onwunwe | Full Aluminum Frame, PBT Keycaps |
| Akụkụ ngwaahịa | 12.89"L x 4.76"W x 1.33"H |
| Atụmatụ pụrụ iche | QMK/VIA Programmable, Double Gasket Design |
Ozi akwụkwọ ikike
Keychron products typically come with a standard manufacturer's warranty. For detailed information regarding the warranty period, coverage, and terms and conditions for your Keychron Q2 keyboard, please refer to the official Keychron websaịtị ma ọ bụ kaadị akwụkwọ ikike gụnyere ngwaahịa gị. Debe ihe akaebe nke ịzụrụ ihe maka akwụkwọ ikike.
Nkwado na akụrụngwa
For further assistance, software downloads (VIA), firmware updates, and frequently asked questions, please visit the official Keychron support page:
- Keychron Official Websaịtị: www.keychron.com
- QMK/VIA Software & Firmware: www.keychron.com/pages/qmk-via
- Keychron Store: Visit the Keychron Store on Amazon
You can also find community forums and additional user guides online for advanced customization and troubleshooting tips.