
Okwu mmalite
This instruction manual provides comprehensive guidance for the Youmile Micro USB Humidifier Module, model JK-YM-163. Please read this manual carefully before installation and operation to ensure correct usage and optimal performance. This module is designed for various DIY humidification and atomization projects.
Ngwaahịa gafereview
The Youmile Micro USB Humidifier Module is a compact 5V ultrasonic atomization circuit board designed to generate fine mist. It operates by converting electrical energy into high-frequency mechanical vibrations, which then atomize water into a fine spray. This module is suitable for integration into small humidifiers, aroma diffusers, and other similar applications.
Akụkụ ndị bụ isi:
- Integrated driver circuit with ON trigger function.
- High-frequency 108 kHz oscillator for efficient atomization.
- Micron-sized aperture for fine mist production.
- Enameled surface on the atomized sheet for durability.
- Micro USB power input for convenient connectivity.
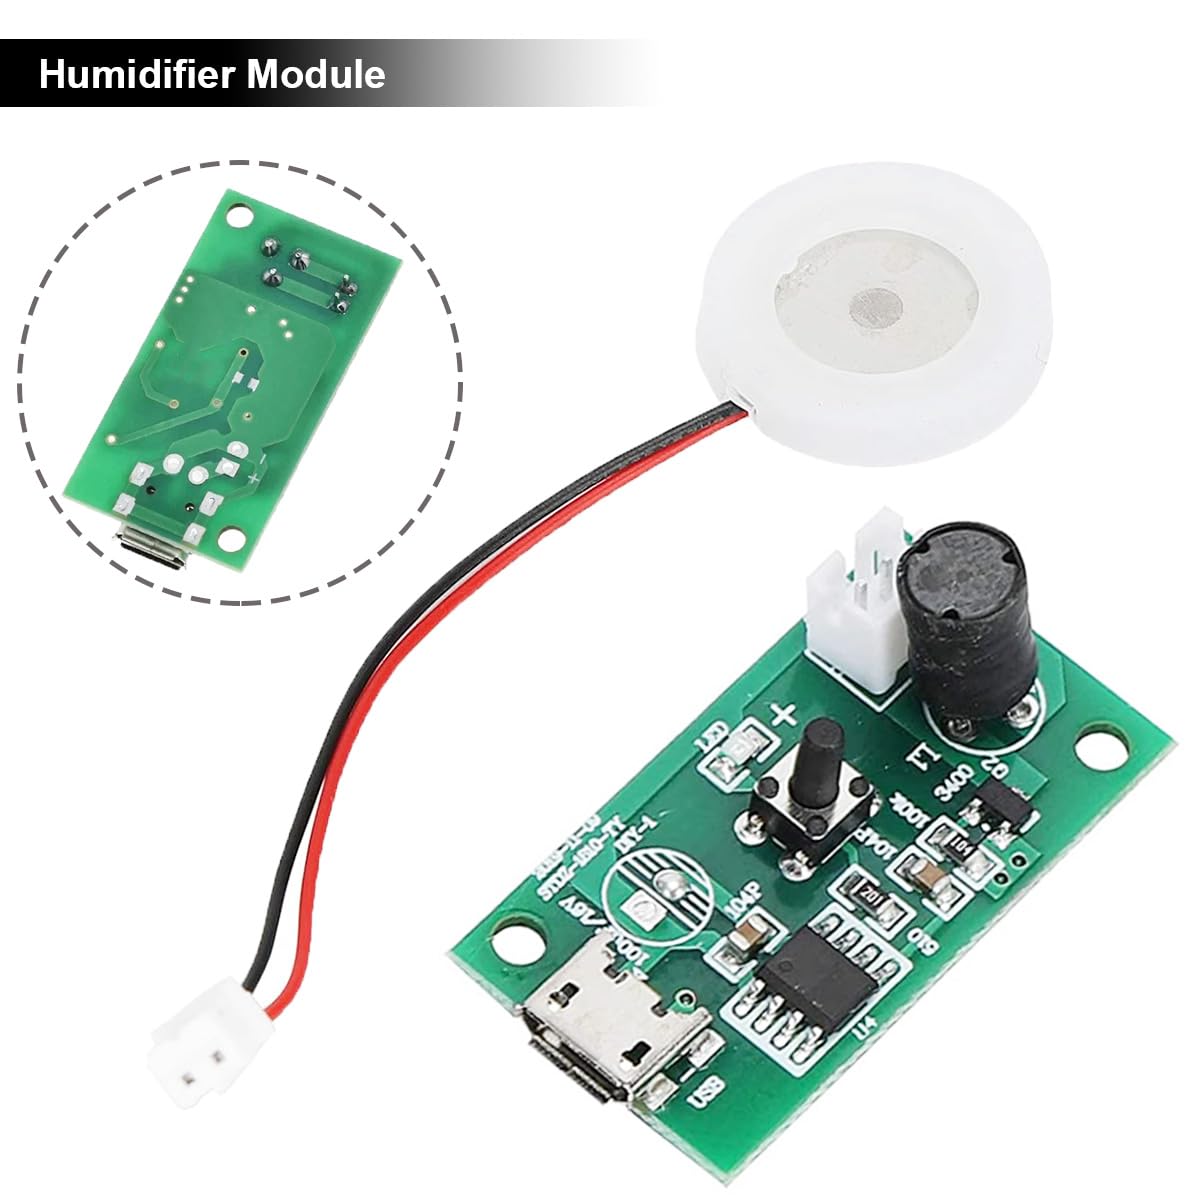
Foto nke 1: The Youmile Micro USB Humidifier Module, showing the main PCB and the connected ultrasonic atomizer disc. The PCB includes the micro USB port and control components.
Ihe ngwugwu
Ihe ndị a gụnyere na ngwugwu gị:
- 1 x Micro USB Humidifier Module (PCB with driver circuit)
- 1 x Humidifier Support (for the atomizer disc)
- 3 x 10mm Cotton Swabs (wicking material)
- 1 x Micro to USB Cable (for power supply)
Nkọwapụta
| Oke | Uru |
|---|---|
| Nrụ ọrụ Voltage | DC 4.5V ~ 5.0V |
| Ike arụ ọrụ | 2 W |
| Ugboro arụ ọrụ | 108 kHz (± 3 kHz) |
| Ụdị Nnyefe Ike | Micro USB female socket |
| Atomizer Diameter (without rubber ring) | 16 mm |
| Atomizer Diameter (with rubber ring) | 20 mm |
| Spray Diameter | 5 µm |
| Spray Holes | oghere 740 |
| Spray Speed | 50 ml / h |
| Okpomọkụ na-arụ ọrụ | 0 ℃ ~ 85 ℃ |
| Iru mmiri na-arụ ọrụ | 10% ~ 90% RH |
| Driver Board Dimensions | 35 x 19 x 15 mm |
| Ihe onwunwe | Stainless steel (atomizer) |

Foto nke 2: Detailed dimensions of the humidifier module, atomizer disc, and cotton swab for integration planning.
Ntuziaka nhazi
Follow these steps to set up your Youmile Micro USB Humidifier Module:
njirimara akụrụngwa:

Foto nke 3: Diagram identifying key components on the humidifier module PCB, including the inductor, atomizer socket, work indicator, controller, and Micro USB port.
- Connect the Atomizer: Plug the atomizer disc's two-pin connector into the "Atomizer Socket" on the PCB. Ensure correct polarity if indicated (usually red wire to positive, black to negative).
- Insert Cotton Swab: If using the humidifier support, insert one of the provided 10mm cotton swabs into the support. Ensure it is fully saturated with water before operation.
- Position the Atomizer: Place the atomizer disc into the humidifier support, ensuring the white piezoelectric ceramic ring surface (spraying surface) faces upwards. The steel sheet surface (suction surface) should face downwards, towards the water source.
- Njikọ ike: Connect the provided Micro USB cable to the Micro USB port on the module. Connect the other end of the USB cable to a 5V DC power source (e.g., USB charger, power bank, computer USB port).
- Isi mmalite mmiri: Ensure the cotton swab or atomizer disc is in direct contact with the water source for proper mist generation.
Ihe ndetu ndị dị mkpa:
- The white piezoelectric ceramic ring surface is the spraying surface and should be installed facing upwards.
- The entire steel sheet surface is the suction surface and should be installed facing downwards, towards the water.
- For continuous atomization without pressing the switch, the left and right solder points of the switch on the PCB can be soldered together. This will enable atomization immediately upon power-on.

Foto nke 4: Illustration showing the anti-vibration rubber ring, piezoelectric ceramic ring, and waterproof welding point of the atomizer. Also depicts an alternative wiring method for direct power supply without Micro USB, connecting wires to the positive and negative solder points on the PCB.
Ntuziaka ọrụ
Once the module is set up and connected to a power source:
- Ike Na: If the switch solder points are not bridged, press the button on the PCB to activate the atomization function. If they are bridged, the module will start atomizing automatically upon power connection.
- Observe Mist: A fine mist should begin to emanate from the atomizer disc. The work indicator LED on the PCB may illuminate.
- Gbanyụọ: To stop atomization, disconnect the Micro USB power cable or press the button again if it functions as a toggle switch.

Foto nke 5: The humidifier module fully assembled with the cotton swab and support, actively producing mist. An inset shows the atomizer disc generating mist from a small container.
Ngwa
This versatile module can be used in various applications, including:
- DIY USB humidifiers
- Medical humidifiers
- Perfume sprayers
- Aromatherapy atomizers
- Automotive parts (e.g., car humidifiers)
- Small-scale industrial humidification

Foto nke 6: Collage showing various applications of the humidifier module, including misting from a sponge, integration into a bottle-top humidifier, use in portable USB humidifiers, and direct misting from a cup.
Nlekọta
To ensure the longevity and optimal performance of your humidifier module:
- Clean the Atomizer Disc: Periodically clean the surface of the atomizer disc to prevent mineral buildup, which can reduce mist output. Use a soft cloth and mild descaling solution if necessary. Avoid abrasive materials.
- Replace Cotton Swabs: If using cotton swabs, replace them regularly, especially if you notice reduced mist or discoloration. Ensure new swabs are fully saturated before use.
- Ogo mmiri: Use clean, distilled, or demineralized water to minimize mineral buildup on the atomizer disc.
- Nchekwa: When not in use for extended periods, disconnect power, clean the module, and store it in a dry, cool place.
Nchọpụta nsogbu
If you encounter issues with your humidifier module, refer to the following common problems and solutions:
| Nsogbu | Ihe nwere ike ime | Ngwọta |
|---|---|---|
| Enweghị alụlụụ ma ọ bụ obere alụlụ |
|
|
| Modulu anaghị agba ọkụ |
|
|
| Mkpọtụ na-adịghị ahụkebe n'oge arụ ọrụ |
|
|
Ozi nchekwa
Biko debe ihe nchekwa nchekwa ndị a:
- Do not operate the module without water. Dry operation can damage the atomizer disc.
- Gbaa mbọ hụ na ọkọnọ ike dị n'ime voltage nso (DC 4.5V-5.0V).
- Keep the module away from children and pets.
- Avoid touching the atomizer disc directly when it is operating, as it vibrates at high frequency.
- Do not immerse the PCB in water. Only the atomizer disc is designed for contact with water.
- Kwupu ike tupu ime mmezi ma ọ bụ ihicha ọ bụla.
Nkwado
For further assistance or inquiries regarding the Youmile Micro USB Humidifier Module (Model JK-YM-163), please refer to the retailer where the product was purchased or visit the official Youmile support channels if available.