
1. Okwu mmalite
This manual provides detailed instructions for the installation, operation, and maintenance of your VPFET HDMI Extender. This device allows you to extend 1080p HDMI signals up to 200 feet (60 meters) over a single Cat5e/6/7 Ethernet cable. It supports Power over Cable (POC) technology, requiring power only at the Transmitter (TX) unit.
2. Ozi nchekwa
- Ensure all cables are connected securely before powering on the device.
- Use only the provided 5V DC power adapter.
- Ewepụla ngwaọrụ ahụ na mmiri ma ọ bụ oke okpomọkụ.
- Avoid disassembling the unit; refer servicing to qualified personnel.
- Use high-quality oxygen-free copper Cat5e/6/7 cables for optimal performance and transmission distance.
3. Ihe ngwugwu
Chọpụta na ihe niile dị na ngwugwu gị:
- 1 x HDMI Transmitter (TX) Unit
- 1 x HDMI Receiver (RX) Unit
- 1 x 5V DC inye ike
- 1 x Akwụkwọ ntuziaka onye ọrụ

Image: Contents of the VPFET HDMI Extender package, showing the transmitter, receiver, power adapter, and user manual.
4. Ngwaahịa gafereview na akụrụngwa
Familiarize yourself with the ports and indicators on both the Transmitter (TX) and Receiver (RX) units.

Foto: Zuru ezu view of the Transmitter (TX) and Receiver (RX) units, highlighting HDMI Input/Output, 5V Power Output, EDID Copy button, and RJ45 ports.
Transmitter (TX) Unit:
- Ntinye HDMI: Connects to the HDMI source device (e.g., PC, DVD player, game console).
- Ntinye Ike 5V: Connects to the included 5V DC power adapter.
- EDID Copy Button: Used to copy EDID information from the display.
- RJ45 Output (OUT): Connects to the Receiver (RX) unit via Cat5e/6/7 cable.
Receiver (RX) Unit:
- Ihe mmepụta HDMI: Connects to the HDMI display device (e.g., TV, monitor).
- RJ45 Input (IN): Connects to the Transmitter (TX) unit via Cat5e/6/7 cable.
- Note: The RX unit receives power via the Cat cable (POC) from the TX unit.
5. Nhazi ntuziaka
Follow these steps to set up your HDMI Extender:
- Connect HDMI Source to TX: Connect your HDMI source device (e.g., PC, DVD player, game console) to the HDMI n'ime port of the Transmitter (TX) unit using a high-quality HDMI cable.
- Connect Display to RX: Connect your HDMI display device (e.g., TV, monitor) to the HDMI pụọ port of the Receiver (RX) unit using a high-quality HDMI cable.
- Connect TX and RX with Ethernet Cable: Jikọọ RJ45 pụọ port of the TX unit to the RJ45 IN port of the RX unit using a single Cat5e, Cat6, or Cat7 Ethernet cable. Ensure the cable is oxygen-free copper for optimal performance.
- Power On TX Unit: Jikọọ ihe nkwụnye ike DC 5V nke etinyere na ya na ihe nkwụnye ike DC 5V nke etinyere na ya Ntinye ike 5V port on the Transmitter (TX) unit. The RX unit will receive power via the Ethernet cable (POC).
- Nyochaa njikọ: Once all connections are made and the TX unit is powered, check for signal on your display.

Image: Connection diagram illustrating how to connect the HDMI source (laptop, PC, DVD, TV Box) to the Transmitter (TX), the TX to the Receiver (RX) via a Cat5e/6/7 cable, and the RX to the display.
Ọrụ EDID:
The EDID (Extended Display Identification Data) copy function ensures the best video and audio signals are transmitted by allowing the TX unit to learn the display's capabilities. It is recommended to perform this step if you experience display issues.
- Connect the Transmitter (TX) unit directly to your monitor/display using an HDMI cable (without the RX unit or Cat cable).
- Connect the 5V power adapter to the TX unit.
- Pịa ma jide bọtịnụ EDID on the TX unit for approximately 3 seconds.
- The signal indicator light will flash 3 times, indicating that the EDID information has been successfully copied and stored.
- You can now proceed with the full setup as described above. The copied EDID will be remembered until the TX unit is reset or a new EDID copy operation is performed.
To restore factory EDID settings, connect the TX unit to power, then press and hold the EDID button for 3 seconds. The signal indicator will light up and then turn off, confirming the reset.

Image: Close-up of the Transmitter (TX) unit, highlighting the EDID button and its function in copying display information.
6. Ntuziaka ọrụ
Once the setup is complete, the VPFET HDMI Extender operates automatically. Ensure your source device is powered on and outputting an HDMI signal, and your display is set to the correct HDMI input.
- Power Over Cable (POC): The TX unit powers the RX unit through the Ethernet cable, simplifying installation by eliminating the need for a power outlet at the display end.
- Automatic Equalization: The built-in automatic equalization algorithm adjusts for cable transmission distance, ensuring stable signal transmission without manual configuration.
- Mkpebi akwadoro: The extender supports resolutions up to 1920x1200@60Hz and 1080p@60Hz.
- Ụdị ọdịyo akwadoro: DTS-HD, Dolby-trueHD, DTS, Dolby-AC3, DSD.
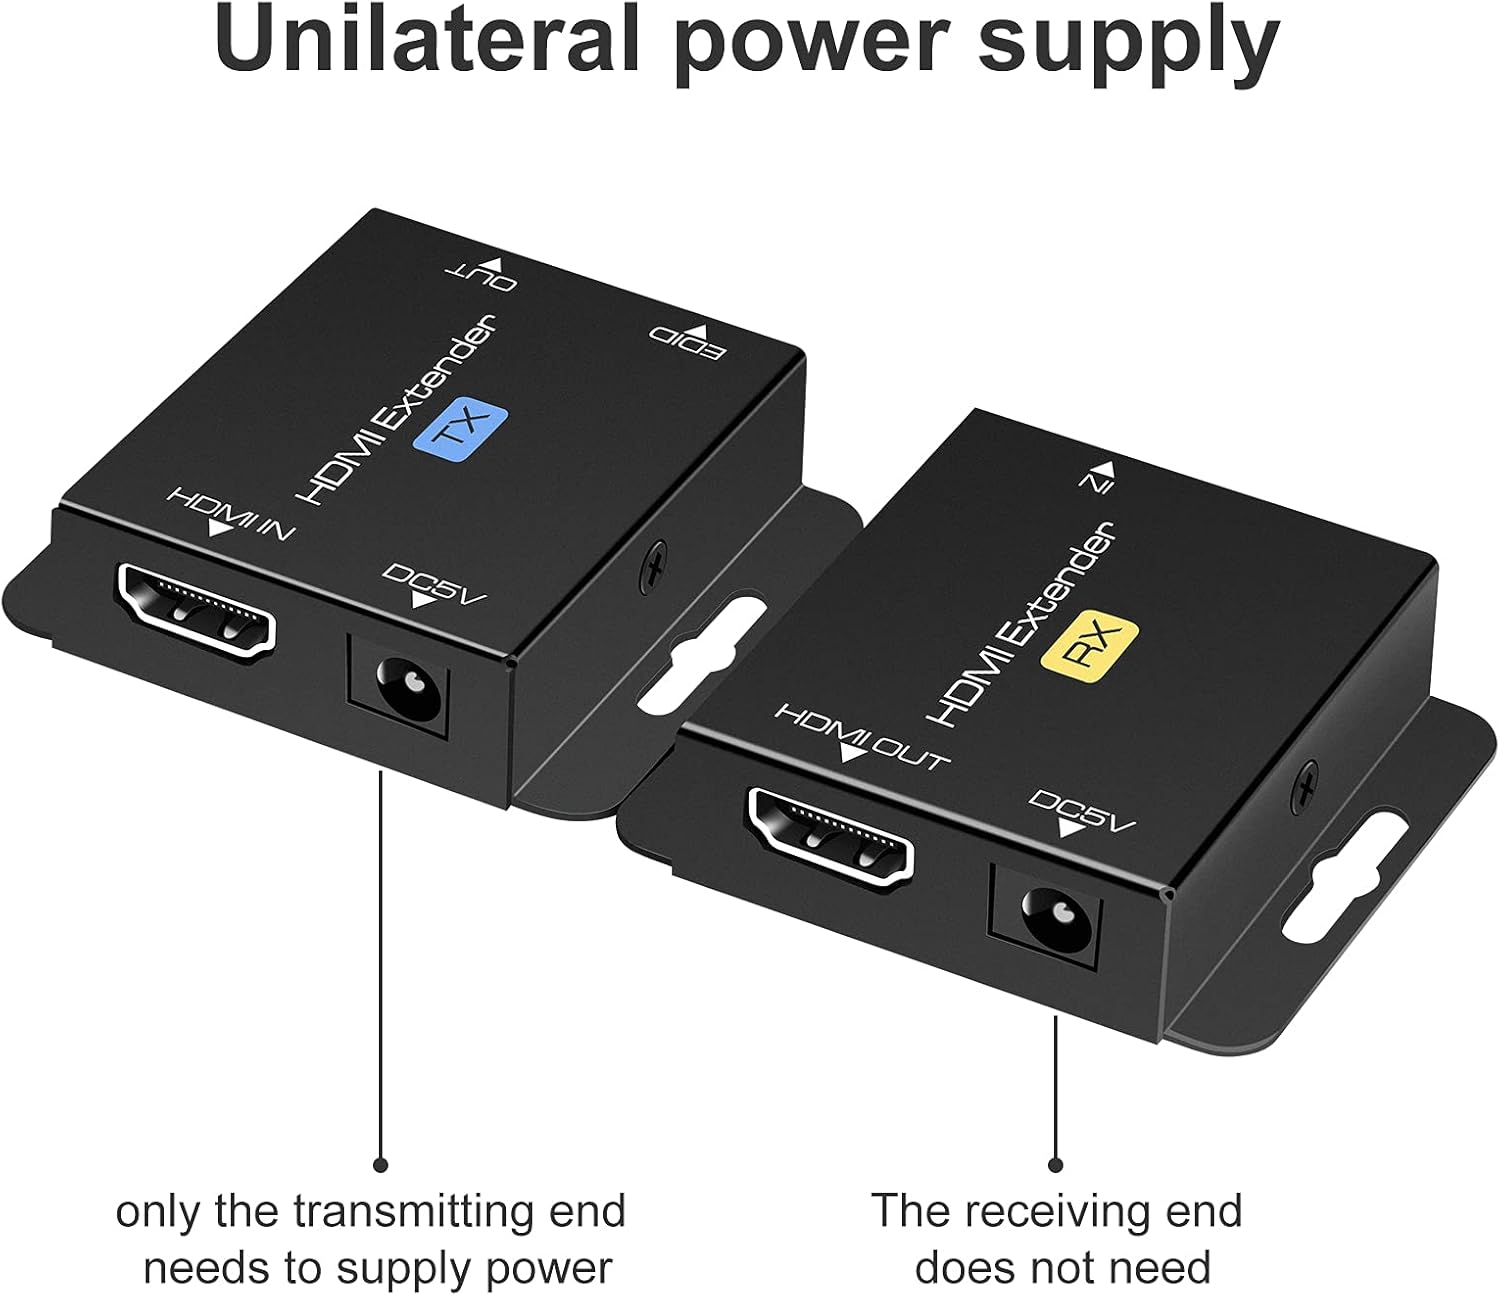
Image: Illustration of the unilateral power supply (POC) feature, indicating that only the transmitting (TX) end requires a power connection, while the receiving (RX) end does not.

Image: An illustration of the HDMI Extender in operation, showing a laptop connected to the TX unit, which is then connected via a long Ethernet cable to the RX unit, and finally to a large display, demonstrating extended transmission distance.
7. Nkọwapụta
| Njirimara | Nkọwa |
|---|---|
| Nkwado mkpebi kacha | 1920x1200@60Hz / 1080p@60Hz / 3D |
| Transmission Distance (Cat5e/6/7) | Up to 200ft (60m) for 1080p; up to 165ft for 1920x1200@60Hz |
| Ụdị ọdịyo akwadoro | DTS-HD, Dolby-trueHD, DTS, Dolby-AC3, DSD |
| Bandwit nnyefe kacha | 1.65Gbps |
| Input/Output HDMI Cable Distance | Up to 16ft (5m) AWG26 HDMI standard cable |
| Ịnye ọkụ | Input: AC 100V-240V (50/60Hz), Output: DC 5V |
| POC Support | Yes (Power on Cat6/7 from TX to RX) |
| Mpempe akwụkwọ EDID | Ee |
| Dimensions (TX/RX Unit) | Approx. 2.4in x 2.1in x 0.63in (6.1cm x 5.3cm x 1.6cm) |
| Ibu Ibu | 9.3 ounces (total package weight) |
Image: Dimensions of the VPFET HDMI Extender Transmitter (TX) unit, showing its compact size.
8. Nchọpụta nsogbu
Ọ bụrụ na ị na-enwe nsogbu, rụtụ aka na nsogbu ndị a na-ahụkarị na ngwọta ndị a:
- Enweghị Foto/Akara:
- Ensure all HDMI and Ethernet cables are securely connected.
- Verify the TX unit is powered on with the included 5V adapter.
- Check if the display is set to the correct HDMI input.
- Try performing the EDID Copy procedure (Section 5).
- Test with shorter, certified HDMI and Ethernet cables.
- Ensure the Ethernet cable is Cat5e/6/7 (oxygen-free copper recommended) and not damaged.
- Flickering/Intermittent Signal:
- Check cable lengths; ensure they are within the specified limits (200ft for Cat cable, 16ft for HDMI).
- Ensure the Ethernet cable is not running parallel to power lines or other sources of interference.
- Gbalịa eriri Ethernet dị iche.
- Perform the EDID Copy procedure.
- Enweghị ọdịyo:
- Nyochaa ntọala ọdịyo na ngwaọrụ isi mmalite gị na ngosipụta.
- Ensure the HDMI cables support audio transmission.
- Perform the EDID Copy procedure.
9. Nlekọta
The VPFET HDMI Extender requires minimal maintenance. Follow these guidelines to ensure longevity:
- Debe ngwaọrụ ahụ n'ebe dị jụụ, kpọrọ nkụ, pụọ na ìhè anyanwụ kpọmkwem na ebe okpomọkụ.
- Jiri akwa dị nro hichaa mpụta. Ejila ihe nhicha mmiri ma ọ bụ ikuku ikuku.
- Hụ na ikuku na-efegharị nke ọma gburugburu ngwaọrụ ndị ahụ iji gbochie oke okpomọkụ.
10. Akwụkwọ ikike na nkwado
For warranty information or technical support, please refer to the contact details provided with your purchase or visit the official VPFET website. Please have your model number (B099ZCTV74) and purchase date ready when contacting support.