Okwu mmalite
This user manual provides detailed instructions for the installation, operation, maintenance, and troubleshooting of your Xprinter XP-K200L 80mm Thermal Receipt Printer. Please read this manual thoroughly before using the printer to ensure proper function and to extend the product's lifespan. Keep this manual for future reference.
Ozi nchekwa
- Always use the power adapter supplied with the printer.
- Do not expose the printer to water or moisture.
- Zere itinye igwe nbipute ahụ n'ebe anwụ na-acha kpọmkwem ma ọ bụ nso ebe okpomọkụ dị.
- Gbaa mbọ hụ na ikuku ikuku dị na gburugburu ngwa nbipute.
- Do not attempt to disassemble or repair the printer yourself. Contact qualified service personnel.
- Debe ebe ụmụaka na-apụghị iru.
Ihe ngwugwu
Please check the package contents upon unpacking. If any items are missing or damaged, contact your vendor.
- Xprinter XP-K200L Thermal Receipt Printer
- Ihe nkwụnye ọkụ
- Ụdọ ọkụ
- eriri USB
- Thermal Paper Roll (starter roll)
- Cable drawer ego
- Akwụkwọ ntuziaka (akwụkwọ a)
Ngwaahịa gafereview
Familiarize yourself with the main components of your Xprinter XP-K200L thermal receipt printer.

Foto 1: Akụkụ view of the Xprinter XP-K200L thermal receipt printer. On the right, the power switch is visible, and on the left, a button to open the paper cover is present.
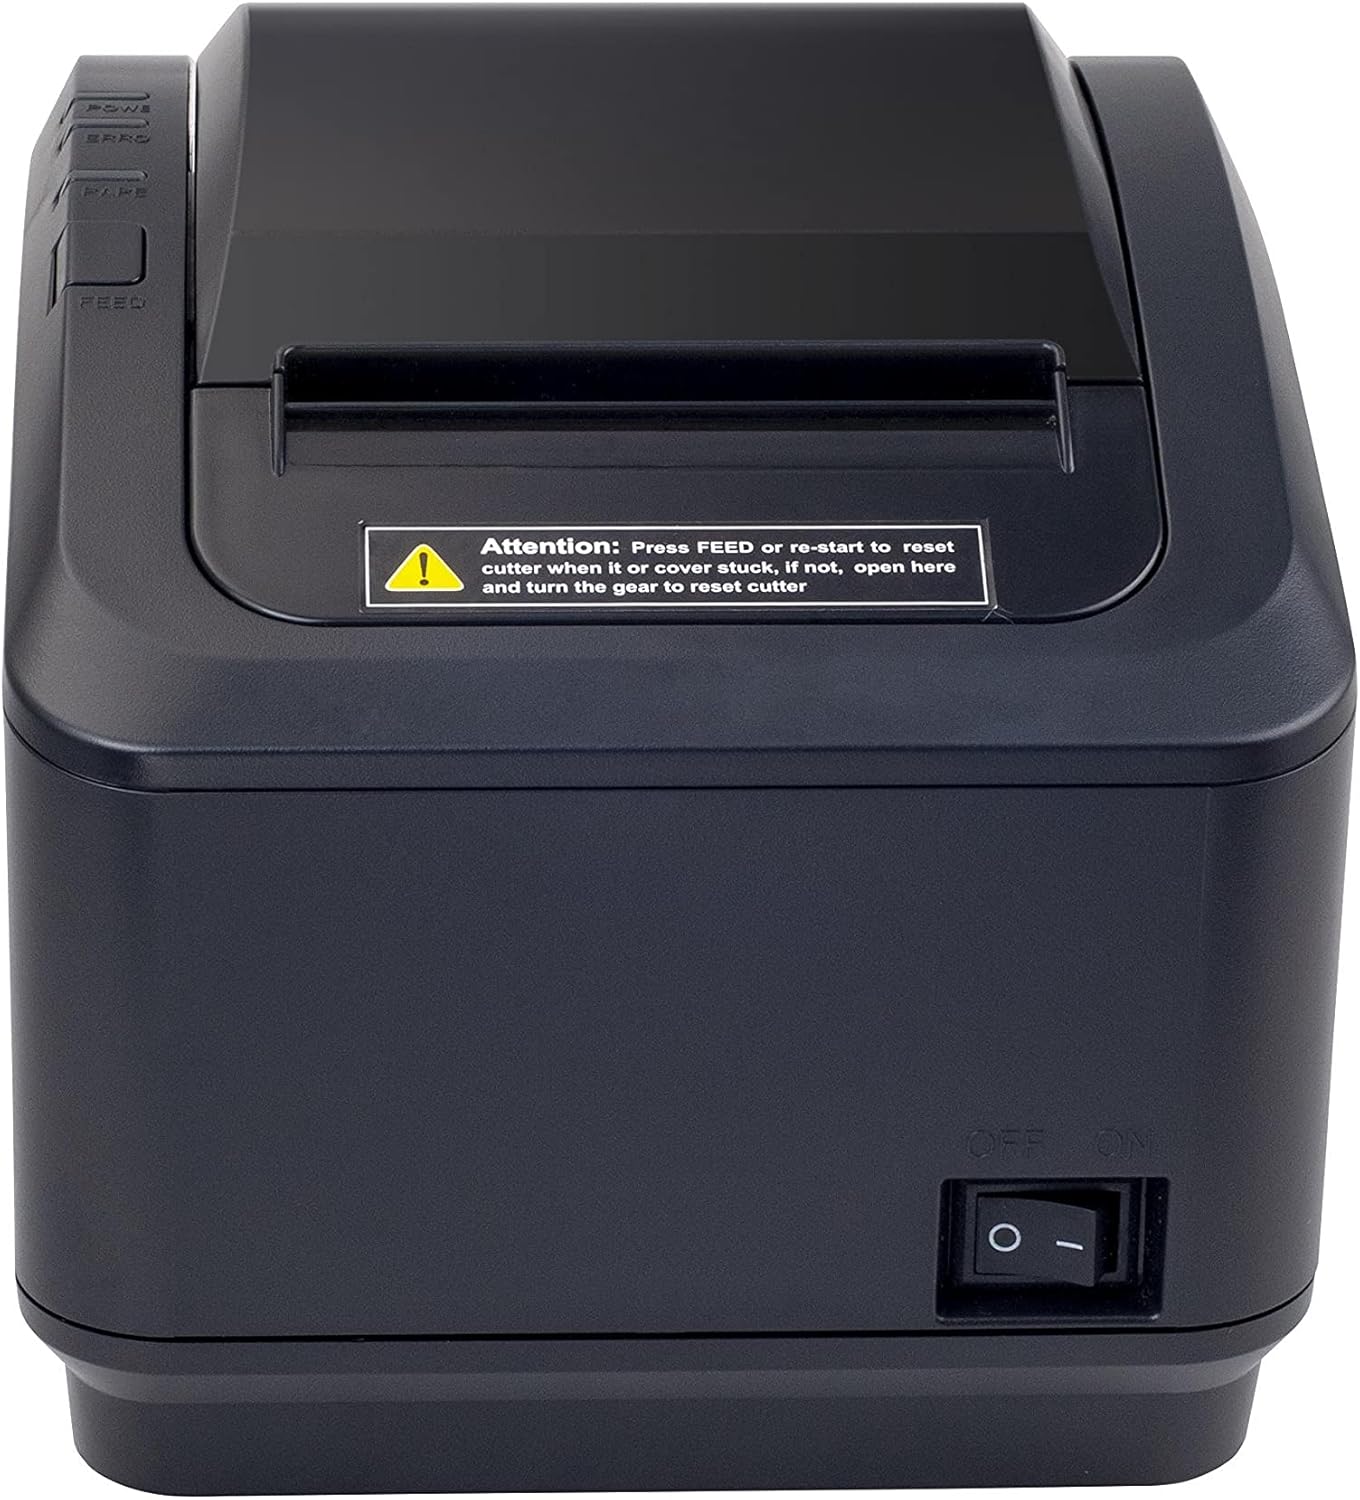
Figure 2: A front view of the Xprinter XP-K200L thermal receipt printer. The paper output slot is at the top, and below it are control buttons for functions like feed and error reset. A warning label is also visible.

Figure 3: This image displays the Xprinter XP-K200L thermal receipt printer with its top cover open, showing the internal compartment where the thermal paper roll is loaded. The print head mechanism is also visible.
Melite
1. Ijikọ Ike
- Ensure the printer's power switch is in the Gbanyụọ ọnọdụ.
- Jikọọ ihe nkwụnye ike ahụ na ọdụ ọkụ nke ngwa nbipute ahụ.
- Tinye eriri ọkụ n'ime ebe eletrik kwesịrị ekwesị.
2. Na-ebunye akwụkwọ ọkụ
- Press the cover open button (refer to Figure 1) to open the top cover of the printer.
- Insert a new 80mm thermal paper roll into the compartment, ensuring the paper feeds from the bottom and the leading edge extends slightly out of the printer.
- Close the top cover firmly until it clicks into place. Ensure there is no slack in the paper roll.
3. Connecting to a Computer/Network
The XP-K200L printer supports both USB and LAN (Ethernet) connectivity.
Njikọ USB:
- Connect one end of the USB cable to the printer's USB port.
- Jikọọ nsọtụ nke ọzọ nke eriri USB na ọdụ USB dị na kọmputa gị.
- Install the printer drivers. Drivers are typically provided on a CD or can be downloaded from the manufacturer's websaịtị. Soro ntuziaka na ihuenyo maka nwụnye.
LAN (Ethernet) Connection:
- Connect one end of an Ethernet cable to the printer's LAN port.
- Jikọọ nsọtụ ọzọ nke eriri Ethernet na rawụta netwọk gị ma ọ bụ gbanwee.
- Configure the printer's network settings (e.g., IP address) if necessary. This usually involves printing a self-test page to get the current IP address and then accessing the printer's web interface or using a utility tool provided by the manufacturer.
- Install the printer drivers on your computer, selecting the network connection option during setup.
4. Connecting a Cash Drawer
- Connect the cash drawer cable to the dedicated cash drawer port on the printer.
- Ensure your POS software is configured to send commands to open the cash drawer via the printer.
Ntuziaka ọrụ
Ịgbanyụ/ Gbanyụọ
- To power on the printer, flip the power switch (refer to Figure 1) to the ON ọnọdụ.
- To power off the printer, flip the power switch to the Gbanyụọ ọnọdụ.
Ihe nbipute isi
Once the printer is connected and drivers are installed, you can print receipts from your POS software or any application that supports printing.
- Ensure the printer is powered on and has paper loaded.
- From your application, select the print option.
- Choose the "Xprinter XP-K200L" from the list of available printers.
- Confirm print settings and click "Print".
Self-Test Page
To print a self-test page, which provides information about the printer's settings and status:
- Ensure the printer is powered off and the paper roll is loaded.
- Pịa ma jide Nri bọtịnụ.
- Mgbe ị na-ejide Nri button, turn the power switch to ON.
- Hapụ ya Nri button after the printer starts printing.
Nlekọta
Na-ehicha ihe nbipute
- Isi Bipụta: Jiri ákwà owu mee obere ihe.ampened with isopropyl alcohol to gently wipe the thermal print head. Allow it to dry completely before use. Clean regularly to ensure print quality.
- Cutter: If the cutter becomes jammed or dirty, carefully clean it with a soft brush or cloth.
- Mputa: Wipe the exterior of the printer with a soft, dry cloth. Do not use abrasive cleaners or solvents.
Replacing Thermal Paper
When the paper roll is depleted or near its end, replace it following the steps in the "Loading Thermal Paper" section under Setup.
Nchọpụta nsogbu
| Nsogbu | Ihe nwere ike ime | Ngwọta |
|---|---|---|
| Ngwa nbipute anaghị agbanwu ọkụ. | Power cord or adapter not connected properly; power outlet issue. | Check all power connections. Try a different power outlet. |
| No printing. | No paper; paper loaded incorrectly; printer offline; driver issue; incorrect connection. | Load paper correctly. Check printer status. Reinstall drivers. Verify USB/LAN connection. |
| Ọdịmma ebipụta na-adịghị mma. | Dirty print head; low quality thermal paper. | Clean the print head (see Maintenance). Use recommended thermal paper. |
| Paper jam or cutter error. | Paper loaded incorrectly; debris in cutter mechanism. | As per printer label: Pịa Nri or re-start to reset cutter. If the issue persists, open the top cover and carefully turn the gear to reset the cutter mechanism. Ensure paper is loaded correctly and remove any obstructions. |
| Cash drawer does not open. | Cable not connected; POS software not configured. | Check cash drawer cable connection. Verify POS software settings for cash drawer trigger. |
Nkọwapụta
| Njirimara | Nkọwa |
|---|---|
| Ụdị | Xprinter |
| Aha Nlereanya | XP-K200L |
| Teknụzụ ngwa nbipute | Thermal |
| Teknụzụ Njikọta | USB, LAN (Ethernet) |
| Atụmatụ pụrụ iche | Njikere netwọk |
| Agba | Nwa |
| Mmepụta ngwa nbipute | Monochrome |
| Ibu Ibu | 1.5 n'arọ |
| Akụkụ ngwaahịa (DxWxH) | 19.5 cm x 14 cm x 13.8 cm |
| Compatible OS/Controller Type | Android (and typically Windows/Linux via drivers) |
| Mgbasa ozi bipute | Plain Thermal Paper |
| Bipute Agba | Nwa |
| Mkpebi | 576 x 512 dots per inch (or dots per line) |
| Max Print Resolution B/W | 576 dpi |
| Ọrụ ndị nbipute ndị ọzọ | Bipụta naanị |
| Usoro njikwa | Ime ime |
| Ogo mgbasa ozi kacha | 80 mm |
| Nha akwụkwọ | 79.5 mm |
| Ike | 60 watt |
| Ngwa gụnyere | Power adapter, Cash drawer cable |
| Usoro | XP-K |
| Ojiji akọwapụtara | Restaurants, bars, cinemas, garages, transportation, hospitals, clinics |
| Mgbakọta ọdụ ụgbọ mmiri USB | 1 |
Akwụkwọ ikike na nkwado
For warranty information and technical support, please refer to the documentation provided with your purchase or contact your vendor directly. Keep your proof of purchase for warranty claims.
For driver downloads and further support resources, visit the official Xprinter websaịtị.