
Okwu mmalite
This manual provides detailed instructions for the setup, operation, and maintenance of your Taylor 5282011 Digital Weather Forecaster. This device is designed to provide accurate indoor and outdoor temperature and humidity readings, along with a 12-hour weather trend forecast and a clock/calendar function.
Ihe ngwugwu
Biko lelee ngwungwu maka ihe ndị a:
- Taylor 5282011 Main Unit
- Ikuku Remote mmetụta
- Type-C USB Power Cord
- Akwụkwọ ntuziaka (akwụkwọ a)
Ngwaahịa gafereview
The Taylor 5282011 Digital Weather Forecaster features a contemporary round design with a bright LED display. It monitors various environmental conditions to help you stay informed.
Main Unit Display Elements
The main unit's display provides the following information:
- Day of the week and Time (12 or 24-hour format)
- Calendar (Month, Day)
- Weather Forecast icon (indicating general trend over 12 hours)
- Okpomọkụ dị n'èzí na iru mmiri
- Ime ụlọ okpomọkụ na iru mmiri
- Nrụgide Barometric
- Ngosipụta ike mgbama ikuku
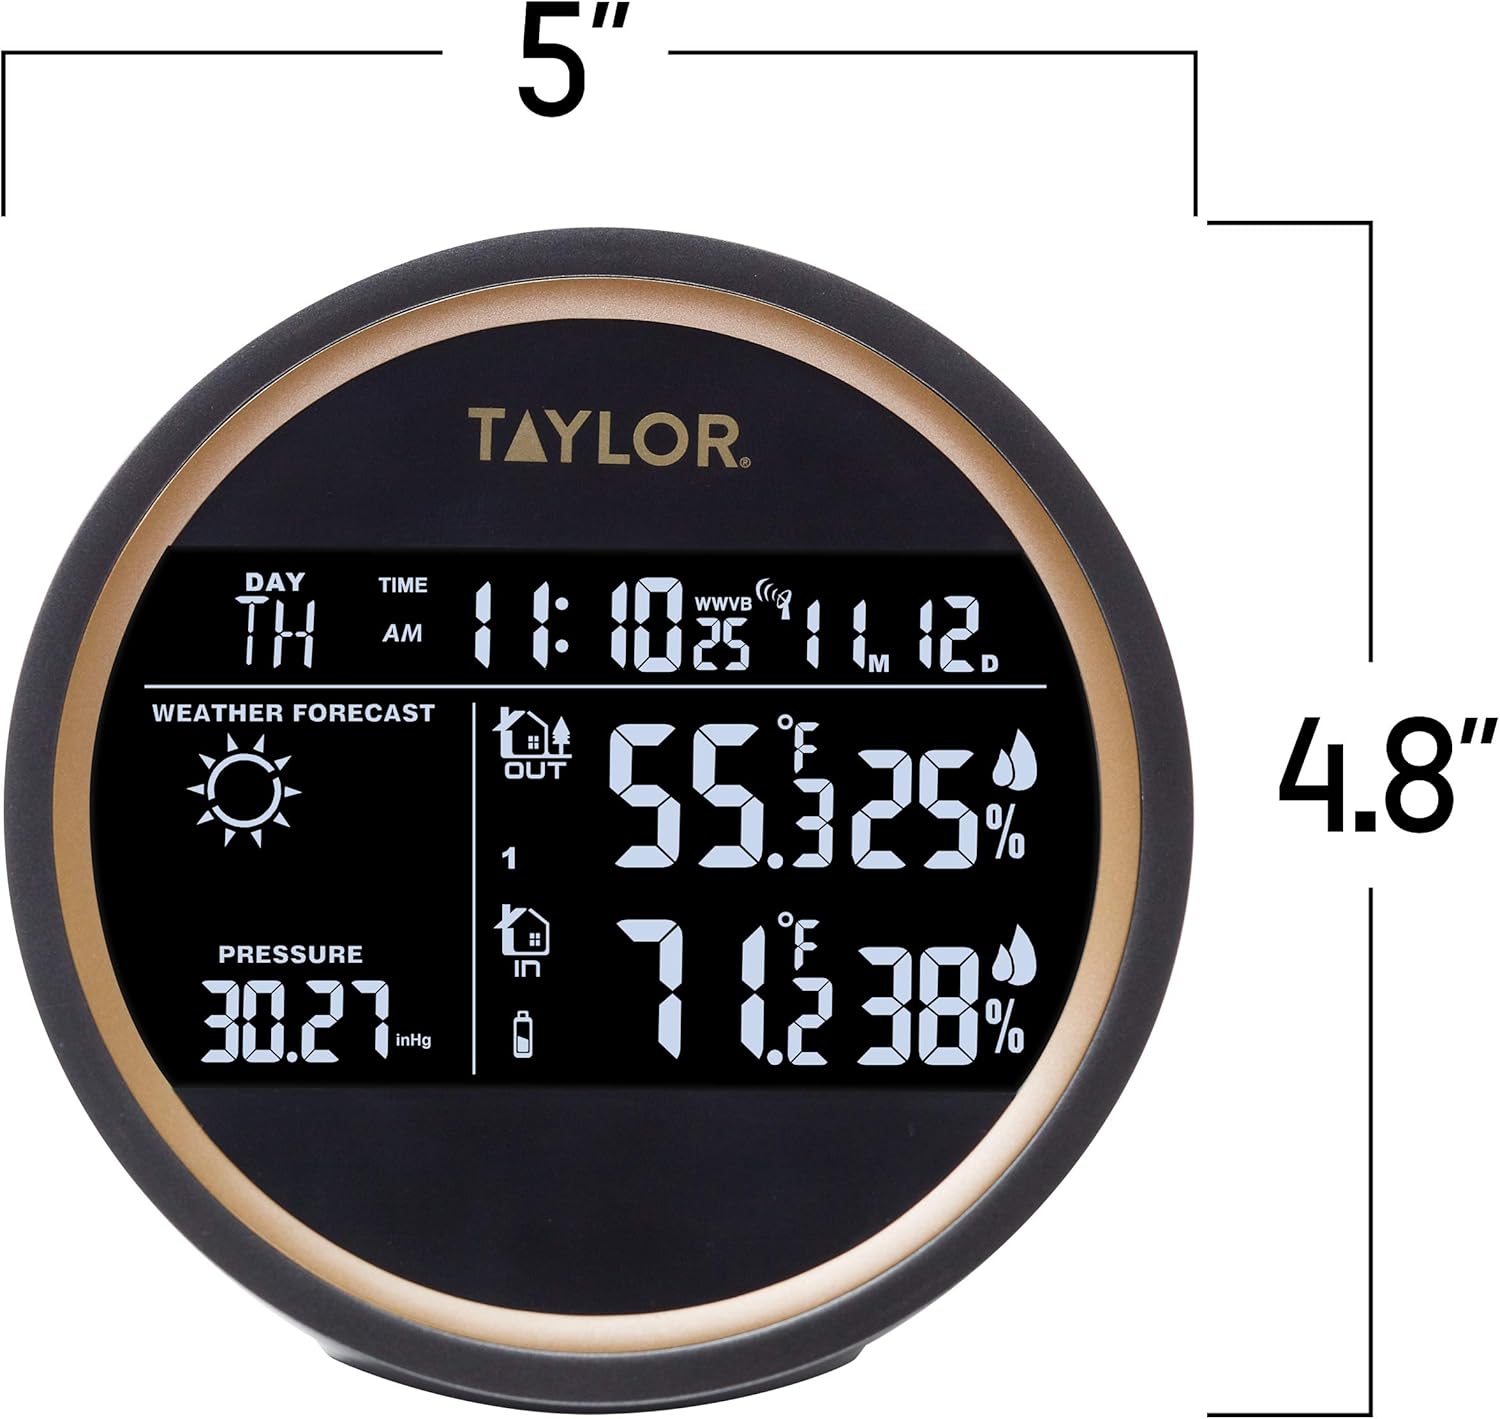
Figure 1: Main Unit Display with Dimensions. The unit measures approximately 5 inches in width and 4.8 inches in height.
Main Unit Rear Controls
The back of the main unit contains control buttons and power ports.

Ọgụgụ 2: N'azụ View of Main Unit. Shows buttons for LIGHT, CHANNEL, SET/AL SET, °F/°C/RCC, MAX/MIN, battery compartment, USB 5V/1A port, and RESET button.
Ikuku Remote mmetụta
The remote sensor transmits outdoor temperature and humidity data to the main unit.

Figure 3: Main Unit and Wireless Remote Sensor. The remote sensor is a compact, rectangular device designed for outdoor placement.
Melite
Powering the Main Unit
The main unit can be powered by either the included Type-C USB cord or 2 AAA batteries (not included).
- Ike USB: Connect the Type-C USB cord to the USB port on the back of the main unit and plug the other end into a compatible USB power adapter (not included).
- Ike batrị: Open the battery compartment on the back of the main unit. Insert 2 new AAA batteries, ensuring correct polarity (+/-). Close the compartment.
Note: Using USB power is recommended for continuous display illumination. Batteries serve as a backup or for temporary use.
Installing Batteries in the Remote Sensor
The wireless remote sensor requires batteries for operation.
- Open the battery compartment on the remote sensor.
- Tinye batrị AAA ọhụrụ abụọ, hụ na polarity ziri ezi (+/-).
- Mechie oghere batrị ahụ nke ọma.
Pairing the Remote Sensor
The main unit will automatically attempt to connect with the remote sensor upon initial power-up. If the connection is not established or is lost:
- Ensure both the main unit and remote sensor have fresh batteries or are powered.
- Place the remote sensor within 200 feet (60 meters) of the main unit, minimizing obstructions.
- Press the 'CHANNEL' button on the back of the main unit to cycle through channels if you have multiple sensors, or to initiate a new search.
- Press the 'RESET' button on the back of the main unit with a small pin if issues persist.
The main unit can accommodate up to 3 wireless remote sensors. Use the 'CHANNEL' button to switch between sensor data displays.
Ntuziaka ntinye
- Isi ngalaba: Place indoors, away from direct sunlight, heat sources, and strong electromagnetic fields.
- Ihe mmetụta dị anya: Place outdoors in a shaded, dry location, protected from direct rain and sunlight. Ensure it is mounted vertically for proper drainage. Avoid placing near metal objects that could interfere with signal transmission.
Ntuziaka ọrụ
Initial Settings (Time, Date, Units)
- Press and hold the 'SET/AL SET' button on the back of the main unit to enter setup mode.
- Use the '▲ CHANNEL' or '▼ °F/°C/RCC' buttons to adjust values.
- Press 'SET/AL SET' again to confirm and move to the next setting.
- Settings typically include: 12/24-hour format, Hour, Minute, Year, Month, Day.
- To switch between Fahrenheit (°F) and Celsius (°C) for temperature display, press the '°F/°C/RCC' button during normal operation.
Ịghọta Ngosipụta ahụ
- Oge na ụbọchị: Displays current time and calendar information.
- Amụma ihu igwe: Icons (e.g., sun, clouds, rain) indicate the predicted weather trend for the next 12 hours based on barometric pressure changes. This is a forecast, not a real-time condition.
- Indoor/Outdoor Readings: Shows current temperature and humidity for both indoor and selected outdoor sensor.
- Nrụgide Barometric: Displays the current atmospheric pressure, often in inHg (inches of mercury).
Ndekọ MAX/MIN
The unit records the maximum and minimum temperature and humidity values.
- Press the 'MAX/MIN' button to view the maximum recorded values.
- Press 'MAX/MIN' again to view the minimum recorded values.
- Press 'MAX/MIN' a third time to return to current readings.
- To clear MAX/MIN records, press and hold the 'MAX/MIN' button while viewna-edekọ.
Ìhè azụ
Press the 'LIGHT' button to activate the display backlight for a few seconds. If powered by USB, the backlight may remain on continuously or be adjustable.
Nlekọta
- Nhicha: Wipe the main unit and remote sensor with a soft, damp akwa . Ejila ihe nchacha abrasive ma ọ bụ ihe mgbaze.
- Ngbanwe batrị: Replace batteries in both units when the low battery indicator appears on the display. Always use fresh batteries of the specified type (AAA).
- Nlekọta ihe mmetụta: Ensure the remote sensor remains protected from extreme weather conditions and direct moisture.
- General Nlekọta: Avoid dropping the device or exposing it to excessive force.
Nchọpụta nsogbu
| Nsogbu | Ngwọta enwere ike |
|---|---|
| Enweghị ngosipụta na isi ngwaọrụ | Check USB power connection or replace AAA batteries. Ensure correct polarity. |
| Outdoor reading not displayed or inaccurate | Replace batteries in the remote sensor. Ensure sensor is within range (up to 200ft) and free from obstructions. Press 'CHANNEL' button on main unit to re-establish connection. Reset both units if necessary. |
| Weather forecast seems incorrect | The weather forecast indicates a trend over 12 hours based on barometric pressure changes, not current conditions. Allow time for the unit to gather data. |
| Time/Date is incorrect | Manually set the time and date using the 'SET/AL SET' button as described in the Operating Instructions. |
Nkọwapụta
- Oke okpomọkụ nke ime ụlọ: 14°F ruo 122°F (-10°C ruo 50°C)
- Oke okpomoku dị n'èzí: -40°F ruo 140°F (-40°C ruo 60°C)
- Okpomọkụ ziri ezi: ±1C
- Oke iru mmiri ime ụlọ/n'èzí: (Information not explicitly provided, but implied by description)
- Oke nnyefe ikuku: Up to 200 feet (60 meters) in open air
- Isi Iyi Ike (Isi Ngalaba): Type-C USB cord (included) or 2 x AAA batteries (not included)
- Power Source (Remote Sensor): Batrị 2 x AAA (anaghị etinye ya)
- Ụdị ngosi: Ikanam
- Ihe: Plastic
- Nọmba nlereanya: 5282011
Ozi akwụkwọ ikike
This product is covered by a manufacturer's warranty. For specific details regarding warranty coverage and duration, please refer to the warranty card included with your purchase or contact Taylor customer support directly. Proof of purchase may be required for warranty claims.
Nkwado ndị ahịa
For technical assistance, troubleshooting, or general inquiries, please contact Taylor customer service. Our USA-based Design, Marketing, Engineering, and Customer Service teams are available to assist you.
Please visit the official Taylor website for contact information or refer to the packaging for support details.