1. Okwu mmalite
The Pro-Ject Debut RecordMaster II is a high-fidelity turntable designed for an enhanced vinyl listening experience and digital conversion. This model features a pre-mounted OM5e cartridge, a built-in switchable phono preamplifier, and a USB output for direct connection to a PC or Mac. It incorporates a belt drive system with a low-noise AC motor, TPE decoupling, and a DC-driven AC generator for stable speed. Electronic speed change allows for playback at 33, 45, and 78 RPM, with a simple stylus exchange (OM78, not included) and drive belt adjustment required for 78 RPM.
This manual provides essential information for the proper setup, operation, and maintenance of your turntable to ensure optimal performance and longevity.
2. Ntuziaka nchekwa
- Gụọ ntuziaka niile nke ọma tupu ojiji.
- Keep the turntable away from water, moisture, and direct sunlight.
- Do not place the turntable near heat sources such as radiators, heat registers, stoves, or other apparatus that produce heat.
- Jiri naanị mgbakwunye / ngwa ndị nrụpụta akọwapụtara.
- Unplug the turntable during lightning storms or when unused for long periods.
- Tụtụ aka n'aka ndị ọrụ ruru eru.
- Gbaa mbọ hụ na ikuku ikuku dị na gburugburu unit ahụ.
3. Ihe ngwugwu
Nyochaa na etinyere ihe niile edepụtara n'okpuru na ngwugwu gị:
- Pro-Ject Debut RecordMaster II Turntable with pre-mounted OM5e cartridge
- Connect it RCA Cable
- Ihe mkpuchi uzuzu
- Adapter for 7-inch singles
- Ịnye ọkụ
4. Ntuziaka Nhazi
Follow these steps to set up your Pro-Ject Debut RecordMaster II turntable:
4.1 Mwepu na ntinye
Carefully remove all components from the packaging. Place the turntable on a stable, level surface away from vibrations and direct heat sources. Ensure adequate space for the dustcover to open fully.
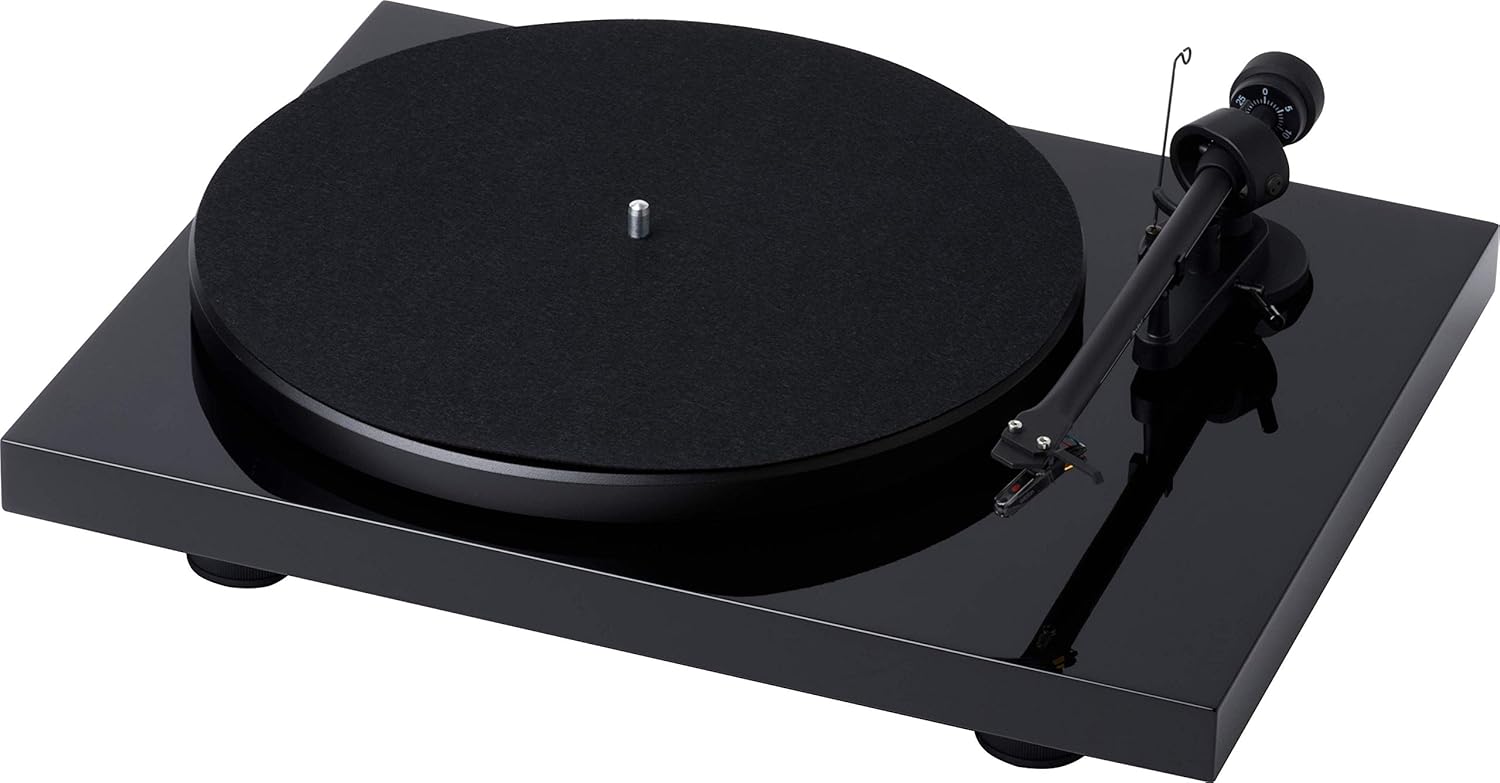
Ọgụgụ 1: N'elu-ala view of the Pro-Ject Debut RecordMaster II Turntable.
4.2 Nwụnye efere na eriri
- Debe efere ahụ n'elu spindle ahụ.
- Carefully loop the drive belt around the motor pulley and the inner rim of the platter.
4.3 Ike Nhazi na Nlekota Tonearm
The turntable comes with a pre-mounted OM5e cartridge. Refer to the cartridge manufacturer's instructions for precise tracking force and anti-skating settings. Generally, balance the tonearm until it floats freely, then set the tracking force using the counterweight.

Figure 2: Close-up of the tonearm, showing the Pro-Ject branding.
4.4 Ijikọ na sistemụ ọdịyo
The Debut RecordMaster II features a built-in switchable phono preamplifier and USB output. You can connect it to a line-level input on your hi-fi system or directly to a PC/Mac via USB.
- Njikọ RCA: Use the supplied RCA cable to connect the turntable's output to an available line-level input (e.g., AUX, CD) on your amplifier or receiver. Ensure the phono preamplifier switch on the turntable is set to 'Line Out' if connecting to a line-level input, or 'Phono Out' if connecting to an amplifia nwere ntinye phono raara onwe ya nye.
- Njikọ USB: Connect the turntable to your computer using a USB cable (not included). This allows for digital recording of your vinyl.
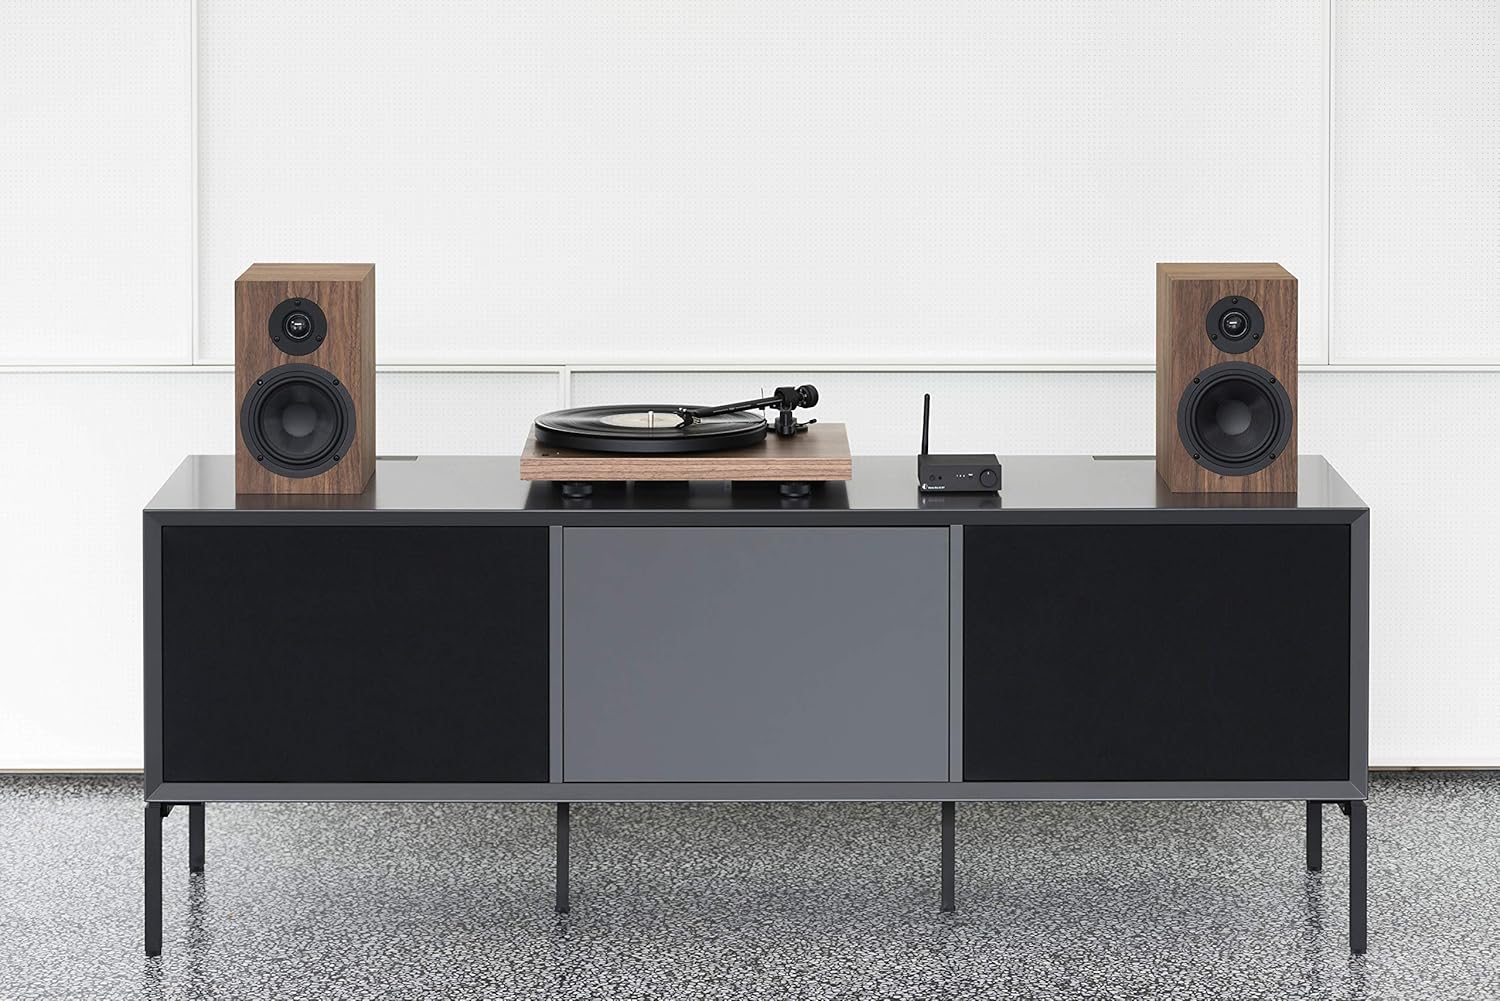
Figure 3: Turntable integrated into a home audio setup with speakers.

Figure 4: Turntable connected to a laptop, demonstrating USB recording capability.
4.5 Dustcover Installation
Attach the dustcover hinges to the designated slots on the rear of the turntable. The dustcover protects the turntable from dust and debris when not in use.
5. Ntuziaka ọrụ
5.1 Gbanyụọ/ gbanyụọ
Locate the power switch, typically on the underside or rear of the plinth. Turn the switch to the 'On' position to power the turntable. Turn it 'Off' when not in use.

Figure 5: Detail of the power switch for the turntable.
5.2 Nhọrọ ọsọ ọsọ
The turntable supports 33, 45, and 78 RPM playback. Use the electronic speed change function to select the appropriate speed for your record. For 78 RPM records, a specific OM78 stylus (not included) and a drive belt turnover to a larger diameter of the pulley are required.
5.3 Ịkpọ egwu ndekọ
- Tinye ndekọ na efere.
- Ensure the correct playback speed is selected.
- Raise the tonearm using the tonearm lift lever.
- Gently move the tonearm over the desired starting groove of the record.
- Slowly lower the tonearm using the lift lever. The stylus will descend onto the record and playback will begin.
5.4 Ịkwụsị Ịkpọghachi
- Raise the tonearm using the tonearm lift lever.
- Move the tonearm back to its rest position.
- Lower the tonearm onto its rest using the lift lever.
- Turn off the turntable.
5.5 USB ndekọ
To record vinyl to your PC/Mac, connect the turntable via USB. Use appropriate audio recording software (not included) on your computer to capture the audio signal. Ensure the turntable's phono preamplifier is set to 'Line Out' for USB recording.
6. Nlekọta
6.1 Ịsacha Stylus ahụ
Regularly clean the stylus using a soft brush or a dedicated stylus cleaning fluid. Brush gently from back to front to remove dust and debris.
6.2 Ndekọ Nhicha
Use a carbon fiber brush or a record cleaning solution to keep your vinyl records free of dust and static. Clean records before each play to minimize wear on the stylus and improve sound quality.
6.3 Dustcover Care
Clean the dustcover with a soft, damp akwa . Zere ihe nchacha nke nwere ike ịcha elu.
7. Nchọpụta nsogbu
If you encounter issues with your turntable, consult the following common problems and solutions:
| Nsogbu | Ihe nwere ike ime | Ngwọta |
|---|---|---|
| Enweghị ụda ma ọ bụ ụda dị ala | Nhọrọ ntinye na-ezighi ezi na-agba amplifier; Phono preamp switch incorrect; Loose cables. | Select correct input; Adjust phono preamp switch; Check all cable connections. |
| Ụda agbagọ | Dirty stylus; Incorrect tracking force or anti-skating; Damaged stylus. | Clean stylus; Re-adjust tracking force/anti-skating; Replace stylus if damaged. |
| Ọsọ egwuregwu na-ezighi ezi | Wrong speed selected; Drive belt issue. | Select correct speed (33/45/78 RPM); Check drive belt for proper placement or wear. |
| mkpọtụ mkpọtụ | Ground wire not connected; Interference from other electronics. | Ensure ground wire is securely connected; Move turntable away from other electronic devices. |
8. Nkọwapụta
| Njirimara | Nkọwa |
|---|---|
| Ụdị | Pro-Ject |
| Aha Nlereanya | Recordmaster II |
| Nọmba Nlereanya ihe | RM II Om5e |
| Ụdị moto | moto AC |
| Ọsọ ntụgharị kacha | 78 RPM |
| Atụmatụ pụrụ iche | USB Output, Built-in Phono Preamplifier, Electronic Speed Change |
| Ngwa dakọtara | Kọmputa nkeonwe |
| Ụdị njikọ | USB |
| Ihe onwunwe | Plastic |
| Akụkụ ngwaahịa | 32 x 41.5 x 11.8 cm; 7.7 n'arọ |
| Ụdị isi iyi ike | Igwe ọkụ eletrik |
| Batrị gụnyere | Mba |
| Batrị achọrọ | Mba |
9. Akwụkwọ ikike na nkwado
For detailed warranty information, please refer to the documentation included with your product or visit the official Pro-Ject Audio Systems website. For technical support or service inquiries, please contact Pro-Ject customer service through their official channels.