
PROVISION ISR B08P4QLQNM
PROVISION ISR Webcam nwere akwụkwọ ntuziaka onye ọrụ ọkụ
Model: B08P4QLQNM
1. Okwu mmalite
This manual provides comprehensive instructions for the setup, operation, and maintenance of your PROVISION ISR Webcam with Light. Please read this manual thoroughly before using the device to ensure optimal performance and longevity.
The PROVISION ISR Webcam with Light is designed to offer a superior video streaming experience with its Full HD 1080p resolution, adjustable integrated lighting, and a built-in noise-reduction microphone. It is ideal for various applications including live streaming, video conferencing, online classes, and content creation.
2. Atụmatụ igodo
- Ọkachamara Webcam with Adjustable Light: Features an innovative design with an integrated LED light offering 3 adjustable brightness levels for optimal illumination in any environment.
- Mkpebi 1080p HD zuru ezu: Delivers crystal-clear images and high color reproduction with a 1080p resolution and a 100-degree wide viewing angle for a natural, undistorted picture.
- Built-in Noise-Canceling Microphone: Equipped with a microphone that reduces background noise and echoes, ensuring clear audio during calls and recordings.
- Ngwa dịgasị iche iche: Suitable for live streaming, video conferences, online courses, vlogging, and gaming.
- Nkwụnye na wụnye: Requires no driver installation; simply connect the USB cable to your device. Compatible with most popular operating systems.
3. Ihe ngwugwu
Biko chọpụta na ihe niile dị na ọnọdụ dị mma mgbe imepe ngwugwu ahụ.
- PROVISION ISR Webcam na Light
- Igwe USB agbakwunyere
- Akwụkwọ ntuziaka (akwụkwọ a)
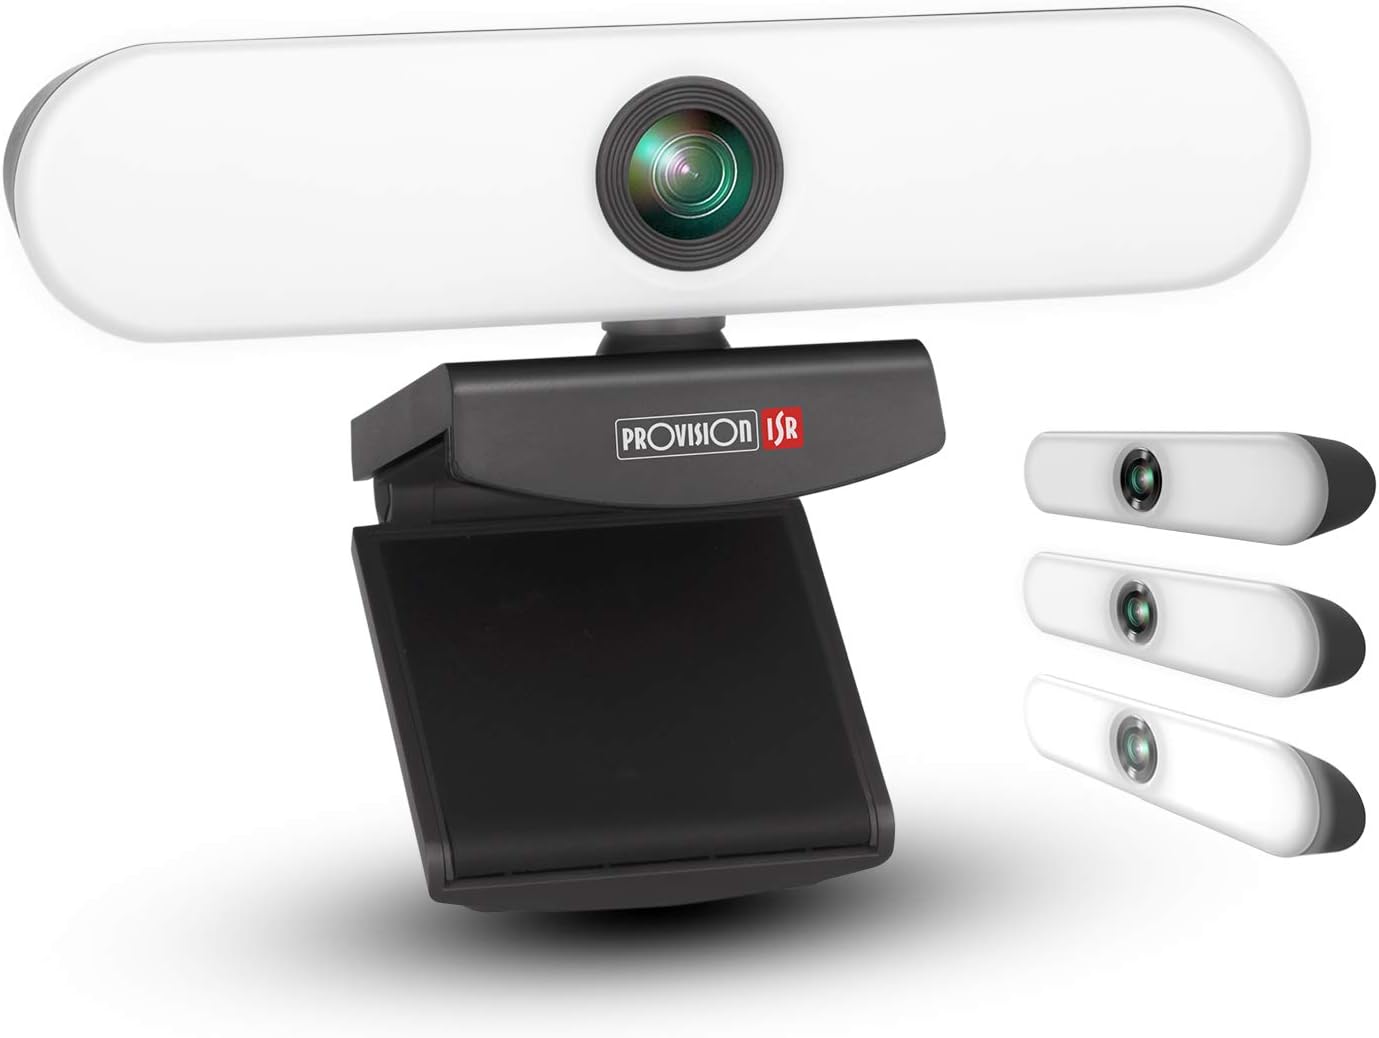
Image: The PROVISION ISR Webcam with Light, showing its integrated light bar and adjustable clip.
4. Ntuziaka Nhazi
4.1 Ijikọ Webcam
- Ịkwapu: Jiri nlezianya wepu webcam sitere na ngwugwu ya.
- Ugwu: Open the adjustable clip base and securely place the webcam on top of your computer monitor, laptop screen, or a flat surface. Ensure the webcam kwụsiri ike ma na-eche ihu ntụziaka achọrọ.
- Jikọọ: Plug the integrated USB cable from the webcam banye n'ọdụ ụgbọ mmiri USB dị na kọmputa gị.

Foto: The webcam shown with its USB cable, illustrating its plug-and-play compatibility with Windows, Mac OS, and Android devices.
4.2 Driver Installation (Plug & Play)
The PROVISION ISR Webcam is designed for plug-and-play operation. Your operating system (Windows, macOS, Linux, Android) should automatically detect and install the necessary drivers upon connection. No manual driver installation is typically required.
- Wait a few moments after connecting the USB cable for your system to recognize the device.
- You may see a notification indicating that a new device has been detected and is ready for use.
4.3 Initial Setup in Applications
Once connected, you can select the webcam and its microphone within your preferred video conferencing or streaming application (e.g., Zoom, Skype, Microsoft Teams, OBS Studio).
- Open your desired application.
- Navigate to the application's settings or preferences, usually under "Audio" or "Video" settings.
- Select "PROVISION ISR Webcam" dị ka ngwaọrụ ntinye vidiyo gị.
- Select "PROVISION ISR Webcam Microphone" (or similar) as your audio input device.
- Adjust video and audio settings as needed within the application.

Image: A woman on a video call, demonstrating the webcam's clear image and sound quality when used with a laptop.
5. Ntuziaka ọrụ
5.1 Adjusting the Integrated Light
Nke webcam features an integrated LED light with three brightness levels. To adjust the light:
- Locate the touch button on the top of the webcam.
- Tap the button once to cycle through the brightness levels: Low, Medium, High, and Off.
- Select the level that provides optimal illumination for your environment.

Image: Illustration showing the webcam and three examples of lighting levels (Low, Medium, High) on a person's face.
5.2 Na-emezigharị Viewna n'akuku
Nke webcam's clip base allows for flexible positioning and angle adjustment.
- Gently tilt the webcam up or down to adjust the vertical viewakụkụ n'akuku.
- Tugharia ihe webcam left or right on its base to adjust the horizontal viewakụkụ n'akuku.
- Gbaa mbọ hụ na webcam is securely positioned after adjustment.

Image: Diagram illustrating the 90-degree wide-angle view nke webcam, showing it capturing a group meeting.
6. Nlekọta
Nlekọta kwesịrị ekwesị na-eme ka ogologo oge na arụmọrụ kachasị mma nke ngwaọrụ gị webcam.
- Na-ehicha oghere: Use a soft, lint-free cloth specifically designed for optical lenses to gently wipe the webLensi kamera. Zere ihe ndị na-emebi emebi ma ọ bụ kemịkalụ siri ike.
- Na-ehicha ahụ: Hichaa ahụ nke webcam with a soft, dry cloth. If necessary, a slightly damp enwere ike iji akwa mee ihe, mana hụ na mmiri adịghị abanye na ngwaọrụ ahụ.
- Nchekwa: Mgbe ejighị ya ogologo oge, chekwaa ya webcam n'ebe dị ọcha, kpọrọ nkụ, ebe anwụ na-anaghị anwụ kpọmkwem na oke okpomọkụ dị elu.
- Nlekọta USB: Avoid bending or kinking the USB cable excessively. Do not pull the cable to disconnect the webcam; always grasp the plug.
7. Nchọpụta nsogbu
| Nsogbu | Ihe nwere ike ime | Ngwọta |
|---|---|---|
| Webcam ahụghị | Loose USB connection, faulty USB port, driver issue, application not recognizing device. | Ensure USB cable is fully inserted. Try a different USB port. Restart your computer. Check device manager for driver status. Select the webcam in your application settings. |
| Enweghị mmepụta vidiyo | Webcam not selected in application, privacy settings blocking camera, lens cap (if applicable). | Nyochaa webcam selection in application settings. Check operating system privacy settings (e.g., Windows Camera Privacy). Ensure nothing is obstructing the lens. |
| Ogo vidiyo na-adịghị mma | Insufficient lighting, dirty lens, low bandwidth, application settings. | Adjust the integrated light to a higher brightness level. Clean the webcam lens. Ensure stable internet connection. Check application video resolution settings. |
| Microphone not working or poor audio | Microphone not selected, privacy settings, background noise. | Họrọ nke webcam's microphone in your application's audio settings. Check operating system microphone privacy settings. Reduce ambient noise. |
| Integrated light not working | Not turned on, faulty unit. | Tap the touch button on top of the webcam to cycle through brightness levels. If still not working, contact customer support. |
8. Nkọwapụta
| Njirimara | Nkọwa |
|---|---|
| Nọmba nlereanya | B08P4QLQNM |
| Mkpebi ịse vidiyo | 1080p zuru oke |
| Teknụzụ ihe mmetụta foto | CMOS |
| Teknụzụ Njikọta | USB |
| Njirimara Pụrụ Iche | Integrated Adjustable Light (3 Levels), Low Light Performance |
| Igwe okwu | Built-in Noise-Reduction Microphone |
| Viewna n'akuku | 100-degree (approx.) |
| Akụkụ (ihe dị ka.) | 15.9 x 7.1 x 6.3 cm |
| Ibu (ihe dị ka.) | 237 g |
| Ndakọrịta | Windows, macOS, Android (Plug & Play) |
9. Akwụkwọ ikike na nkwado
PROVISION ISR products are manufactured to high quality standards. For specific warranty information, please refer to the warranty card included with your purchase or visit the official PROVISION ISR websaịtị. Debe nnata nzụta gị ka ihe akaebe nke ịzụrụ.
For technical support, troubleshooting assistance beyond this manual, or warranty claims, please contact PROVISION ISR customer service through their official channels. Contact information can typically be found on the product packaging or the brand's official websaịtị.
Note: Warranty terms and support availability may vary by region.
Ask a question about this manual
Ask about setup, troubleshooting, compatibility, parts, safety, or missing instructions. Manuals+ will review the question and use this page’s manual context to help answer it.