
Okwu mmalite
This manual provides detailed instructions for the setup, operation, and maintenance of your groov e Atlas Radio Alarm Clock with Wireless Charger. Please read this manual thoroughly before using the device to ensure proper function and to maximize your user experience. Keep this manual for future reference.
Ihe ngwugwu
Chọpụta na ihe niile dị na ngwugwu:
- groov e Atlas Radio Alarm Clock
- Ihe nkwụnye ọkụ
- Akwụkwọ ntuziaka onye ọrụ
Njirimara ngwaahịa
- Wireless Charging (5W): Conveniently charge compatible smartphones by placing them on the top surface.
- Igwe Redio: Tune into your favorite FM stations.
- Ikanam Display: Clear digital time display.
- Akwadoro isi ihe: Reliable power supply for continuous operation.
- ọdụ ụgbọ USB: Additional USB port for charging other devices.
- Mkpu abụọ: Tọọ mkpu abụọ nọọrọ onwe ha maka oge teta dị iche iche.
- Gosipụta dimmer: Adjust the brightness of the LED display.
Melite
- Njikọ Ike: Insert the power adapter into the 'DC IN' port on the back of the alarm clock, then plug the adapter into a wall outlet. The display will light up.
- Tọọ oge:
- Press and hold the 'TIME SET' button located on the back of the unit.
- Use the 'TUN-' or 'TUN+' buttons on the top panel to adjust the hour.
- Press 'TIME SET' again to confirm the hour and move to minutes.
- Use 'TUN-' or 'TUN+' to adjust the minutes.
- Press 'TIME SET' once more to confirm and exit time setting.
- To switch between 12-hour and 24-hour format, press the '12/24H' button on the back.

Foto: N'azụ view of the groov e Atlas alarm clock, highlighting the DC IN power input and the USB charging port. The '12/24H TIME SET' and 'SLEEP' buttons are also visible.
Ntuziaka ọrụ
Setting Alarms (ALM1 / ALM2)
- Press the 'ALM1' or 'ALM2' button to select the alarm you wish to set. The alarm icon will flash on the display.
- Use the 'TUN-' or 'TUN+' buttons to adjust the alarm hour.
- Press the 'ALM1' or 'ALM2' button again to confirm the hour and move to minutes.
- Use 'TUN-' or 'TUN+' to adjust the alarm minutes.
- Press the 'ALM1' or 'ALM2' button a third time to confirm the alarm time. The alarm icon will remain lit, indicating the alarm is active.
- To deactivate an alarm, press the corresponding 'ALM1' or 'ALM2' button until the alarm icon disappears from the display.
FM Radio arụ ọrụ
- Gbanwuo/ Gbanyụọ: Press the 'ON/OFF' button to turn the radio on or off.
- Nyocha akpaaka: Press the 'SCAN' button to automatically scan and save available FM stations.
- Akwụkwọ ntuziaka: Use the 'TUN-' or 'TUN+' buttons to manually adjust the frequency. Press and hold for faster tuning.
- Ụlọ atọrọ atọ: Use 'MEM-' or 'MEM+' to cycle through saved preset stations.
- Gbanwee olu: Use the 'VOL-' or 'VOL+' buttons to control the radio volume.
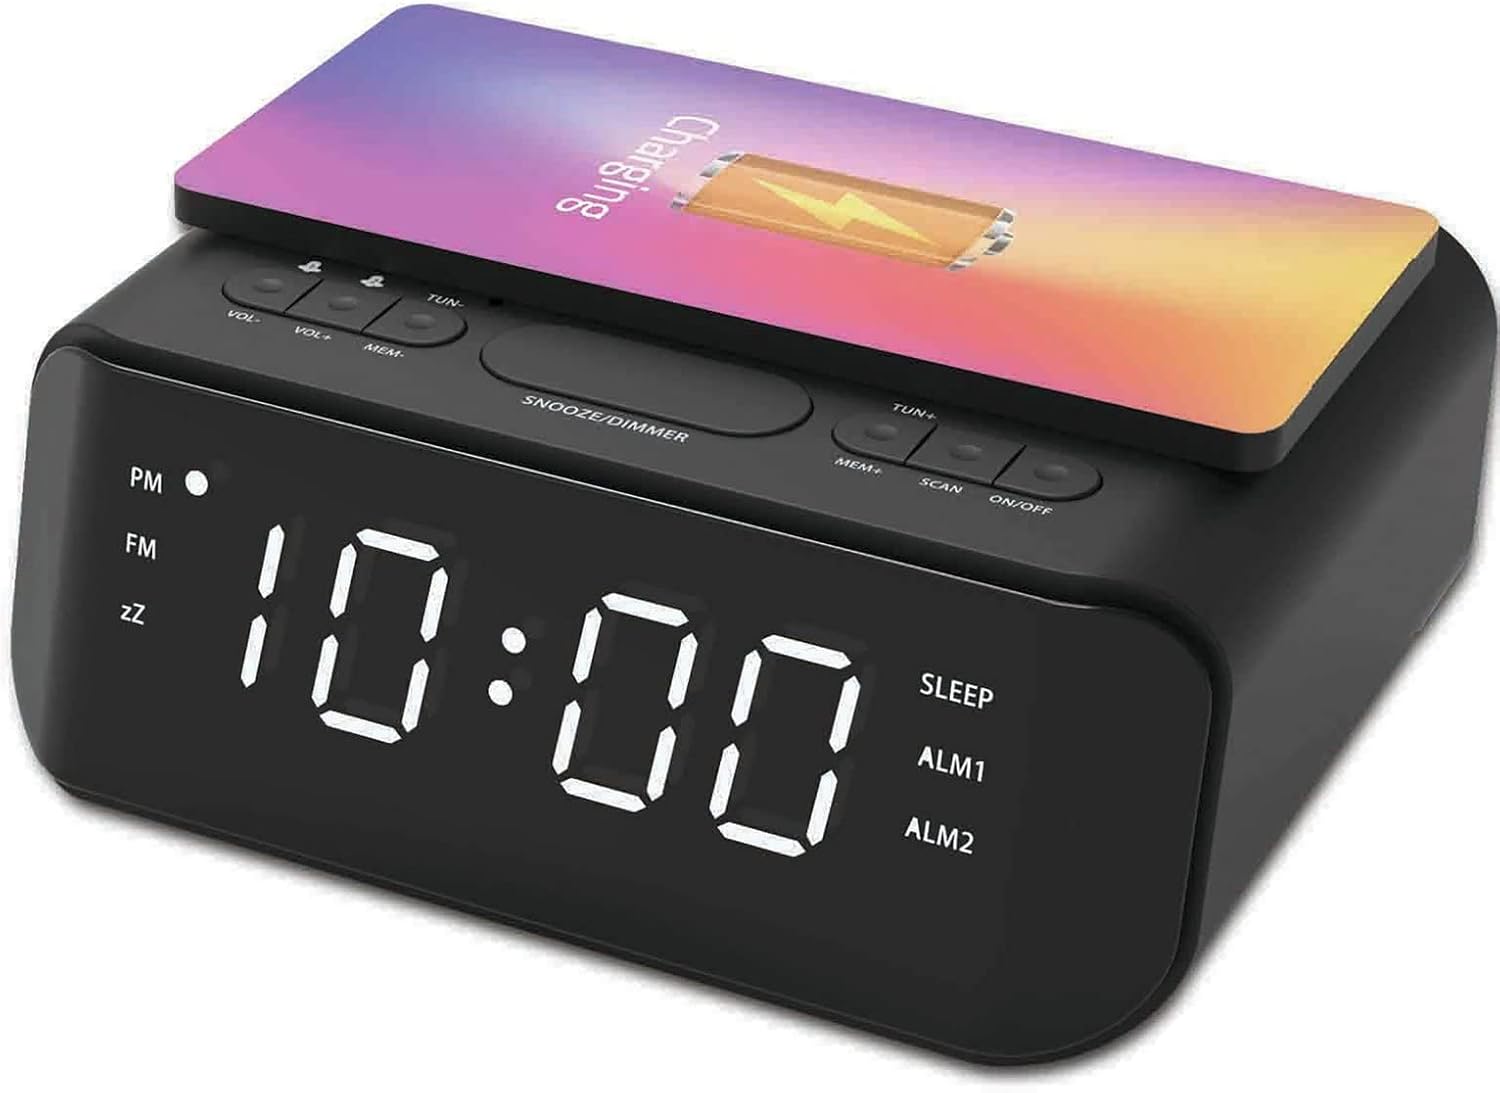
Foto: Top view of the groov e Atlas alarm clock, illustrating the layout of the control buttons for volume, tuning, memory, scan, and power.
Nchaji ikuku
- Ensure your smartphone is compatible with 5W Qi wireless charging.
- Place your compatible smartphone centrally on the wireless charging pad located on the top surface of the alarm clock.
- The phone's display should indicate that charging has begun. If not, adjust the phone's position.

Image: A smartphone placed on the groov e Atlas alarm clock's top surface, showing the charging indicator on the phone's screen, confirming wireless charging is active.
Nchaji USB
- Connect a USB charging cable (not included) to the USB port on the back of the alarm clock.
- Jikọọ nsọtụ nke ọzọ nke eriri na ngwaọrụ gị.
- Ngwaọrụ gị ga-amalite ịchaji.
Ngosipụta Dimmer
Press the 'SNOOZE/DIMMER' button to cycle through different brightness levels for the LED display. This allows you to adjust the display to your preferred visibility, especially in dark environments.
Nlekọta
- Nhicha: Jiri ákwà dị nro ma kpọọ nkụ hichaa elu elekere mkpu. Ejila ihe nhicha mmiri ma ọ bụ ihe ndị na-eme ka ọ dị nro.
- Nchekwa: Mgbe ejighị ya ogologo oge, wepụ ngwaọrụ ahụ ma chekwaa ya n'ebe dị jụụ na nkụ.
- Nchekwa: Do not expose the device to water, high humidity, or extreme temperatures. Avoid dropping or subjecting the device to strong impacts.
Nchọpụta nsogbu
| Nsogbu | Ihe nwere ike ime | Ngwọta |
|---|---|---|
| Ngwaọrụ anaghị agbanwu ọkụ. | Ejikọghị ihe nkwụnye ọkụ ma ọ bụ ụzọ adịghị mma. | Ensure the power adapter is securely plugged into the device and a working wall outlet. Try a different outlet. |
| Nchaji ikuku anaghị arụ ọrụ. | Phone not Qi-compatible or not positioned correctly. | Verify your phone supports Qi wireless charging. Reposition the phone centrally on the charging pad. Remove any thick phone cases. |
| Oti mkpu anaghị ada ụda. | Mkpu anaghị arụ ọrụ ma ọ bụ olu ya dị oke ala. | Check if the alarm icon is lit on the display. Increase the alarm volume using the 'VOL+' button. |
| Nnabata redio adịghị mma. | Weak signal or antenna position. | Extend and adjust the position of the FM antenna wire on the back of the unit for better reception. |
Nkọwapụta
- Nọmba nlereanya: GVWC06BK
- Akara: groov e
- Agba: Nwa
- Ụdị ngosi: Igwe ọkụ dijitalụ
- Isi mmalite ike: Mains Powered (AC Adapter included)
- Nchaji ikuku ikuku: 5W
- Mmepụta Nchaji USB: 5V/1A
- Alarm Features: Dual Alarm, Snooze
- Redio: FM
- Ihe: Acrylonitrile Butadiene Styrene (ABS)
- Ụdị: Rectangular
- Ụdị nkwụnye: Ugwu okpokoro
- Ụdị mmegharị: Quartz
- Batrị: Not included (requires 1 battery for backup, type not specified in data)
Akwụkwọ ikike na nkwado
Your groov e Atlas Radio Alarm Clock GVWC06BK comes with a standard manufacturer's warranty. Please refer to the warranty card included in your package for specific terms and conditions, including the warranty period and coverage details.
For technical support, troubleshooting assistance, or warranty claims, please contact groov e customer service through their official websaịtị ma ọ bụ ozi kọntaktị enyere na kaadị akwụkwọ ikike gị.
Biko dowe ihe akaebe nke ịzụrụ ihe maka ajụjụ ọ bụla metụtara akwụkwọ ikike.