
1. Okwu mmalite
Thank you for choosing the Oasser P2A Cordless Air Compressor. This manual provides essential information for the safe and efficient operation, maintenance, and troubleshooting of your device. Please read this manual thoroughly before use and retain it for future reference.
The Oasser P2A is a portable, rechargeable electric air compressor designed for inflating tires on cars, motorcycles, bicycles, and other inflatable items. It features a built-in 2000 mAh lithium battery, a maximum pressure of 120 PSI, an LED light for dark conditions, and an LCD screen for precise pressure monitoring.
2. Ntuziaka nchekwa
To ensure safe operation, always follow these precautions:
- Gụọ ntuziaka niile nke ọma tupu i jiri ngwaọrụ ahụ.
- Debe ngwaọrụ ahụ ka ụmụaka ghara iru ya.
- Do not operate the compressor in wet conditions or near flammable liquids or gases.
- Ensure the air hose is securely connected to both the compressor and the item being inflated before starting.
- Do not over-inflate items. Always refer to the manufacturer's recommended pressure for the item being inflated.
- Monitor the pressure gauge during inflation to prevent over-inflation. The device features automatic shut-off, but manual monitoring is still recommended.
- Ahapụla kọmpụta ahụ n'echeghị ya mgbe ọ na-arụ ọrụ.
- Avoid directing the air stream at people or animals.
- Charge the battery in a well-ventilated area. Do not charge if the device or charger is damaged.
- If the device becomes unusually hot during use or charging, discontinue use immediately and contact customer support.
- Always disconnect the air hose and store the device properly after use.
3. Ihe ngwugwu
Chọpụta na ihe niile dị na ngwugwu gị:
- 1 x Oasser P2A Air Pump
- 1 x Short Air Hose
- 1 x Long Air Hose
- 1 x agịga bọọlụ
- 1 x Plastic Nozzle
- 1 x Presta Valve nkwụnye
- 1 x USB Charging Cable (USB charger not included)
- 1 x Akpa nchekwa
- 1 x Akwụkwọ ntuziaka onye ọrụ

Image: Oasser P2A Cordless Air Compressor with all included accessories, such as air hoses, nozzles, and charging cable.
4. Ngwaahịa gafereview
Familiarize yourself with the components of your Oasser P2A air compressor:

Image: Diagram illustrating the main components of the Oasser P2A, including the LED light, digital LCD display, and rechargeable lithium battery.
- Ọkụ LED: Na-enye ọkụ maka ojiji na ọnọdụ ọkụ dị ala.
- Ngosipụta LCD dijitalụ: Shows real-time and preset pressure values.
- bọtịnụ njikwa: Power, unit selection, and pressure adjustment (+/-).
- Njikọ ikuku ikuku: Point for attaching the air hose.
- Trigger/Start Button: Initiates the inflation process.
- Rechargeable Lithium Battery (2000 mAh): Provides cordless power.
- USB Nchaji Port: Maka ịchaji ngwaọrụ.
5. Ịchaji ngwaọrụ
Before first use, fully charge the air compressor. It takes approximately 4 hours for a complete charge.
- Connect the provided USB charging cable to the USB charging port on the compressor.
- Connect the other end of the USB cable to a compatible USB power adapter (not included) or a USB port.
- The charging indicator light will illuminate. Once fully charged, the light may change color or turn off depending on the model.
Important: Please charge the battery completely within 3 days after each use to maintain battery health.
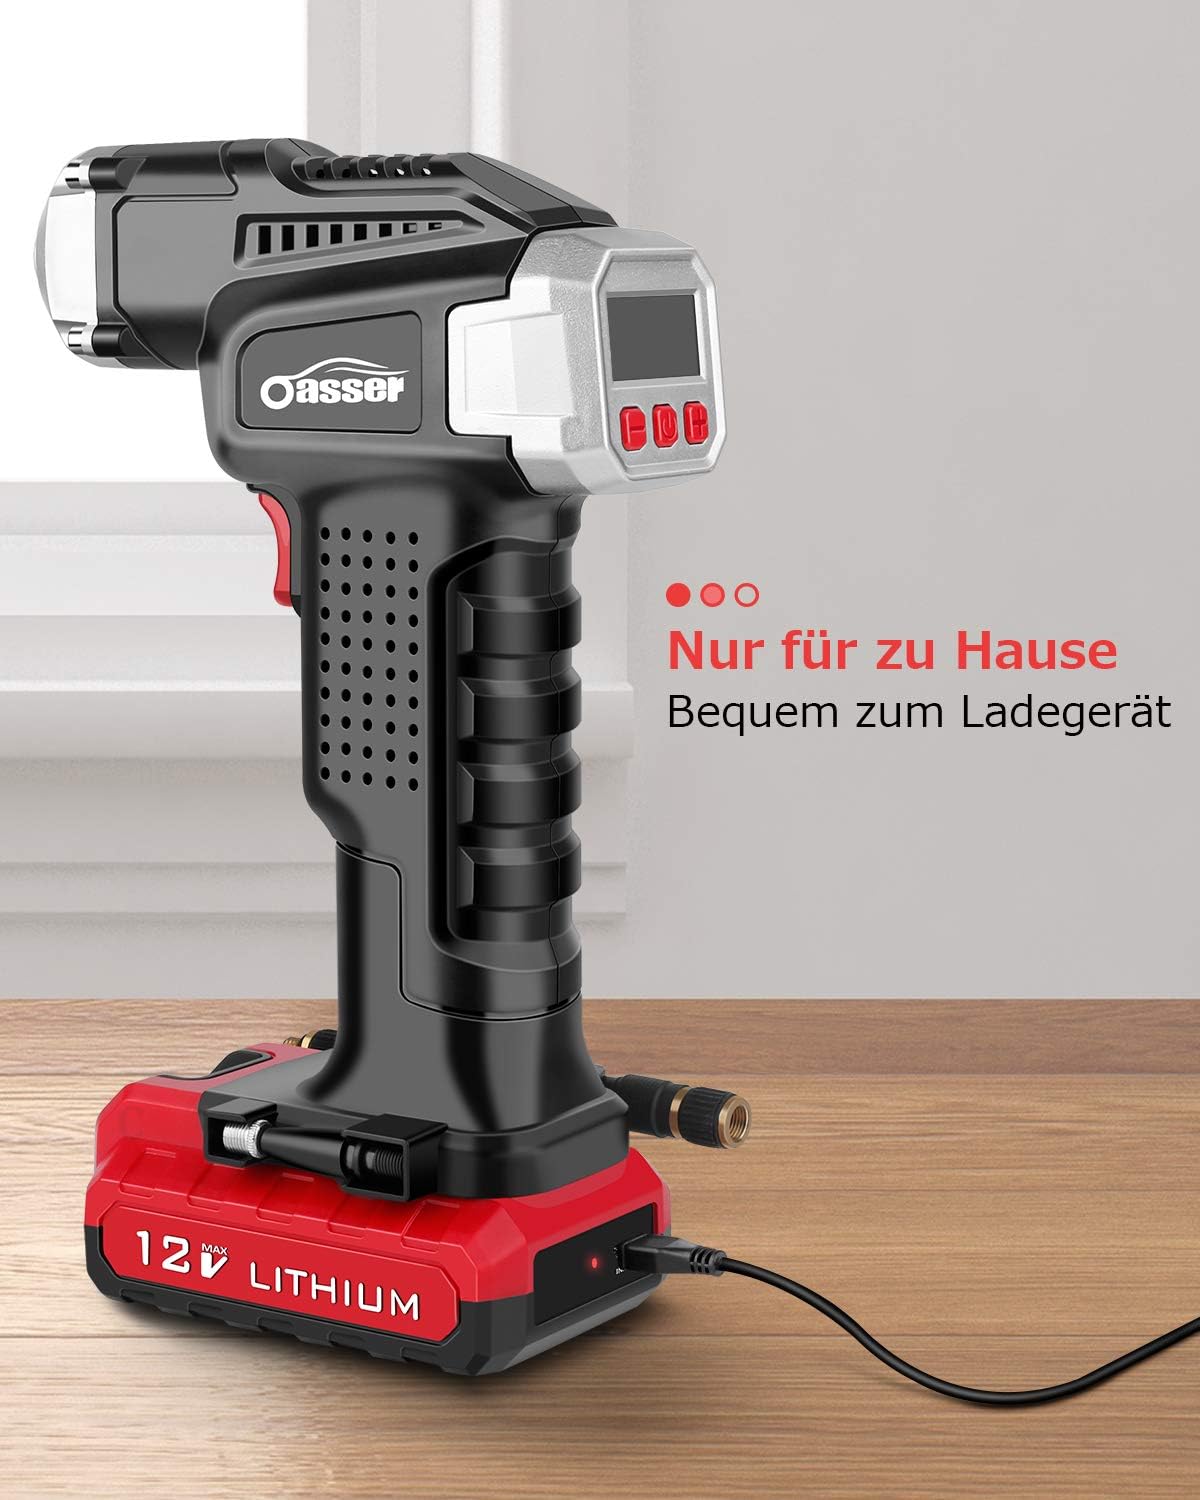
Image: The Oasser P2A air compressor connected to a USB charging cable, indicating the charging process.
6. Nhazi
Prepare your air compressor for inflation:
- Jikọọ eriri ikuku: Screw the desired air hose (short or long) onto the air hose connection port at the front of the compressor until secure.
- Họrọ nkwụnye ziri ezi: Choose the appropriate nozzle or adapter for the item you wish to inflate (e.g., Presta valve adapter for bicycles, ball needle for sports balls, plastic nozzle for inflatable toys). Attach it to the end of the air hose.
7. Ntuziaka ọrụ
Follow these steps to inflate an item:
- Ike Na: Press the middle button on the control panel to turn on the device. The LCD display will illuminate.
- Jikọọ na Valve: Securely connect the air hose adapter to the valve of the item you intend to inflate. The current pressure will be displayed on the LCD screen.
- Tọọ nrụgide achọrọ: Use the '+' and '-' buttons to adjust the target pressure. You can cycle through pressure units (PSI, BAR, KPA, kg/cm²) by pressing the unit selection button (often the power button briefly).
- Malite onu oriri: Press the red trigger/start button on the handle to begin inflation. The compressor will operate, and the real-time pressure will be shown on the display.
- Nwepu akpaaka: The compressor will automatically stop once the preset target pressure is reached.
- Kwụpụ: Carefully disconnect the air hose from the item's valve.
- Gbanyụọ: Press and hold the middle button to turn off the device.
Iji ọkụ LED: Press the dedicated LED light button (if available, often integrated with another button) to turn the light on or off for visibility in dark environments.
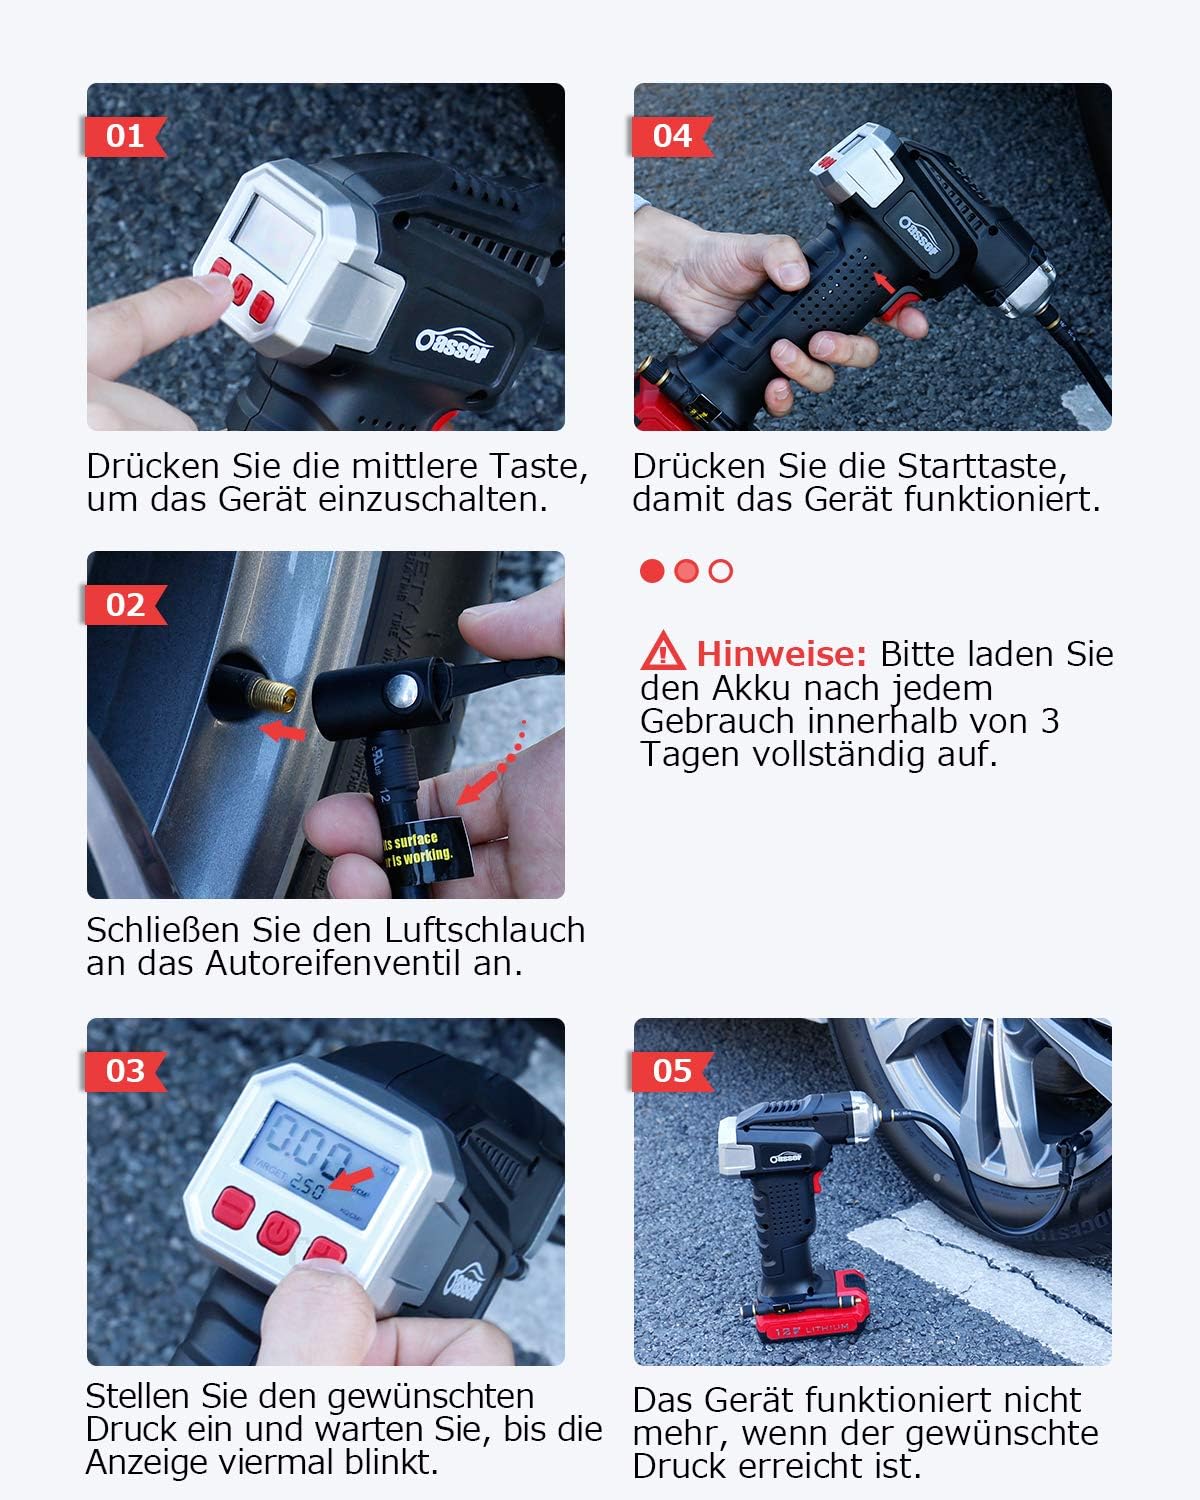
Image: Visual guide demonstrating the operational steps: powering on, connecting the hose, setting pressure, and starting inflation.

Image: The Oasser P2A air compressor actively inflating a car tire, demonstrating its practical application.

Foto: nkọwa zuru ezu view of the Oasser P2A's digital LCD display, clearly showing pressure readings and unit selection.
8. Nlekọta
Proper maintenance ensures the longevity and performance of your air compressor:
- Nhicha: Jiri nwayọ hichaa ngwaọrụ ahụ, damp cloth. Do not use harsh chemicals or abrasive cleaners. Ensure the device is dry before storage.
- Nchekwa: Store the compressor in a cool, dry place, away from direct sunlight and extreme temperatures. Use the provided storage bag to protect it from dust and damage.
- Nlekọta batrị: Recharge the battery regularly, especially if the device has not been used for an extended period. Avoid completely draining the battery frequently to prolong its lifespan.
- Hose and Nozzle Inspection: Periodically check the air hoses and nozzles for any signs of wear, cracks, or damage. Replace them if necessary to ensure a proper seal and efficient inflation.
9. Nchọpụta nsogbu
If you encounter issues with your Oasser P2A, refer to the following common problems and solutions:
| Nsogbu | Ihe nwere ike ime | Ngwọta |
|---|---|---|
| Ngwaọrụ anaghị agbanwu. | Batrị agwụla. | Chajie ngwaọrụ ahụ nke ọma. |
| Device turns on but does not inflate. | Air hose not securely connected. Incorrect pressure setting. | Ensure air hose is tightly screwed on. Check that the target pressure is set above the current pressure. |
| Ọgụgụ nrụgide na-ezighi ezi. | Loose connection to valve. | Ensure the nozzle is firmly attached to the item's valve without air leaks. |
| Device stops prematurely. | Target pressure reached. Battery low. | This is normal if target pressure is met. If not, recharge the battery. |
| Device is very loud during operation. | Normal operation noise. | Air compressors generate noise during operation. This is generally normal. |
10. Nkọwapụta
| Njirimara | Nkọwapụta |
|---|---|
| Nọmba nlereanya | P2A |
| Ụdị | Onye njikwa |
| Ụdị batrị | 1 Lithium-ion (gụnyere) |
| Ike batrị | 2000 mAh |
| Oke nrụgide | 120 PSI |
| Voltage | 12 volts |
| Isi Iyi Ike | Akwanyere batrị |
| Ibu Ibu | 1.08 kilogram |
| Akụkụ ngwugwu | 26 x 17.6 x 8.4 cm |
| Ụdị ngosi | 1.5" Digital LCD |
| Inflation Units | PSI, BAR, KPA, kg/cm² |
11. Akwụkwọ ikike na nkwado
Oasser is committed to providing high-quality products and excellent customer service. If you have any questions, concerns, or require assistance with your Oasser P2A Cordless Air Compressor, please refer to the contact information provided with your purchase or visit the official Oasser websaịtị maka nkwado.