
1. Okwu mmalite
The Onset HOBO H21-USB Micro Station is a compact, weatherproof data logger designed for multi-channel monitoring of environmental conditions. This battery-powered station supports up to five plug-and-play Smart Sensors, making it suitable for a wide range of indoor and outdoor applications. Its robust design and built-in USB interface ensure efficient data collection and offload.
Akụkụ ndị bụ isi:
- Compact size for easy deployment in various environments.
- Five smart sensor inputs for versatile data collection.
- Wide range of compatible plug-and-play smart sensors.
- Integrated USB interface for direct data offload to PC or Mac.
- Weatherproof IP66 enclosure for harsh outdoor conditions.
- Hinged door and integrated mounting tabs for simple installation.
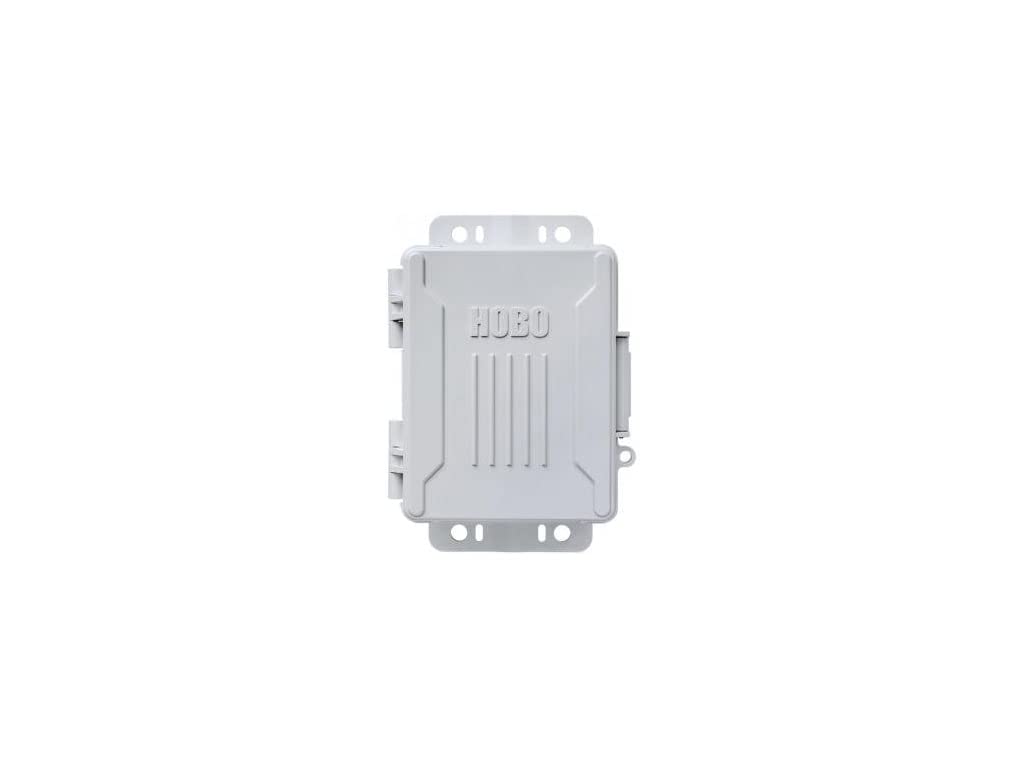
Figure 1: Onset HOBO H21-USB Micro Station Data Logger. This image shows the compact, grey data logger unit with its hinged door closed, highlighting its robust design.
2. Ihe ngwugwu
Hụ na ihe niile dị na ngwugwu ahụ tupu ịmalite nrụnye:
- HOBO H21-USB Micro Station Data Logger
- eriri USB
- Akwụkwọ ntuziaka (akwụkwọ a)
- (Note: Smart Sensors are sold separately and are not included with the base unit.)
3. Nhazi
3.1. Nwụnye ngwanrọ
Before deploying the HOBO H21-USB, install the necessary HOBOware software on your computer. HOBOware is required for configuring the logger, launching deployments, and offloading data.
- Download the latest version of HOBOware from the official Onset websaịtị: www.onsetcomp.com/support/software
- Follow the on-screen instructions to complete the installation for your Windows PC or Mac operating system.
- Connect the HOBO H21-USB to your computer using the provided USB cable. The software should recognize the device automatically.
3.2. Physical Installation and Sensor Connection
The H21-USB Micro Station is designed for easy deployment. Ensure the installation location is suitable for the sensors being used and provides adequate protection from extreme conditions beyond the logger's specifications.
- Open the hinged door of the Micro Station.
- Connect up to five compatible Smart Sensors into the available ports. Ensure each sensor is securely plugged in.
- Close the hinged door firmly to maintain the weatherproof seal.
- Use the integrated mounting tabs to secure the logger to a pole, post, or flat surface using screws or zip ties (not included). Ensure the logger is mounted in a way that does not obstruct sensor readings or expose it to unnecessary physical stress.
4. Ntuziaka ọrụ
4.1. Configuring and Launching a Deployment
Use HOBOware software to configure the logging parameters and start a new data collection session.
- Connect the HOBO H21-USB to your computer via USB.
- Open HOBOware software.
- From the HOBOware menu, select Device > Launch.
- Configure the desired logging parameters, including:
- Interbanye abanye: How frequently data is recorded (e.g., every 5 minutes).
- Oge mmalite: Immediate, at a specific date/time, or on button push.
- Oge nkwụsị: When memory is full, at a specific date/time, or never (manual stop).
- Nhazi ihe mmetụta: Enable/disable connected sensors and set specific sensor parameters if applicable.
- Pịa Malite to launch the deployment. The logger will begin recording data according to your settings.
4.2. Data Offload and Analysis
Once a deployment is complete or you wish to retrieve data, follow these steps:
- Connect the HOBO H21-USB to your computer via USB.
- Open HOBOware software.
- From the HOBOware menu, select Device > Readout.
- The software will offload the recorded data from the logger.
- Chekwaa data file to your computer. HOBOware allows you to view, plot, and export the data in various formats (e.g., CSV, Excel) for further analysis.
5. Nlekọta
5.1. Ngbanwe batrị
The HOBO H21-USB is powered by user-replaceable batteries. Refer to the specifications for the correct battery type. Replace batteries when the low battery indicator appears in HOBOware or if the logger fails to power on.
- Ensure the logger is not actively logging data. If it is, stop the deployment and offload any critical data.
- Open the hinged door and locate the battery compartment.
- Carefully remove the old batteries and dispose of them according to local regulations.
- Fanye batrị ọhụrụ, na-ahụ polarity ziri ezi.
- Close the battery compartment and the hinged door securely.
5.2. Nhicha na Nchekwa
Regular cleaning and proper storage ensure the longevity and accuracy of your data logger.
- Wipe the exterior of the logger with a damp akwa . Ejila ihe nchacha abrasive ma ọ bụ ihe mgbaze.
- Ensure all ports and seals are free of dirt and debris.
- When not in use, store the logger in a cool, dry place away from direct sunlight and extreme temperatures.
- If storing for extended periods, remove the batteries to prevent leakage.
6. Nchọpụta nsogbu
This section addresses common issues you might encounter with your HOBO H21-USB Micro Station.
| Nsogbu | Ihe nwere ike ime | Ngwọta |
|---|---|---|
| Logger not recognized by HOBOware. |
|
|
| Logger not recording data. |
|
|
| Inaccurate sensor readings. |
|
|
If you encounter issues not covered here, please refer to the Onset support websaịtị ma ọ bụ kọntaktị nkwado teknụzụ.
7. Nkọwapụta
| Njirimara | Nkọwa |
|---|---|
| Nlereanya | H21-USB |
| Ụdị | Mmalite |
| Ngwaọrụ Akụrụngwa | USB |
| Ngwa dakọtara | PC (Windows), Mac |
| Number of Smart Sensor Inputs | 5 |
| Mgbakọta ọdụ ụgbọ mmiri USB | 1 |
| Ibu Ibu | 2.3 pound |
| Ngosi ihe mkpuchi | IP66 (ihe mkpuchi ihu igwe) |
| Nleba akwadoro | 4-20mA, Amp Hour, Barometric Pressure, DC Voltage, Kilowatt Hours, Leaf Wetness, Light Intensity, Power Factor, Pulse Input, Rainfall, Relative Humidity, Soil Moisture, Temperature, Volt-Amp Reactive, Volt-Amp Reactive hour, Volt-Amps, Water Flow, Watt Hours, Watts, Wind (Requires compatible Smart Sensors) |
| Environment na-arụ ọrụ | Ime ụlọ na n'èzí |
| UPC | 645759321725 |
| ASIN | B07N92MPXS |
8. Akwụkwọ ikike na nkwado
8.1. Akwụkwọ ikike ngwaahịa
Onset products are typically covered by a limited warranty against defects in materials and workmanship. The specific duration and terms of the warranty may vary. Please refer to the warranty information provided with your purchase documentation or visit the official Onset websaịtị maka amụma nkwa zuru ezu.
This warranty generally covers the repair or replacement of defective units, but does not cover damage caused by misuse, improper installation, unauthorized modification, or natural disasters.
8.2. Nkwado nka na ụzụ
For technical assistance, troubleshooting, or questions regarding your HOBO H21-USB Micro Station, please contact Onset Technical Support.
- Nkwado n'ịntanetị: Visit the Onset support website for FAQs, knowledge base articles, and software downloads: www.onsetcomp.com/support
- Ozi mkpọtụrụ: Refer to the Onset website for current phone numbers and email addresses for technical support.
When contacting support, please have your product model (H21-USB) and a detailed description of the issue ready.