
1. Okwu mmalite
This manual provides detailed instructions for the safe and efficient operation of your Unbranded DC-330Pro 13-inch A3 Mini Vinyl Cutter Plotter. Please read this manual thoroughly before using the machine to ensure proper setup, usage, and maintenance. Keep this manual for future reference.
The DC-330Pro model features upgraded movable paper rollers for better material stabilization, an additional communication interface for USB flash drives, an integrated screen display for improved user interaction, and a camera-based A3 positioning system for higher accuracy. The number of paper rollers has been increased from 2 to 3 to prevent material lifting or curling.
2. Nchekwa nchekwa
- A ga-ewepụrịrị ihe nchebe tupu ịgbanye onye na-akpa nkata ịkpụ.
- Lelee akara dị n'azụ azụ nke onye na-akpa nkata iji gosi na voltage chọrọ site na onye na-akpa nkata dabara na voltage nke isi ike.
- Firstly make sure that the power switch is off, then plug the power supply into a grounded power outlet.
- Biko ejikwala aka mmiri emetụ eriri ọkụ ahụ aka ka ị ghara ịma jijiji eletrik.
- Biko jiri naanị eriri ọkụ, eriri data enyere na ngwaahịa a, ma ọ bụ nnọchi ndị nrụpụta kwadoro.
- Biko atụbakwala ihe igwe na mmiri mmiri n'ime igwe ka ịzenarị arụ ọrụ.
- Mgbe emechara, ị ga-echere sekọnd 5 ọzọ ka ịgbanye onye na-egbutu osisi ahụ ọzọ, ma ọ bụghị ya, ọ ga-emebi onye na-ese ihe.
- Na égbè eluigwe, gbanye ọkụ ọkụ ka ọ bụrụ gbanyụọ wee wepụ eriri ọkụ.
- Please do not privately change the manufacturer's components.
- Onye nrụpụta nwere ikike ịgbanwe nkọwapụta ngwaahịa na-enweghị ọkwa mbụ.
- Onye nrụpụta ahụ na-ebu naanị ọrụ iwu nke ngwaahịa n'onwe ya erere ndị ọrụ, na anaghị ebu mfu ndị ọzọ kpatara mmebi nke ngwaahịa ahụ.
- Enweghị ikike ụlọ ọrụ anyị, ọ nweghị akụkụ nke akwụkwọ ntuziaka a nwere ike ịdepụta ma ọ bụ bufee n'aha ọ bụla.
3. Ndepụta nkwakọ ngwaahịa
Ensure all items are present and undamaged upon unpacking:
- 1 x Isi ngalaba
- 1 x Power Adapter (110-240V)
- 1 x eriri ọkụ
- 1 x USB Data USB
- 1 x USB Flash Drive
- 1 x Cutting Blade Holder, Set of Blades (45°)
- 1 x Drawing Pen Holder, Pen Cartridge
- 2 x Cutting Mat
- 1 x kaadị ikike
4. Ngwaahịa gafereview
Familiarize yourself with the main components and features of your vinyl cutter.
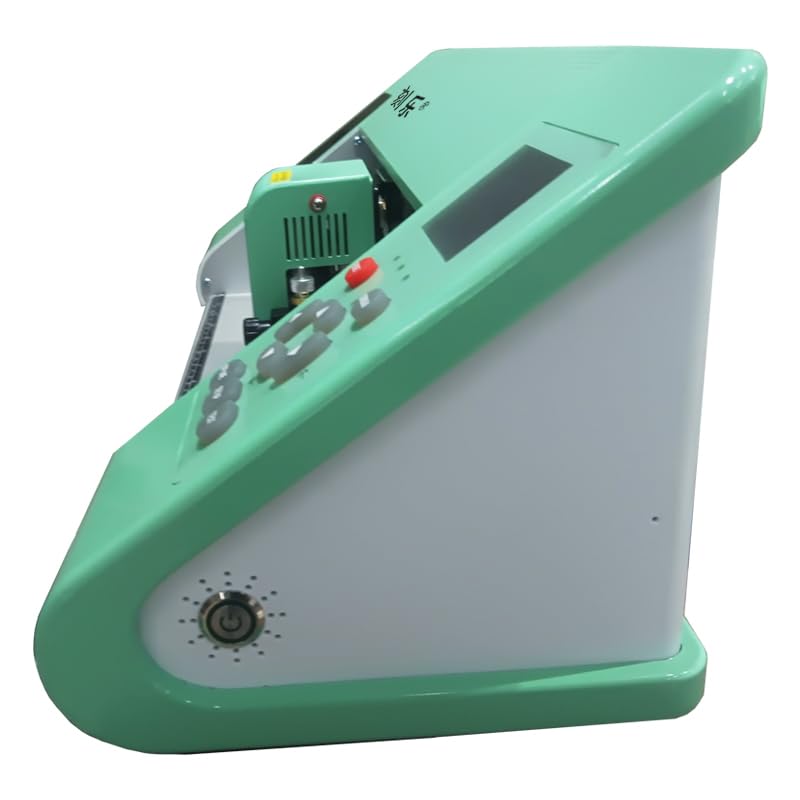
Foto 4.1: Akụkụ view of the DC-330Pro vinyl cutter.

Figure 4.2: Dimensions of the DC-330Pro vinyl cutter (63cm/24.8in length, 17.5cm/6.89in height, 18cm/7.09in depth).

Figure 4.3: Front and rear component identification. Front: Tool Box, Blade Pad, Cutting Mat, Blade Holder, Paper Holder, Rest, Speed, Origin, Pressure, Offline, Setup, Test. Rear: Power Socket, USB Flash Drive Port, USB Data Cable Port, Paper Holder Lever, Paper Holder.
Figure 4.4: Detailed component breakdown. Key parts include the pinch rollers, carriage, blade clamp, touch screen, and various ports.
5. Nhazi
5.1 Assemble Floor Stand (If applicable)
If your model includes a floor stand, follow these steps for assembly:
- Attach the horizontal support bars to the vertical legs using the provided screws and screwdriver. Ensure all connections are secure.
- Install the caster wheels onto the base of the vertical legs.
- Mount the vinyl cutter main unit onto the assembled stand, aligning the mounting points and securing with screws.
Video 5.1: Visual guide for assembling the plotter stand and mounting the unit.
5.2 Plug in the Power Cord
Connect the power cable to the plotter's power socket and then to a grounded electrical outlet. Ensure the power switch is in the OFF position before connecting.
Video 5.2: Demonstration of connecting the power cord and turning on the unit.
5.3 Connect the USB Cable to Computer
Connect the provided USB data cable from the plotter to your computer's USB port.
Video 5.3: Guide on connecting the USB cable for computer communication.
5.4 Place the Paper to be Cut
Load your vinyl or other cutting material onto the rollers. Ensure it is aligned straight and free of wrinkles.
Video 5.4: Instructions for loading the cutting material onto the plotter.
5.5 Press the Pressure Rollers
Lower the pressure rollers to firmly hold the material in place. This prevents shifting during the cutting process.
Video 5.5: How to engage the pressure rollers to secure the material.
5.6 Install the Blade
Carefully insert the cutting blade into the blade holder. Ensure it is seated correctly.

Figure 5.1: Blade assembly diagram.
Video 5.6: Visual guide for installing the blade into the holder.
5.7 Adjust Blade Depth
Loosen the blade adjustment nut and rotate the shank to adjust the length of the exposed blade tip. Determine the tip length according to the thickness of the material. A test cut is recommended to find the optimal depth.
Figure 5.2: Blade depth adjustment for various material thicknesses.
Video 5.7: Demonstration of adjusting the blade depth and performing a test cut.
5.8 Nwụnye ngwanrọ
Insert the provided USB Flash Drive into your computer. Follow the on-screen instructions to install the SignMaster software. You will need to enter the Product Serial Number (PSN) found on the left side of the opened software box to activate the software.
Video 5.8: Step-by-step guide for installing and activating the SignMaster software.
6. Ntuziaka ọrụ
6.1 Ogwe njikwa gafereview
The control panel allows you to navigate menus, adjust settings, and control the plotter's movement.

Figure 6.1: Control buttons description and operation instructions flowchart.
6.2 Setting Origin Point
Use the arrow keys on the control panel to move the blade carriage to your desired starting position on the material. Press the 'Origin' button to set this as the new origin point for your cut.
Video 6.1: How to use the control panel to set the cutting origin.
6.3 Test Cut
Perform a test cut to verify the blade depth and pressure settings are appropriate for your material. Adjust as needed.
Video 6.2: Performing a test cut and adjusting blade settings.
6.4 Sending Design to Cutter
Once your design is ready in the SignMaster software, select the appropriate cutter model and media width. Click 'Cut Now' to send the design to the plotter.
Video 6.3: Steps to prepare and send a design from the software to the vinyl cutter.
6.5 Weeding Vinyl
After cutting, carefully remove the excess vinyl from around your design using a weeding tool. This process reveals your final cut design.
Video 6.4: Demonstration of weeding excess vinyl from a cut design.
6.6 Applying Transfer Tape
Apply transfer tape over your weeded vinyl design. Use a squeegee to ensure the vinyl adheres to the tape and remove any air bubbles.
Video 6.5: Guide on applying transfer tape to the vinyl design.
6.7 Painting with Stencil (Optional)
If using the vinyl as a stencil, apply it to your surface. For best results and to prevent bleeding, seal the stencil with a thin layer of your base coat paint before applying the final color.
Video 6.6: Tips for using vinyl as a stencil for painting projects.
7. Nlekọta
- Nhicha: Regularly clean the plotter's surface and rollers with a soft, dry cloth. Ensure no dust or debris accumulates in the cutting area.
- Ndochi agụba: Replace blades when they become dull to ensure clean and precise cuts. Refer to section 5.6 for blade installation.
- Mmelite ngwanrọ: Periodically check for software updates to ensure optimal performance and compatibility.
8. Nchọpụta nsogbu
| Nsogbu | Ihe nwere ike ime | Ngwọta |
|---|---|---|
| Cutter not responding | Loose cable connection, software not activated, incorrect driver. | Check USB and power connections. Ensure software is activated and the correct cutter model is selected in the software. |
| Ogbenye ịkpụ mma | Dull blade, incorrect blade depth, insufficient pressure, material not secured. | Replace blade, adjust blade depth (Section 5.7), increase cutting pressure, ensure material is held firmly by rollers. |
| Material jams or shifts | Material not loaded straight, pressure rollers not engaged, material too thick/thin. | Reload material straight, engage pressure rollers, verify material compatibility with cutter specifications. |
9. Nkọwapụta
- Ụdị: DC-330Pro
- Voltage: AC 100-240V
- Oke. Obosara nri: 450mm
- Oke. Ogologo Mbelata: 310mm
- Ọkpụrụkpụ ịkpụ: ≤1mm
- Ọsọ/nrụgide: 20-800mm / s, 20-500g
- Nchekwa: 1-4M
- Ngosipụta LCD: CN/EN
- Ọsọ n'oge a: Nkwado Nkwado
- Ihuenyo: USB+U-DISK
- Ọrụ mweghachi: Nkwado
- Izizi nke ziri ezi: 0.127mm
- Usoro mkpebi: 0.0245mm / nzọụkwụ
- Ụdị asụsụ: HPGL
- Ibu ihe: 20 pound
- Ihe: Ọla
- Agba: Uhie
- Active Surface Area: 928.6 square sentimita
- Ụdị ọrụ: Akpaaka
10. Akwụkwọ ikike
This product includes a Warranty Card. Please refer to the Warranty Card included in your packaging for detailed information regarding warranty coverage, terms, and conditions. Keep your proof of purchase for warranty claims.
11. Nkwado
For technical assistance, troubleshooting, or inquiries about your Unbranded DC-330Pro vinyl cutter, please contact your retailer or the manufacturer's customer support. Refer to the contact information provided on the product packaging or the official websaịtị.