
1. Okwu mmalite
The Cricut Brayer and Mat Remover Set is designed to enhance your crafting experience by providing essential tools for material application and removal. The brayer ensures materials adhere smoothly and securely to your cutting mat, while the mat remover assists in safely detaching cut materials without damage.
2. Ngwa gụnyere
- Cricut Brayer: A roller tool with a soft rubber surface, designed for pressing materials onto cutting mats.
- Cricut Mat Remover: A broad-tipped tool, resembling tweezers, used for gently lifting materials from the cutting mat.

Figure 1: The Cricut Brayer and Mat Remover tools.
3. Nhazi
No assembly is required for these tools. Ensure your cutting mat is clean and free of debris before use to maximize adhesion and cutting precision. For optimal results, always work on a flat, stable surface.
4. Ntuziaka ọrụ
4.1 Using the Cricut Brayer
- Place your material (e.g., vinyl, fabric, paper) onto the adhesive surface of your Cricut cutting mat.
- Starting from the center of the material, gently roll the brayer outwards across the entire surface.
- Apply even pressure to ensure the material adheres firmly to the mat, eliminating air bubbles and wrinkles. This helps prevent material shifting during cutting.

Figure 2: A hand demonstrating the use of the Cricut Brayer to smooth fabric onto a cutting mat.
4.2 Using the Cricut Mat Remover
- After your design has been cut, carefully bend the cutting mat away from the material.
- Use the broad-tipped end of the mat remover to gently slide under the edge of your cut material.
- Slowly lift the material from the mat, working around the edges to avoid tearing or stretching the design. The mat remover's design helps to minimize contact with the adhesive, preserving mat stickiness.
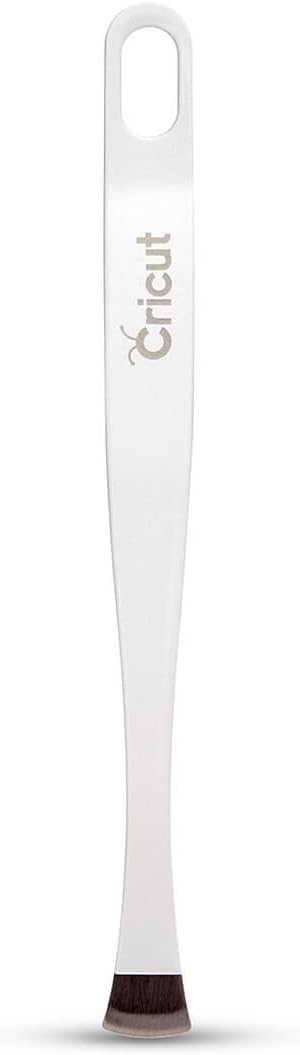
Figure 3: The Cricut Mat Remover tool, designed for delicate material removal.
4.3 Video ngosi ngwaahịa
Vidiyo nke 1: Ngosipụta ngosipụta ngwaahịa gọọmentịasing the use of the Cricut Brayer and Mat Remover tools for various crafting tasks.
5. Nlekọta
- Brayer: Clean the rubber roller with a damp cloth after each use to remove any adhesive residue or material fibers. Allow it to air dry completely before storing.
- Mat Remover: Wipe the broad tip with a clean, dry cloth. If adhesive builds up, gently clean with a mild adhesive remover, ensuring to rinse thoroughly and dry.
- Nchekwa: Store tools in a clean, dry place away from direct sunlight and extreme temperatures to prolong their lifespan.
6. Nchọpụta nsogbu
- Material not sticking to mat: Ensure the mat is clean. Use the brayer with firm, even pressure across the entire material surface. If the mat's adhesive is worn, consider using a new mat or a stronger grip mat for heavier materials.
- Material tearing during removal: Always bend the mat away from the material, rather than peeling the material off the mat. Use the mat remover gently and slowly. For delicate materials, use a light grip mat.
- Tools feel sticky: Clean the brayer roller and mat remover tip as described in the Maintenance section.
7. Nkọwapụta
- Akara: Cricut
- Ihe: Ọla, plastik, rọba
- Ụdị ọrụ: Akwụkwọ ntuziaka
- Ibu ihe: Ihe dị ka 0.43 Pound (0.2 n'arọ)
- Ngwa gụnyere: 1 Brayer, 1 Mat Remover

Figure 4: Approximate dimensions of the Cricut Brayer.
8. Akwụkwọ ikike na nkwado
For information regarding product warranty, returns, or technical support, please refer to the official Cricut website or contact Cricut customer service directly. Keep your proof of purchase for any warranty claims.
Nkwado n'ịntanetị: Gaa leta Cricut.com for FAQs, tutorials, and contact information.