
1. Okwu mmalite
This manual provides detailed instructions for the safe and effective operation of your Profile 191000001 Digital Multimeter. This device is designed for measuring DC/AC voltage, DC current, resistance, diode forward voltage drop, and transistor hFE. Please read this manual thoroughly before use and retain it for future reference.
2. Ozi nchekwa
WARNING: Failure to follow these safety instructions can result in electric shock, fire, or personal injury.
- Jide n'aka na igwe mita ahụ nọ n'ọnọdụ dị mma tupu ejiri ya. Lelee ihe nlele ule maka mmebi.
- Etinyekwala ihe karịrị ogo voltage (600V DC/AC) between the terminals or between any terminal and ground.
- Jiri nlezianya dị oke egwu mgbe ị na-arụ ọrụ na voltages karịrị 30V AC RMS, 42V elu, ma ọ bụ 60V DC. Vol ndị atages na-ebute ihe egwu ujo.
- Mgbe niile, wepụ ihe nlele ule ahụ na sekit ahụ tupu ị gbanwee ọrụ.
- Do not attempt to measure current on a circuit with voltage karịrị 600V.
- Ensure the correct function and range are selected for the measurement.
- Dochie batrị mgbe ihe ngosi batrị dị ala pụtara iji hụ na agụpụtara nke ọma.
- Ejila igwe multimeter arụ ọrụ n'ebe ihe na-agbawa agbawa ma ọ bụ n'ebe gas ma ọ bụ uzuzu na-ere ọkụ nọ.
3. Ihe ngwugwu
Chọpụta na ihe niile edepụtara n'okpuru dị na ngwugwu gị:
- Profile Igwe ihe ntanetị dijitalụ 191000001
- One pair of Test Leads (Red and Black)
- Transistor hFE Test Adapter
- 2 x 1.5V AAA Batteries (may be pre-installed)
- Akwụkwọ ntuziaka onye ọrụ

Figure 1: The Profile 191000001 Digital Multimeter, including the main unit, red and black test leads, and the hFE transistor test adapter.
4. Nhazi
4.1. Ntinye batrị
The multimeter requires two 1.5V AAA batteries for operation. These are typically included and may be pre-installed. If not, or if replacement is needed:
- Hụ na agbanyụrụla multimeter ahụ.
- Chọta ebe mkpuchi batrị n'azụ unit ahụ.
- Jiri screwdriver wepụ skru ahụ nke na-ejide mkpuchi ahụ.
- Insert the two AAA batteries, observing the correct polarity (+ and - markings).
- Dochie mkpuchi nke batrị batrị ma jiri nkedo chekwaa ya.
4.2. Ijikọ ụzọ ule
The test leads are essential for making measurements. Connect them as follows:
- Tinye isi ule ojii ahụ n'ime jakị 'COM' (Common).
- Maka ọtụtụ voltage, resistance, and diode measurements, insert the red test lead into the 'VΩmA' jack.
- For current measurements up to 10A, insert the red test lead into the '10A' jack.
5. Ntuziaka ọrụ
The multimeter features a rotary switch to select the desired measurement function and range. The display will show the measurement value.
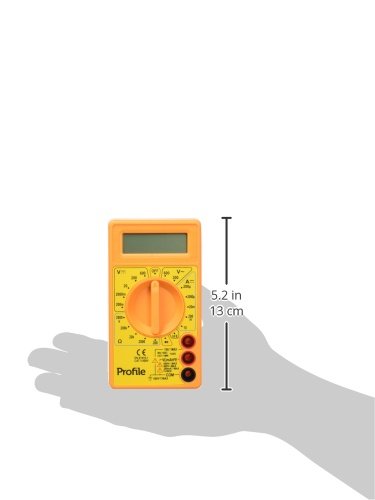
Figure 2: The Profile 191000001 Digital Multimeter with an overlay indicating its approximate dimensions (13 cm height).
5.1. Ịtụ DC Voltage (V---)
- Connect the red test lead to the 'VΩmA' jack and the black test lead to the 'COM' jack.
- Tọọ mgba ọkụ rotary na DC Vol achọrọtage range (e.g., 20V, 200V, 600V). If the voltage is unknown, start with the highest range and decrease as needed.
- Connect the test leads in parallel across the component or circuit to be measured.
- Gụọ voltage uru na ngosi.
5.2. Atụ AC Voltage (V~)
- Connect the red test lead to the 'VΩmA' jack and the black test lead to the 'COM' jack.
- Tọọ mgba ọkụ na-agbanwe agbanwe na AC Vol achọrọtage range (e.g., 200V, 600V).
- Connect the test leads in parallel across the AC source or component.
- Gụọ voltage uru na ngosi.
5.3. Measuring DC Current (A---)
CAUTION: To avoid damage to the multimeter or the circuit, never connect the multimeter in parallel when measuring current. Always connect it in series.
- For currents up to 200mA, connect the red test lead to the 'VΩmA' jack. For currents up to 10A, connect the red test lead to the '10A' jack. The black test lead always connects to 'COM'.
- Set the rotary switch to the desired DC Current range (e.g., 200µA, 2mA, 20mA, 200mA, 10A).
- Open the circuit where current is to be measured and connect the multimeter in series.
- Gụọ uru dị ugbu a na ngosi.
5.4. Measuring Resistance (Ω)
- Connect the red test lead to the 'VΩmA' jack and the black test lead to the 'COM' jack.
- Set the rotary switch to the desired Resistance range (e.g., 200Ω, 2kΩ, 20kΩ, 200kΩ, 2MΩ).
- Hụ na sekit ma ọ bụ akụkụ ahụ anaghị arụ ọrụ nke ọma tupu ị tụọ ihe ndị na-eguzogide ya.
- Jikọọ ndị na-enye ule n'ofe akụkụ ahụ.
- Gụọ uru ndị na-eguzogide na ngosipụta.
5.5. Nnwale diode
- Connect the red test lead to the 'VΩmA' jack and the black test lead to the 'COM' jack.
- Set the rotary switch to the diode symbol (→|).
- Connect the red lead to the anode and the black lead to the cathode of the diode. The display will show the forward voltage dobe.
- Reverse the leads. The display should show 'OL' (Overload) for a good diode.
5.6. Nnwale transistor hFE
- Set the rotary switch to the 'hFE' position.
- Insert the transistor hFE test adapter into the designated sockets on the multimeter.
- Identify if the transistor is NPN or PNP and its Emitter (E), Base (B), Collector (C) terminals.
- Insert the transistor leads into the corresponding holes on the hFE adapter.
- Read the hFE (DC current gain) value on the display.
6. Nlekọta
6.1. Ngbanwe batrị
When the low battery indicator appears on the display, replace the batteries promptly to ensure accurate measurements. Refer to Section 4.1 for battery installation instructions.
6.2. Nhicha
Iji hichaa multimeter, hichaa akpa ahụ na mgbasa oziamp ákwà na ihe nhicha dị nro. Ejila ihe na-eme ka ihe dị nro ma ọ bụ ihe mgbaze ghara ịdị. Hụ na ngwaọrụ ahụ kpọrọ nkụ kpamkpam tupu e jiri ya.
6.3. Nchekwa
If the multimeter is not used for an extended period, remove the batteries to prevent leakage and store the device in a cool, dry place away from direct sunlight.
7. Nchọpụta nsogbu
- Enweghị ngosipụta ma ọ bụ ngosipụta dị nro: Check battery charge and ensure they are correctly installed. Replace batteries if necessary.
- 'OL' (Overload) on display: Uru a tụrụ gafere oke ahọpụtara. Gbanwee gaa na oke dị elu.
- Ọgụgụ na-ezighi ezi: Ensure test leads are properly connected, the correct function and range are selected, and the batteries are not low. Verify the circuit is de-energized for resistance measurements.
- No reading for current: Ensure the multimeter is connected in series with the circuit and the correct current jack (VΩmA or 10A) is used for the red lead.
8. Nkọwapụta
| Njirimara | Nkọwapụta |
|---|---|
| Nọmba nlereanya | 191000001 |
| Max DC/AC Voltage | 600V |
| Max DC Current | 10A |
| Ntụle Nguzogide | Ee |
| Nleba diode | Ee |
| Ntụkọ transistor hFE | Ee |
| Isi Iyi Ike | 2 x 1.5V batrị AAA |
| Akụkụ ngwaahịa (L x W x H) | 13.5 x 3 x 18.9 cm (5.3 x 1.2 x 7.4 inch) |
| Ibu ngwaahịa | 0.22 n'arọ (0.48 lbs) |
| Onye nrụpụta | Eltra N.V. |
9. Akwụkwọ ikike na nkwado
9.1. Akwụkwọ ikike
This Profile 191000001 Digital Multimeter comes with a 2-year warranty from the date of purchase, covering manufacturing defects. This warranty does not cover damage caused by misuse, unauthorized modification, accident, or normal wear and tear.
9.2. Nkwado ndị ahịa
For technical assistance, warranty claims, or further inquiries, please contact your retailer or the manufacturer's customer support channels. Please have your product model number and proof of purchase ready when contacting support.