
Ozi nchekwa dị mkpa
Ịdọ aka ná ntị: To avoid electric shock, always disconnect power at the main circuit breaker or fuse box before beginning installation or performing any maintenance. This product must be installed in accordance with the applicable installation code by a person familiar with the construction and operation of the product and the hazards involved. If you are unsure about any part of the installation process, consult a qualified electrician.
Atụmatụ ịdọ aka ná ntị 65: Ngwaahịa a nwere ike ịnwe kemịkalụ ndị Steeti California maara na ha na-akpata ọrịa kansa na nkwarụ ọmụmụ ma ọ bụ mmerụ ahụ ọzọ metụtara ọmụmụ nwa. Biko lelee iwu obodo gị tupu ịzụrụ ya.asing ngwaahịa a.
Always use a stable ladder and ensure all connections are secure. Do not exceed the maximum wattage akọwapụtara maka bọlbụ ahụ.
Ihe ngwugwu
Verify that all components are present before beginning installation. The package should include:
- Chandelier fixture body with adjustable arms
- Mounting bracket and hardware (screws, nuts, washers)
- Canopy
- Chain (if applicable for hanging height adjustment)
- Akwụkwọ ntuziaka
- Ozi akwụkwọ ikike
Note: Light bulbs are typically sold separately. This fixture requires eight medium G40 up to 100W bulbs.
Ntuziaka nwụnye
Ngwa achọrọ (anaghị etinye ya):
- Phillips isi sikruuokwomoto
- Ihe mkpuchi flathead
- Waya waya
- Pliers
- Igwe ọkụ eletrik
- Voltagọ bụ onye nyocha
- Ubube nzọụkwụ
Nzọụkwụ 1: Kwadebe maka nwụnye
- Kwụpụ ike: Locate the main circuit breaker or fuse box for your home and turn off the power to the circuit where you will be installing the chandelier.
- Verify Power is Off: Jiri voltage tester to confirm that the power is completely off at the junction box where the fixture will be installed.
- Wepụ ihe ndozi ochie: Carefully remove any existing light fixture from the ceiling, disconnecting its wiring.
- Bupụ ma nyochaa: Unpack the new Kichler Armstrong Chandelier and all its components. Inspect for any damage or missing parts.
Kwụpụ 2: Wụnye ihe nrịbama ugwu
- Attach the mounting bracket to the ceiling junction box using the provided screws. Ensure it is securely fastened.
- Thread the fixture's wires through the mounting box and prepare them for connection.
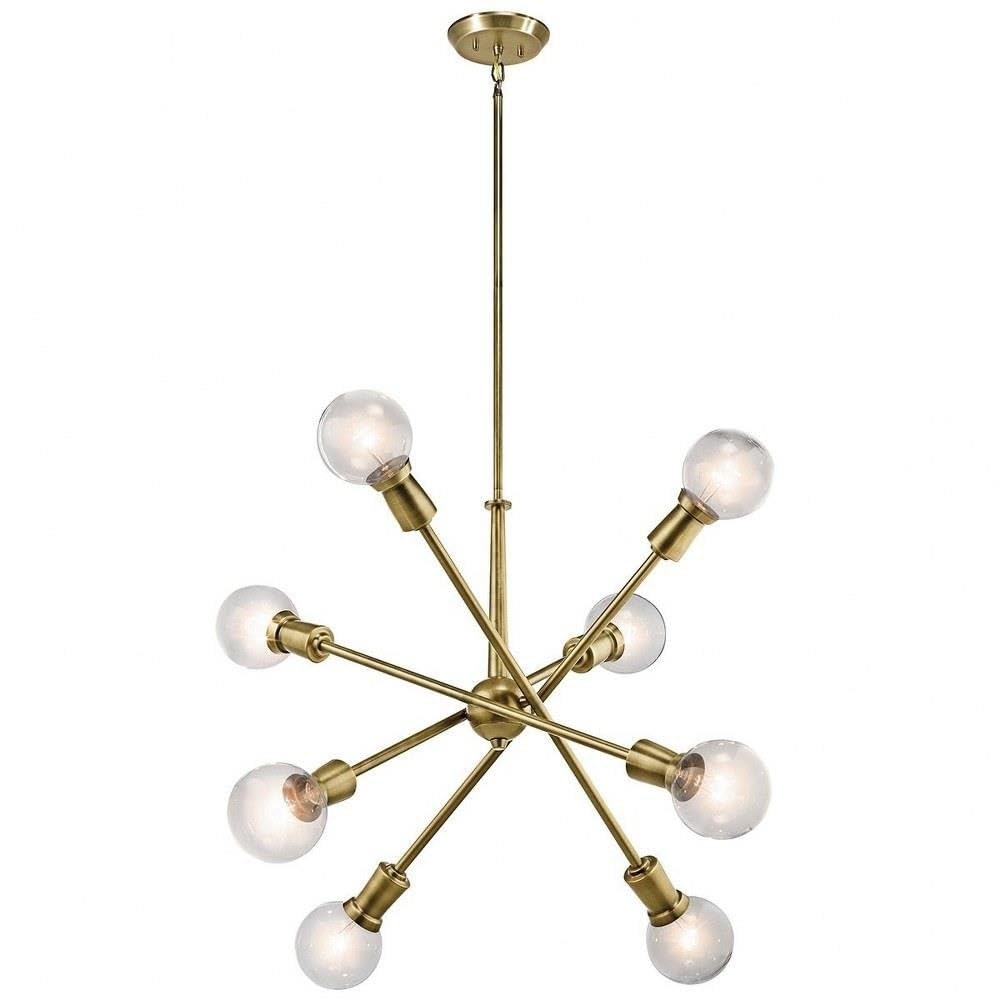
Image: The Kichler Armstrong 8-Light Chandelier in Natural Brass finish, showcasing its adjustable arms and exposed bulbs.
Nzọụkwụ 3: Njikọ Waya
- Waya ala: Connect the bare copper ground wire from the fixture to the ground wire from the junction box (usually bare copper or green) using a wire nut. If your junction box has a ground screw, wrap the ground wire around it before connecting.
- Waya na-anọpụ iche: Jikọọ waya ọcha ahụ site na ihe nkwụnye ahụ gaa na waya ọcha (nke na-anọpụ iche) site na igbe njikọ ahụ site na iji waya aki.
- Hot Wire: Jikọọ waya ojii ahụ site na ihe nkwụnye ahụ gaa na waya ojii (ọkụ) site na igbe njikọ ahụ site na iji waya aki.
- Njikọ echekwara Ensure all wire nuts are tightly secured. Wrap electrical tape around each wire nut and connection for added safety.
- Waya Tuck: Jiri nlezianya tinye waya niile ejikọtara n'ime igbe njikọ ahụ, hụ na waya ọ bụla adịghị n'otu aka.
Nzọụkwụ 4: Wụnye Fixture
- Raise the canopy of the chandelier to the ceiling, aligning it with the mounting bracket.
- Secure the canopy to the mounting bracket using the provided hardware (e.g., decorative nuts or screws).
- Adjust the arms of the chandelier to your desired horizontal or vertical configuration.

Image: The Kichler Armstrong Chandelier configured with its arms spread horizontally, ideal for wider spaces.

Image: The Kichler Armstrong Chandelier configured with its arms clustered vertically, suitable for narrower or taller spaces.
Step 5: Install Light Bulbs
- Carefully screw the eight medium G40 bulbs (up to 100W each) into the sockets. Do not overtighten.
Nduzi Vidiyo Nwụnye:
Video: A step-by-step guide on how to install Kichler Chandeliers and Pendants. This video demonstrates general installation procedures for Kichler lighting fixtures.
Ntuziaka ọrụ
Once installation is complete and verified, restore power at the main circuit breaker. Operate the chandelier using your wall switch. The adjustable arms allow for customization of light direction and aesthetic. Gently reposition the arms as desired, ensuring not to apply excessive force.
Nlekọta
- Nhicha: To clean the fixture, ensure power is off. Wipe with a soft, dry cloth. Do not use abrasive cleaners or solvents as they may damage the finish.
- Ndokwa bọlbụ: Always turn off power before replacing bulbs. Allow bulbs to cool before handling. Replace with eight medium G40 bulbs, not exceeding 100W per bulb.
- Nyocha: Na-elele njikọ niile na ngwa mgbakwunye maka ike ha.
Nchọpụta nsogbu
| Nsogbu | Ihe nwere ike ime | Ngwọta |
|---|---|---|
| Ìhè anaghị agbanwuo |
|
|
| Ọkụ na-egbuke egbuke |
|
|
Nkọwapụta
| Nọmba nlereanya | 43118NBR |
| Ụdị | Kichler |
| Agba | Eke Brass |
| Ihe onwunwe | Alloy Steel, Glass |
| Ụdị | Modern, Contemporary/Mid-Century Modern |
| Ụdị ihe nrụnye ọkụ | Chandelier |
| Ụdị ụlọ | Living Room, Dining Room, Kitchen, Foyer |
| Ojiji ime ime/n'èzí | Ime ụlọ |
| Isi Iyi Ike | Igwe ọkụ eletrik |
| Isi Iyi Ìhè | Incandescent |
| Ọnụọgụ nke isi mmalite ọkụ | 8 |
| Voltage | 120 volts |
| Wattage | 100 watts (per bulb) |
| Isi Bulb | E26 |
| Akụkụ akụkụ L x W x H | 30"L x 30"W x 26"H |
| Ibu Ibu | 8 pound |
| Mgbakọ achọrọ | Ee |
Akwụkwọ ikike na nkwado
Akwụkwọ ikike onye nrụpụta: This Kichler product comes with a limited warranty of one (1) year from the date of purchase.
For additional support, troubleshooting, or to explore coordinating products, please visit the official Kichler Store: Ụlọ Ahịa Kichler dị na Amazon.