
1. Okwu mmalite
Daalụ maka ịzụrụasing the RHYTHM 8RZ166SR03 Fit Wave Smart Alarm Clock. This device is a radio-controlled alarm clock equipped with a thermometer, hygrometer, and calendar display. Its compact design and user-friendly interface make it ideal for various indoor settings. This manual provides detailed instructions to help you set up, operate, and maintain your new alarm clock.
Akụkụ ndị bụ isi:
- Atomic Clock Movement: Automatically synchronizes time via radio waves for precise accuracy.
- Okpomọkụ Ngosipụta: Shows ambient temperature from -9.9 to 50 ℃.
- Ngosipụta iru mmiri: Shows ambient humidity from 20% to 95%.
- Electronic Sound Alarm: Features an alarm with an auto-stop function.
- Ọrụ Sooze: Mechie mkpu nwa oge.
- Dial Light: Includes an afterglow function for visibility in low light (5 seconds).
- Ngosipụta kalenda: Shows date and day of the week, including Rokuyoku (Japanese traditional calendar).
- 12/24 Hour Display: Switchable time format.
2. Ihe ngwugwu
Biko lelee ma ihe niile dị na ngwugwu ahụ:
- RHYTHM 8RZ166SR03 Fit Wave Smart Alarm Clock
- Akwụkwọ ntuziaka (akwụkwọ a)
Note: 2 x AA manganese batteries are required and sold separately.
3. Ngwaahịa gafereview
N'ihu View and Display Elements:

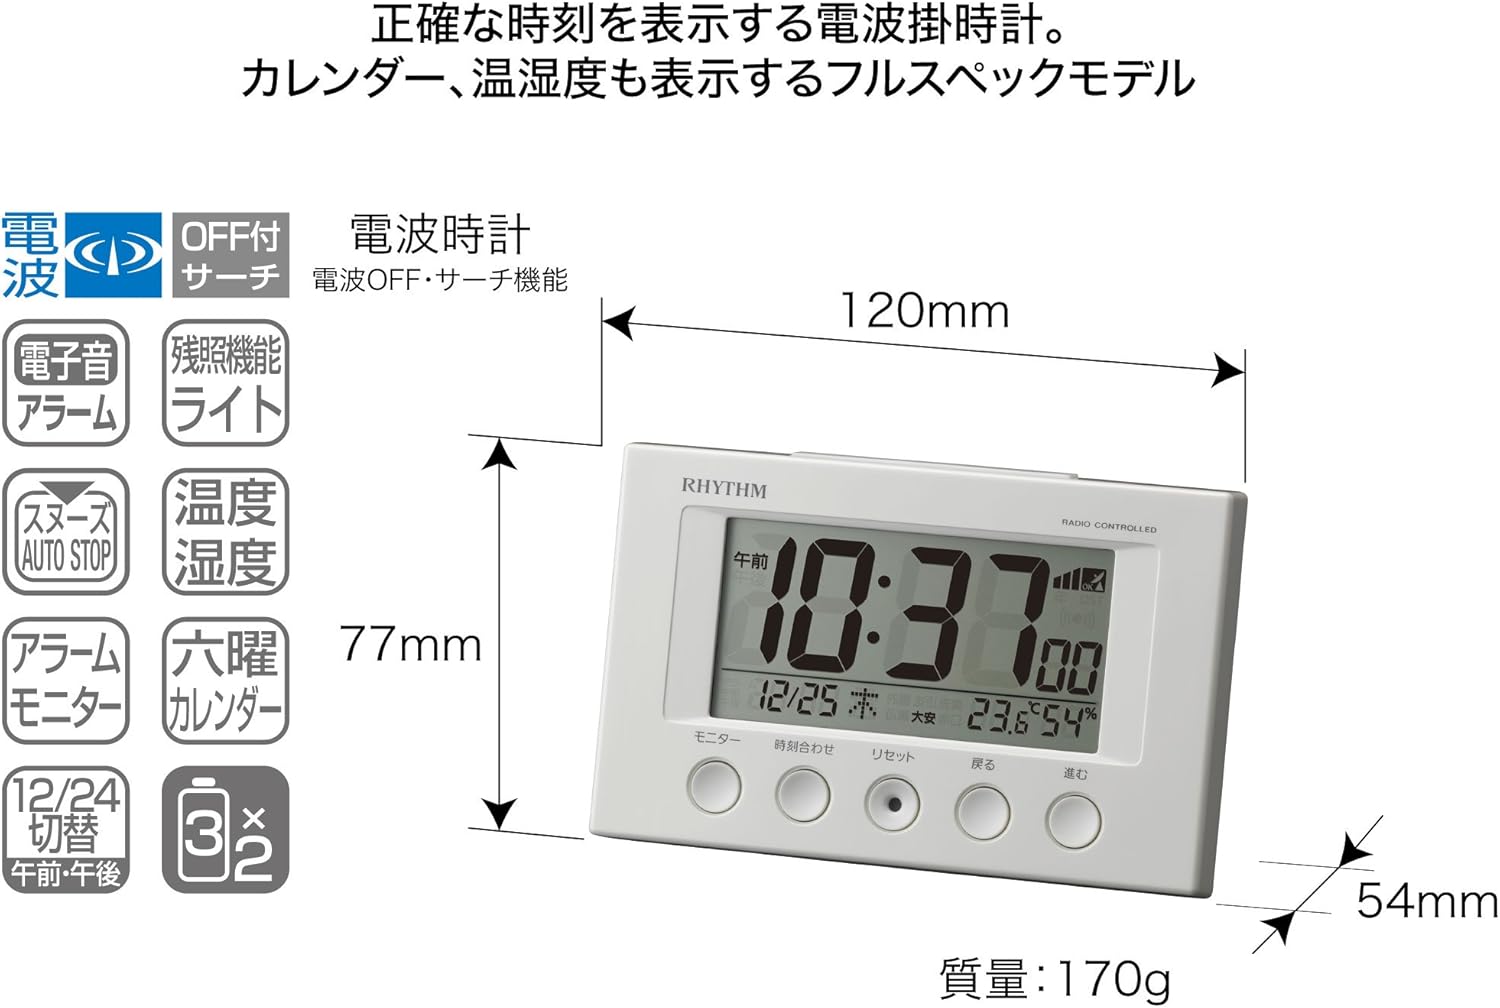
This image displays the front of the RHYTHM 8RZ166SR03 alarm clock. It features a large digital LCD screen at the top, showing time, date, temperature, and humidity. Below the screen are five circular control buttons labeled (from left to right): Monitor, Time Adjustment, Reset, Back, and Forward.

This diagram illustrates the various elements of the LCD display:
- Ngosipụta oge: Shows the current time in 12-hour (AM/PM) or 24-hour format.
- Radio Wave Reception Indicator: Displays the status of radio wave reception.
- Ihe ngosi mkpu: An icon appears when the alarm is activated.
- Okpomọkụ Ngosipụta: Na -egosi oke okpomọkụ dị n'ime ụlọ ugbu a.
- Ngosipụta iru mmiri: Shows the current room humidity.
- Ngosipụta kalenda: Shows the current date and day of the week, including Rokuyoku.
Azu View na njikwa:
The back of the clock features the alarm ON/OFF slide switch on the left side and the battery compartment cover in the center. The model number '8RZ166' and 'MADE IN CHINA' are also visible.
Control Buttons Explained:

This image details the function of each button:
- Bọtịnụ nlekota: Used to check the alarm sound.
- Time Adjustment Button: Used for manual time setting and switching between 12/24 hour display.
- Tọgharịa bọtịnụ: Resets the clock and also functions as a forced radio wave reception button.
- Back Button (←): Used to decrease values during alarm or time settings.
- Forward Button (→): Used to increase values during alarm or time settings.
- Alarm Switch (on back): Slides up for ON, down for OFF.
- Snooze Button (top): Activates the snooze function and the dial light.
4. Nhazi
4.1 Ntinye batrị
- Remove the battery compartment cover on the back of the clock.
- Insert two (2) AA manganese batteries, ensuring the correct polarity (+/-) as indicated inside the compartment.
- Dochie mkpuchi oghere batrị.
This image shows the open battery compartment with two AA batteries correctly inserted, indicating the positive and negative terminals.
4.2 Initial Power On and Radio Wave Reception
After battery installation, the clock will automatically attempt to receive radio waves to set the correct time. This process may take several minutes. Ensure the clock is placed in an area with good reception, away from electronic devices that may cause interference.

This diagram illustrates how radio-controlled clocks receive standard time signals from two transmission stations (one in Fukushima, 40kHz, and one in Fukuoka/Saga, 60kHz) to automatically correct and display the precise time. The clock will automatically adjust its time based on these signals.
If reception is successful, the time will be set automatically. If not, you may need to manually set the time (refer to Section 5.1).
5. Ntuziaka ọrụ
5.1 Manual Time and Date Setting
In cases where radio wave reception is difficult or for specific time zone adjustments:
- Pịa ma jide Ndozi oge button until the time display starts flashing.
- Jiri ihe Back (←) na Forward (→) bọtịnụ iji dozie awa.
- Pịa Ndozi oge button again to move to minutes, then adjust using Back (←) na Forward (→).
- Gaa n'ihu ịpị Ndozi oge iji gbanwee ntọala afọ, ọnwa, na ụbọchị, na-agbanwe nke ọ bụla site na iji Back (←) na Forward (→).
- Ozugbo ntọala niile ziri ezi, pịa bọtịnụ Ndozi oge button one last time to confirm and exit the setting mode.
5.2 Ntọala mkpu
- Iji tọọ oge mkpu, pịa ma jide Ndozi oge button until the alarm time starts flashing (this may require cycling past the current time settings if already in manual time setting mode).
- Jiri ihe Back (←) na Forward (→) buttons to set the desired alarm hour and minute.
- Pịa Ndozi oge bọtịnụ iji kwado oge oti mkpu.
5.3 Activating/Deactivating the Alarm
Jiri ihe Alarm ON/OFF slide switch located on the back of the clock:
- Malite mgba ọkụ UP to activate the alarm. An alarm icon will appear on the display.
- Malite mgba ọkụ N'ala to deactivate the alarm. The alarm icon will disappear.
5.4 Snooze Function and Dial Light
Mgbe oti mkpu na-ada, pịa nnukwu Bọtịnụ snooze located on the top of the clock. This will:
- Temporarily silence the alarm (snooze duration is preset).
- Activate the dial light for approximately 5 seconds, illuminating the display for easy viewna-abanye n'ọchịchịrị.
The alarm will sound again after the snooze period. To stop the alarm completely, slide the Mgbanwe mgbanyụ ọkụ/gbanyụọ ka Gbanyụọ.
5.5 Display Modes (12/24 Hour Format)
To switch between 12-hour (with AM/PM indicator) and 24-hour time formats, briefly press the Ndozi oge button outside of setting mode.
5.6 Checking Alarm Sound
Iji bu ụzọview the alarm sound, press the Nyochaa button on the front of the clock.
6. Nlekọta
6.1 Nhicha
To clean the clock, wipe it gently with a soft, dry cloth. Do not use abrasive cleaners, solvents, or chemical sprays, as these can damage the casing ma ọ bụ ngosipụta.
6.2 nnọchi batrị
When the display becomes dim or the clock functions erratically, it is time to replace the batteries. Follow the battery installation steps in Section 4.1. It is recommended to replace both batteries at the same time with new ones.
7. Nchọpụta nsogbu
| Nsogbu | Ihe nwere ike ime | Ngwọta |
|---|---|---|
| Clock does not display anything or display is dim. | Batrị anwụọla ma ọ bụ tinye na ezighi ezi. | Dochie batrị na batrị AA ọhụrụ, na-ahụ na polarity ziri ezi. |
| Time is incorrect or does not set automatically. | Poor radio wave reception; clock is outside reception area; interference from other electronics. | Move the clock to a different location, away from electronic devices. Try manual time setting (Section 5.1). Press the Reset button to force reception. |
| Oti mkpu anaghị ada ụda. | Alarm is not activated; alarm volume is too low (if adjustable); incorrect alarm time set. | Ensure the Alarm ON/OFF switch is in the ON position. Verify the alarm time is set correctly. |
| Time drifts by an hour occasionally. | Daylight Saving Time (DST) adjustment issues, especially if the clock is designed for a specific region's DST rules. | Manually adjust the time if the automatic DST adjustment is not suitable for your region. Some radio-controlled clocks are optimized for specific regional signals. |
| Display is difficult to read from certain angles. | LCD displays have optimal viewakụkụ . | Hazie nke viewing angle or the position of the clock for better clarity. |
8. Nkọwapụta
| Njirimara | Nkọwapụta |
|---|---|
| Nọmba nlereanya | 8RZ166SR03 |
| Ụdị | RHYTHM |
| Ntughari | Atomic clock (Radio-controlled) |
| Frame Ihe | Plastic |
| Ụdị ngosi | Dijitalụ LCD |
| Isi Iyi Ike | Battery Powered (2 x AA manganese batteries, sold separately) |
| Ibu Ibu | 0.17 kilogram |
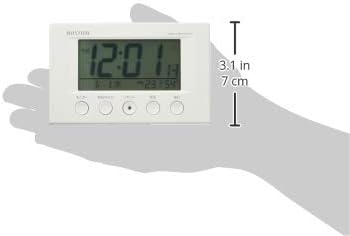
| Akụkụ ngwaahịa | 12W x 7.7H x 5.4D centimetres (approx. 4.7 x 3.0 x 2.1 inches) |
| Oke ngosi okpomoku | -9.9 ℃ ruo 50 ℃ |
| Oke ngosi iru mmiri | 20% ruo 95% RH |
| Atụmatụ pụrụ iche | Calendar Display, Humidity Display, Snooze, Temperature Display, Dial Light (afterglow function) |
| Ụdị ụlọ | Bedroom, General Indoor Use |
9. Akwụkwọ ikike na nkwado
RHYTHM products are manufactured with high-quality standards. For warranty information, please refer to the documentation provided at the time of purchase or contact your retailer. If you encounter any issues or require technical assistance, please contact the RHYTHM customer support or your local distributor. Keep your purchase receipt as proof of purchase.