
1. Okwu mmalite
This manual provides detailed instructions for the setup, operation, and maintenance of your Assistive Technology Services Personal Assistance Voice Dialer II. This system is designed to provide a reliable method for contacting pre-programmed individuals in an emergency, without requiring monthly monitoring fees.
2. Ihe ngwugwu
Before proceeding with setup, please verify that all components are present:
- Main Base Console
- Ekwentị
- Power Adapter (DC 9V 300mA)
- Ụdọ ekwentị
- Waterproof Panic Button with Lanyard and Wristband
- 23A 12V Alkaline Battery (for Panic Button, pre-installed)

Image: The complete system, including the main base console, handset, power adapter, telephone line cord, and the panic button.
3. Nhazi ntuziaka
3.1 Njikọ ike
- Connect the power adapter to the DC 9V 300mA port on the back of the main base console.
- Tinye ihe nkwụnye ọkụ n'ime oghere eletrik ọkọlọtọ.
3.2 Telephone Line Connection
- Connect one end of the telephone line cord to the 'LINE' port on the main base console.
- Jikọọ nsọtụ nke ọzọ nke eriri ekwentị ahụ na ihe mkpuchi ekwentị mgbidi gị.
- If using a Bluetooth cellular adapter (optional, not included), refer to the adapter's instructions for connection to the Voice Dialer II.
3.3 Battery Backup Installation (for Base Console)
The base console requires 4 x AA Alkaline batteries (not included) for up to 12 hours of battery backup during power outages.
- Locate the battery compartment on the underside of the main base console.
- Insert 4 AA Alkaline batteries, observing correct polarity.
- Dochie mkpuchi oghere batrị.
3.4 Programming Emergency Numbers
The system can dial up to 30 pre-programmed phone numbers in an emergency. It is recommended to program family members, friends, or neighbors.
- Ensure the 'PRO' (program) ON/OFF switch, located on the base console, is set to 'ON' to enable programming. This switch protects the unit from accidental reprogramming when set to 'OFF'.
- Press the 'PROGRAM' button on the base console.
- Enter the first emergency phone number (up to 22 digits).
- Press 'SAVE' or 'STORE' (button label may vary) to save the number.
- Repeat for additional numbers, up to 30 entries.
- After programming, set the 'PRO' switch back to 'OFF' to prevent accidental changes.
3.5 Recording Personalized Emergency Message
A personalized emergency message will be played to the recipient when the system dials out.
- Press the 'RECORD MESSAGE' button (button label may vary) on the base console.
- Speak your emergency message clearly into the microphone on the base unit.
- Press 'STOP' or 'SAVE' to end recording.
- You can play back the message to ensure clarity.
4. Ọrụ
4.1 Using the Panic Button
The waterproof panic button can be worn as a pendant or on a wristband. It is designed to be pacemaker safe.

Image: The panic button worn as a pendant for easy access.

Image: The compact panic button resting in the palm of a hand.
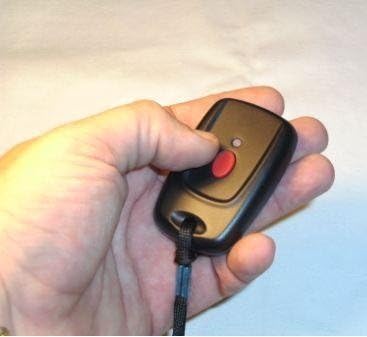
Image: A hand demonstrating how to press the red emergency button on the device.
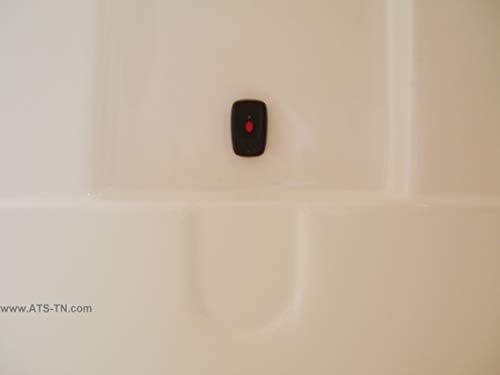
Image: The waterproof panic button affixed to a shower wall, highlighting its suitability for wet environments.
To activate an emergency call:
- Press the red button on the panic button.
- The base console will instantly begin dialing the pre-programmed numbers in sequence.
- When a call is answered, your personalized emergency message will play.
- The recipient must press '0' on their phone keypad to acknowledge the call and open two-way communication through the base console's speakerphone. This confirms the call was received by a person, not an answering machine.
- The recipient can listen in on the room for up to two minutes to assess the situation.
4.2 Ịza oku mbata
You can answer incoming calls through the speakerphone by pressing the panic button.
4.3 Base Console Features
- Talking Caller ID Speakerphone: The system speaks the phone number of incoming calls.
- Nnukwu bọtịnụ: Large, easy-to-read buttons for dialing.
- Talking Buttons: Buttons speak the number as they are pressed during dialing.
- One-Touch Dialing: Dedicated buttons for SOS, M1, and 911 on the base console.
- AmpOke olu: Handset volume control and speakerphone volume control (up to 40dB).
- Amplified Ringer: Ringer volume up to 90dB with a flashing light indicator.
- LCD Back Light: Ensures visibility of the screen in low light conditions.
- Real Time Clock Display: Na-egosi oge dị ugbu a.
- Akwụkwọ ekwentị: Stores up to 30 memories.
- Message Memories: Up to 64 message memories.
5. Nlekọta
5.1 nnọchi batrị
- Bọtịnụ ụjọ: The panic button uses a 23A 12V Alkaline battery. Replace when the indicator light on the button no longer flashes or its range decreases significantly.
- Base Console: The base console uses 4 x AA Alkaline batteries for backup. Replace when the 'Low Battery' indicator illuminates or after prolonged power outages.
5.2 Nhicha
Wipe the base console and panic button with a soft, damp cloth. Do not use abrasive cleaners or immerse the base console in water.
6. Nchọpụta nsogbu
- System not dialing emergency numbers:
- Ensure the telephone line cord is securely connected to both the base console and the wall jack.
- Verify that emergency numbers have been correctly programmed (refer to Section 3.4).
- Check that the 'PRO' switch is in the 'OFF' position after programming.
- Confirm that your landline service is active.
- Speakerphone not working:
- Ensure the speakerphone volume control is adjusted to an audible level.
- Verify the unit has power.
- Low battery light blinks constantly (base console):
- Replace the 4 AA Alkaline batteries in the battery backup compartment with new ones, ensuring correct polarity.
- Panic button range is reduced:
- Replace the 23A 12V Alkaline battery in the panic button.
- Ensure there are no significant obstructions (e.g., thick walls, large metal objects) between the panic button and the base console.
- Difficulty programming:
- Refer to Section 3.4 for detailed programming steps.
- If issues persist, contact Assistive Technology Services customer support for assistance.
7. Nkọwapụta
| Nọmba nlereanya | atspavdiiaz2 |
| Akụkụ ngwugwu | 10.3 x 9.6 x 2.7 sentimita asatọ |
| Ibu Ibu | 2 pound |
| Agba | Nwa |
| Ụdị ekwentị | Ejiri ya |
| Isi Iyi Ike | Battery Powered (backup) / External Adapter |
| Ụdị ọkpụkpọ | Otu ahụ igodo |
| Ụdị Sistemu na-aza | Dijitalụ |
| Ngwa dakọtara | Traditional Telephone Network, Cellular Network (with adapter) |
| Ike oku ogbako | 2-ụzọ |
| Multiline arụ ọrụ | Ịrụ otu Ahịrị |
| Phone Standby Time (Battery Backup) | Ruo awa iri abụọ |
| Panic Button Frequency | 433.92 MHz |
| Panic Button Range | 100-150 Feet (depending on environment) |
| Panic Button Battery | 23A 12V Alkaline battery |
| Base Console Battery | Batrị 4 x AA Alkaline (anaghị etinye ya) |
8. Nkwado
For further assistance, technical support, or inquiries regarding your Assistive Technology Services Personal Assistance Voice Dialer II, please contact Assistive Technology Services customer support. They are available to guide you through setup and address any operational questions.