1. Okwu mmalite
Thank you for choosing the Pro-Ject Debut Carbon DC Turntable. This manual provides essential information for the proper setup, operation, and maintenance of your turntable. Please read these instructions carefully before using the device to ensure optimal performance and longevity.
The Pro-Ject Debut Carbon DC is a high-fidelity turntable designed for exceptional audio reproduction, featuring an 8.6-inch carbon fiber tonearm and a pre-mounted Ortofon 2M Red cartridge.
2. Ntuziaka nchekwa
- Always disconnect the turntable from the power supply before cleaning or performing any maintenance.
- Keep the turntable away from water, moisture, and direct sunlight.
- Place the turntable on a stable, level surface to prevent vibrations and ensure proper operation.
- Do not attempt to repair the unit yourself. Refer all servicing to qualified personnel.
- Avoid touching the stylus with your fingers to prevent damage.
3. Ihe ngwugwu
Chọpụta na ihe niile edepụtara n'okpuru dị na ngwugwu gị:
- Pro-Ject Debut Carbon DC Turntable with pre-mounted Ortofon 2M Red Cartridge
- Connect-It E RCA Cable
- Removable Power Supply
- Felt Platter Mat
- Ihe mkpuchi uzuzu
- Ibu ibu
- Ibu mgbochi skate
4. Nhazi
4.1 Mwepu na ntinye
Jiri nlezianya wepụ ihe niile dị na ngwugwu ahụ. Debe ihe ntụgharị ahụ n'elu ebe siri ike ma dị larịị, ebe ọkụ na-anaghị abata kpọmkwem ma ọ bụ mkpọtụ siri ike. Hụ na ikuku na-ekupụ ikuku gburugburu ngwaọrụ ahụ.
4.2 Nwụnye efere na eriri
- Place the main platter onto the turntable spindle.
- Locate the drive belt. Carefully stretch the belt around the inner rim of the platter and around the motor pulley. Ensure the belt is not twisted.
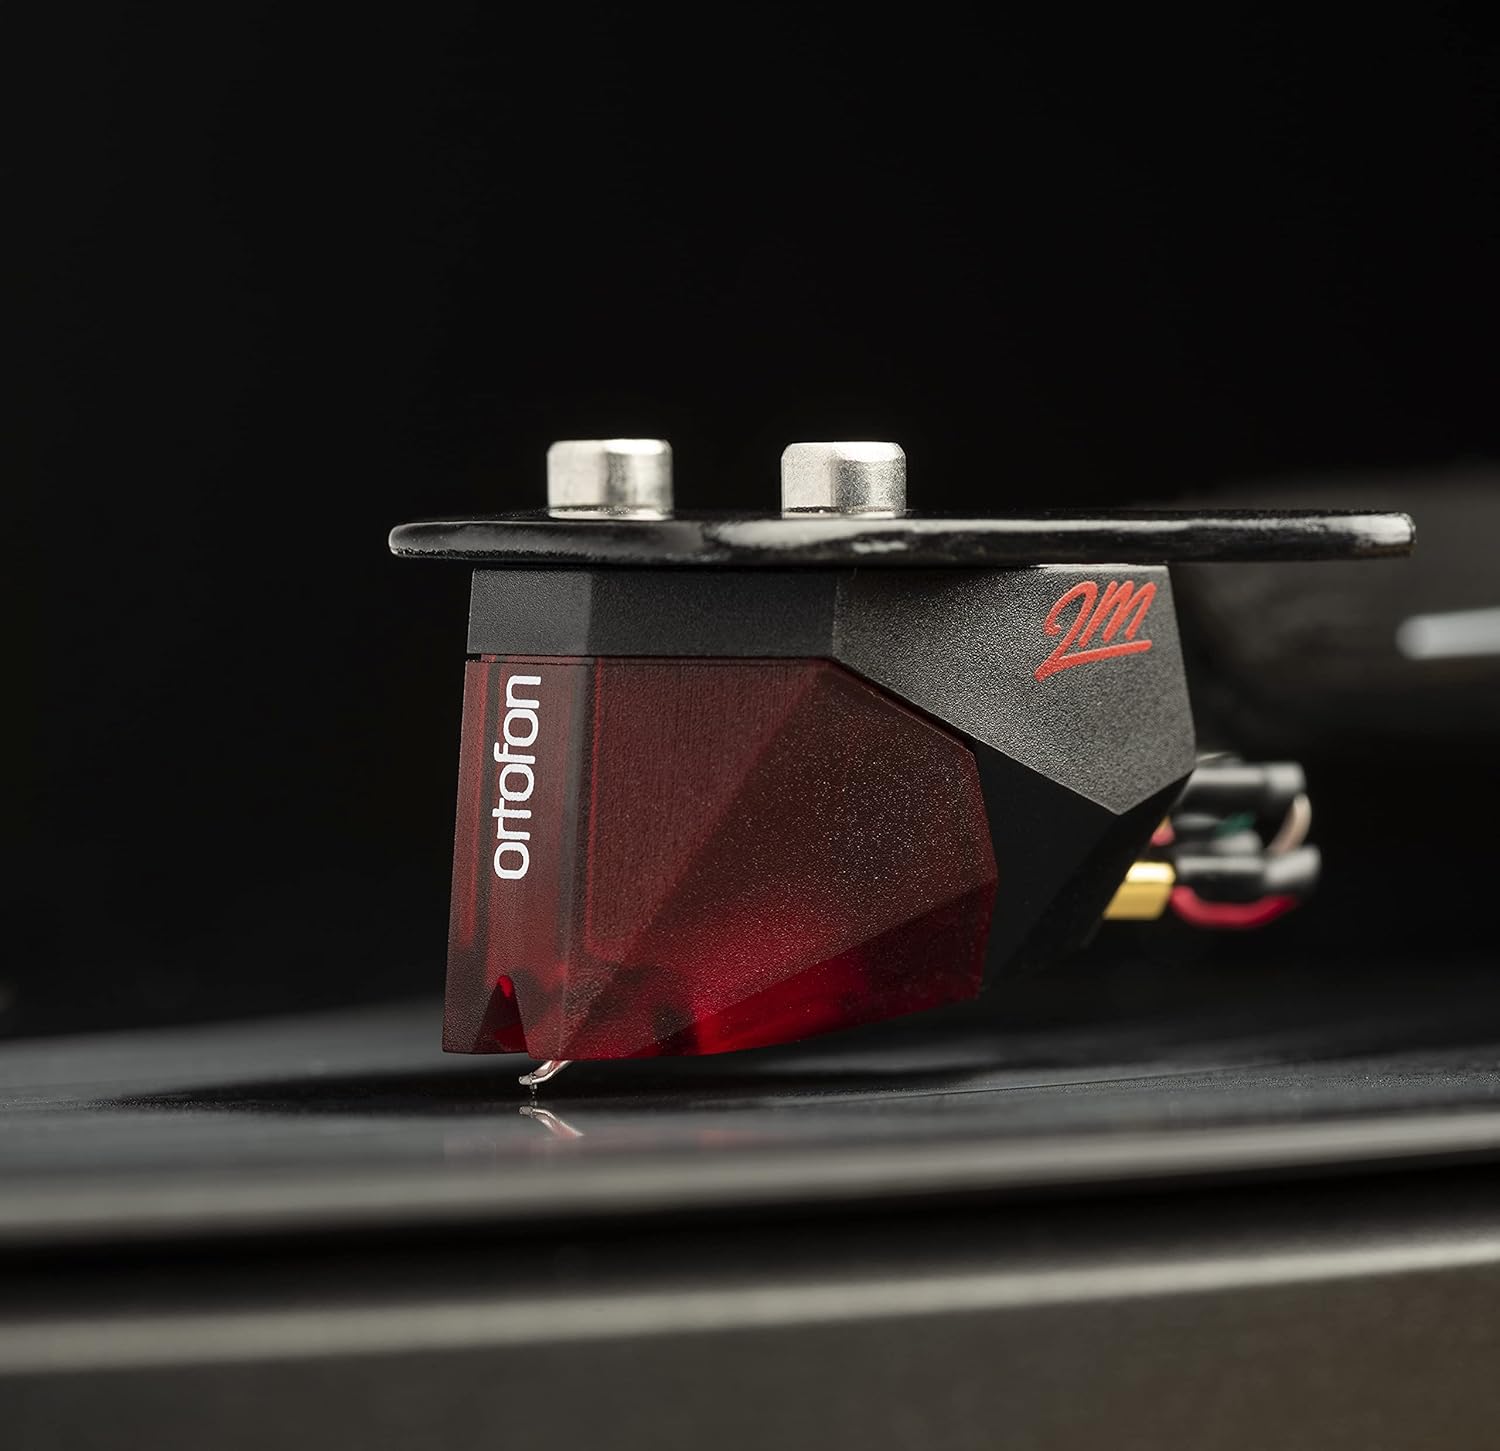
Image: The Pro-Ject Debut Carbon DC Turntable fully assembled, showing the platter, tonearm, and Ortofon 2M Red cartridge. This image illustrates the overall appearance of the turntable after initial setup.
4.3 Ike Nhazi na Nlekota Tonearm
The Ortofon 2M Red cartridge is pre-mounted. However, proper tonearm balance and tracking force adjustment are crucial for optimal sound and record preservation.
- With the anti-skate weight removed, carefully unclip the tonearm and move it away from the tonearm rest.
- Rotate the counterweight on the rear of the tonearm until the tonearm floats freely and is perfectly balanced horizontally.
- Once balanced, return the tonearm to its rest. Hold the counterweight steady and rotate the numbered ring until '0' aligns with the line on the tonearm.
- Rotate the entire counterweight counter-clockwise until the desired tracking force is set. For the Ortofon 2M Red, the recommended tracking force is typically 1.8 grams.
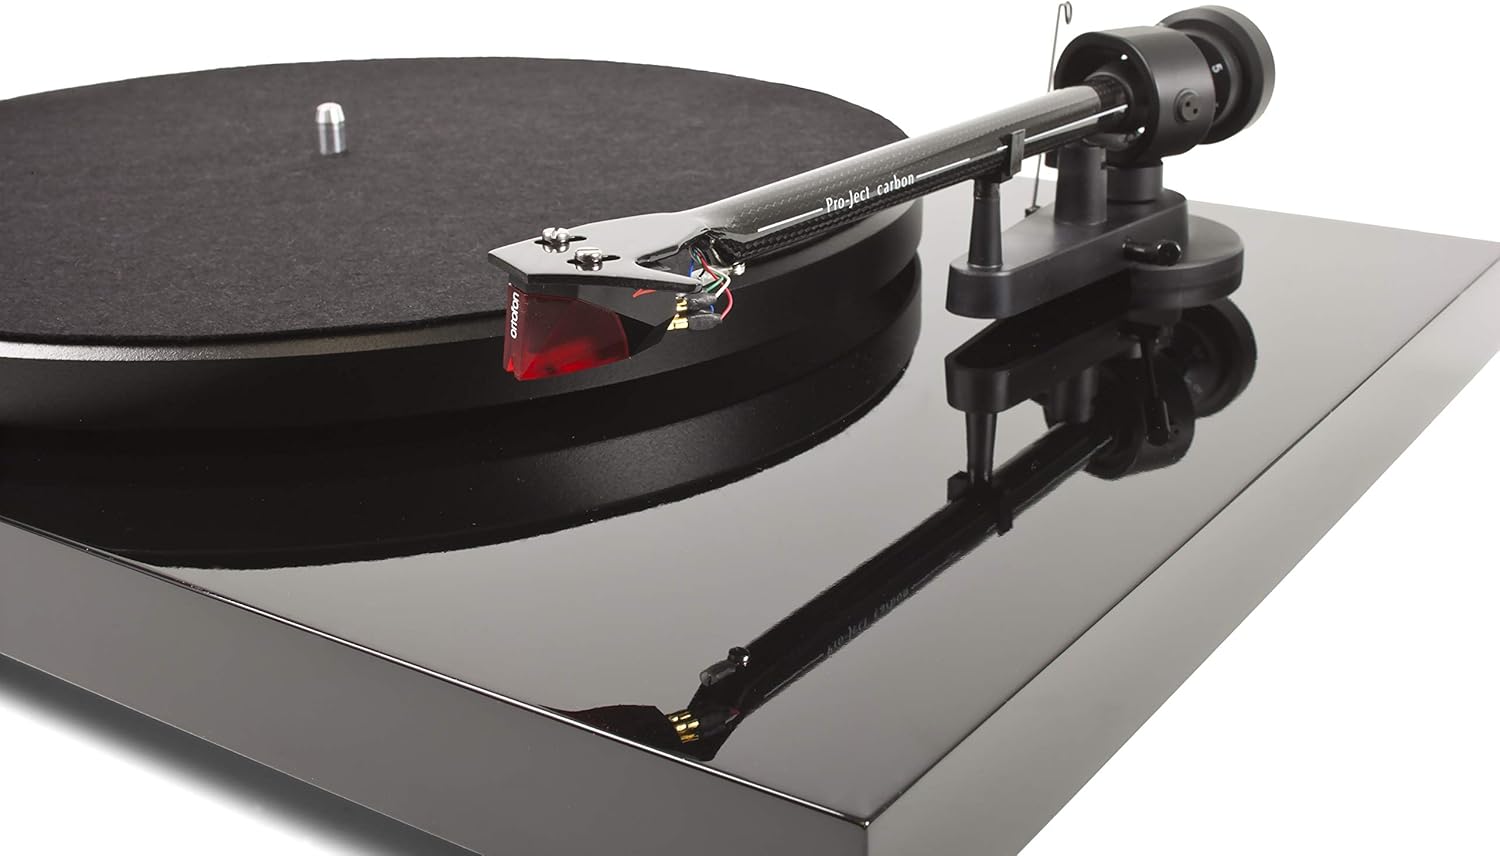
Foto: A nso nso view of the Ortofon 2M Red cartridge mounted on the carbon fiber tonearm of the Pro-Ject Debut Carbon DC turntable. This highlights the stylus and cartridge assembly.
4.4 Anti-Skate Adjustment
The anti-skate mechanism prevents the tonearm from being pulled inwards towards the center of the record. Attach the small loop of the anti-skate weight's thread to the second groove of the anti-skate stub on the tonearm support.
4.5 Ijikọ na Ampna -emegharị ihe
Connect the supplied RCA cable from the turntable's output jacks to the 'Phono' input on your amplifier or a dedicated phono pre-amponye ndu. Ọ bụrụ na gị amplifier does not have a 'Phono' input, you will need an external phono pre-amplifier. Connect the ground wire from the turntable to the ground terminal on your amplifier or phono pre-ampihe na-eme ka ihe dị nro belata.

Foto: Akụkụ view of the Pro-Ject Debut Carbon DC Turntable, illustrating the rear panel with RCA output jacks and the power input. This shows where to connect audio cables and the power supply.
4.6 Njikọ ike
Connect the power supply to the turntable's power input and then plug it into a suitable wall outlet.
4.7 Uzuzu mkpuchi
Carefully attach the dust cover to the hinges on the rear of the turntable. The dust cover protects the turntable from dust when not in use.
5. Ntuziaka ọrụ
5.1 Gbanyụọ/ gbanyụọ
The power switch is located on the underside of the turntable, near the front left corner. Flip the switch to the 'ON' position to start the platter rotation. Flip it to 'OFF' to stop.
5.2 Ịkpọ egwu ndekọ
- Place a record on the platter, ensuring it is centered.
- Jiri mgba ọkụ gbanye ọkụ.
- Carefully lift the tonearm using the cueing lever.
- Position the tonearm over the desired starting groove of the record.
- Gently lower the tonearm using the cueing lever. The stylus will make contact with the record and playback will begin.
- At the end of the record, lift the tonearm using the cueing lever and return it to the tonearm rest.
5.3 Changing Playback Speed (33/45 RPM)
The Pro-Ject Debut Carbon DC requires manual adjustment to change playback speed between 33 and 45 RPM.
- Turn off the turntable.
- Carefully remove the felt mat and lift the platter off the spindle.
- Locate the motor pulley. It has two different diameter steps.
- For 33 RPM, place the drive belt around the smaller diameter step of the motor pulley.
- For 45 RPM, place the drive belt around the larger diameter step of the motor pulley.
- Replace the platter and felt mat.
6. Nlekọta
6.1 Nhicha nke Turntable
Use a soft, lint-free cloth to gently wipe the turntable chassis and dust cover. Avoid using abrasive cleaners or solvents. For the platter, use a slightly damp cloth if necessary, ensuring it is dry before use.
6.2 Nlekọta Stylus
The stylus is delicate. Use a soft stylus brush, brushing gently from back to front, to remove dust and debris. Never use your fingers to clean the stylus. A dirty stylus can damage your records and degrade sound quality.
6.3 Drive Belt Inspection
Periodically inspect the drive belt for signs of wear or stretching. A worn belt can lead to inconsistent playback speed. Replace the belt if it appears damaged or loose.
7. Nchọpụta nsogbu
| Nsogbu | Ihe nwere ike ime | Ngwọta |
|---|---|---|
| Enweghị ike | Power cable not connected; power outlet faulty; power switch off. | Check power connections; try a different outlet; ensure power switch is ON. |
| Enweghị ụda sitere na otu ọwa ma ọ bụ abụọ | RCA cables not connected correctly; phono input not selected; damaged stylus; ampnsogbu ndị na-edozi ahụ. | Check RCA connections; select correct input on amplifier; inspect stylus; test amplifier with another source. |
| mkpọtụ mkpọtụ | Ground wire not connected; proximity to other electronic devices; faulty cables. | Connect ground wire; move turntable away from other electronics; try different RCA cables. |
| Ọsọ egwuregwu na-ezighi ezi | Drive belt incorrectly positioned; worn drive belt. | Adjust drive belt to correct motor pulley step; replace drive belt if worn. |
| Ụda agbagọ | Dirty or damaged stylus; incorrect tracking force; worn record. | Clean or replace stylus; re-adjust tracking force; try a different record. |
If you encounter problems not listed here or if the suggested solutions do not resolve the issue, please contact your dealer or Pro-Ject customer support for assistance.
8. Nkọwapụta
| Njirimara | Nkọwa |
|---|---|
| Aha Nlereanya | Debut Carbon DC |
| Nọmba Nlereanya ihe | 9120050435933 |
| Akụkụ ngwaahịa | 12.6 x 16.34 x 4.65 sentimita asatọ |
| Ibu Ibu | 12.35 pound (gram 5600) |
| Ụdị | Pro-Ject |
| Ọsọ ntụgharị kacha | 45 RPM (also supports 33 RPM) |
| Ngwa gụnyere | Turntable with pre-mounted Ortofon 2M Red Cartridge, Connect-It E RCA Cable, removable Power Supply, felt platter mat, and dust cover |
| Atụmatụ pụrụ iche | Carbon Tube Tone-Arm, Balanced Steel Platter, Decoupled Motor, Pre-Mounted Ortofon 2M Red Cartridge |
| Ihe onwunwe | Osisi injinia, Plastic |
| Agba | Piano Black |
| Ngwa dakọtara | Speaker, Personal Computer, Desktop, Smartphone, Tablet, Laptop (via appropriate audio interfaces/pre-amps) |
9. Akwụkwọ ikike na nkwado
Specific warranty information for the Pro-Ject Debut Carbon DC Turntable is typically provided with the product packaging or available from your authorized dealer. Please retain your proof of purchase for warranty claims.
For technical support, service, or further inquiries, please contact your local Pro-Ject dealer or visit the official Pro-Ject Audio Systems websaịtị.