
PeakTech P 3131
PeakTech True RMS P 3131 Clamp Meter with Multimeter User Manual
Model: P 3131 | Brand: PeakTech
1. Okwu mmalite
This manual provides comprehensive instructions for the safe and effective use of the PeakTech True RMS P 3131 Clamp Meter with Multimeter. This device is designed for measuring AC/DC currents without circuit interruption, as well as AC/DC voltage and resistance, with continuity testing capabilities. It features a 3 3/4 digit LCD display with True RMS measurement for accurate readings.
Biko gụọ akwụkwọ ntuziaka a nke ọma tupu ị rụọ ọrụ ngwaọrụ ahụ ma debe ya maka ntụaka n'ọdịnihu.
2. Ozi nchekwa
WARNING: Improper use of this meter can cause damage, shock, injury, or death. Always follow all safety precautions.
- Na-agbaso koodu nchekwa mpaghara na nke obodo mgbe niile.
- Do not use the meter if it appears damaged or if the insulation on test leads is compromised.
- Ensure the meter is set to the correct function and range before making measurements.
- Avoid contact with live circuits. Use appropriate personal protective equipment (PPE).
- The device is rated for CAT II 600V. Do not exceed these limits.
- Dochie batrị ozugbo mgbe ihe ngosi batrị dị ala pụtara.
- Do not operate the meter in explosive atmospheres.
3. Ngwaahịa gafereview na akụrụngwa
The PeakTech P 3131 is a robust and reliable clamp meter. Familiarize yourself with its main components:

Foto 1: N'ihu view of the PeakTech P 3131 Clamp Meter, showing the clamp jaw, function selector, LCD display, and input terminals.
- Clamp Nkịta: For non-contact AC/DC current measurement.
- Function Selector Dial: To select measurement modes (A~, A=, V~, V=, Ω/Continuity, OFF).
- Ngosipụta LCD: Na-egosi ọgụgụ nha, nkeji, na ihe ngosi.
- Bọtịnụ: AC/DC, ZERO, H/MAX (Data Hold/Max Hold).
- Ọnụ ntinye: COM (common) and VΩ (voltage/resistance) for test leads.
- Aka nche: Provides protection against accidental contact.
4. Nhazi
4.1 Ntinye batrị
The PeakTech P 3131 requires two 1.5V AAA batteries (included). To install or replace batteries:
- Gbaa mbọ hụ na agbanyụrụ ngwaọrụ ahụ.
- Locate the battery compartment cover on the rear of the meter.
- Jiri screwdriver imeghe oghere.
- Insert the two AAA batteries, observing correct polarity (+ and -).
- Dochie mkpuchi nke batrị batrị ma jiri nkedo chekwaa ya.
When the low battery indicator appears on the display, replace the batteries immediately to ensure accurate measurements.
4.2 Njikọ Ndị Nnwale Nlele
Maka voltage, resistance, and continuity measurements, connect the supplied test leads:
- Tinye ụzọ ule ojii n'ime COM (common) input terminal.
- Tinye ụzọ ule uhie n'ime VΩ ntinye ọnụ.

Figure 2: PeakTech P 3131 Clamp Meter shown with its carrying case, test leads, batteries, and user manual.
5. Ntuziaka ọrụ
5.1 Gbanyụọ ma ọ bụ gbanyụọ
Rotate the function selector dial from the "OFF" position to any desired measurement function to power on the meter. To power off, rotate the dial back to "OFF". The meter features an automatic power-off function (can be deactivated) to conserve battery life.
5.2 Nha ugbu a AC/DC (Cl)amp)
To measure current without breaking the circuit:
- Tụgharịa ọkpụkpọ ahọpụtara ọrụ na A~ (AC Current) or A= ọnọdụ (DC Ugbu a).
- Pịa AC/DC button if you need to switch between AC and DC current modes (if the dial position combines them).
- Pịa ZERO button to zero the display before measuring DC current, especially for small currents, to compensate for residual magnetism.
- Mepee clamp agba site na ịpị ihe mkpali ahụ.
- Enclose only otu conductor with the clamp agba. Hụ na agba ahụ emechiela nke ọma.
- Gụọ uru dị ugbu a na ngosipụta LCD.
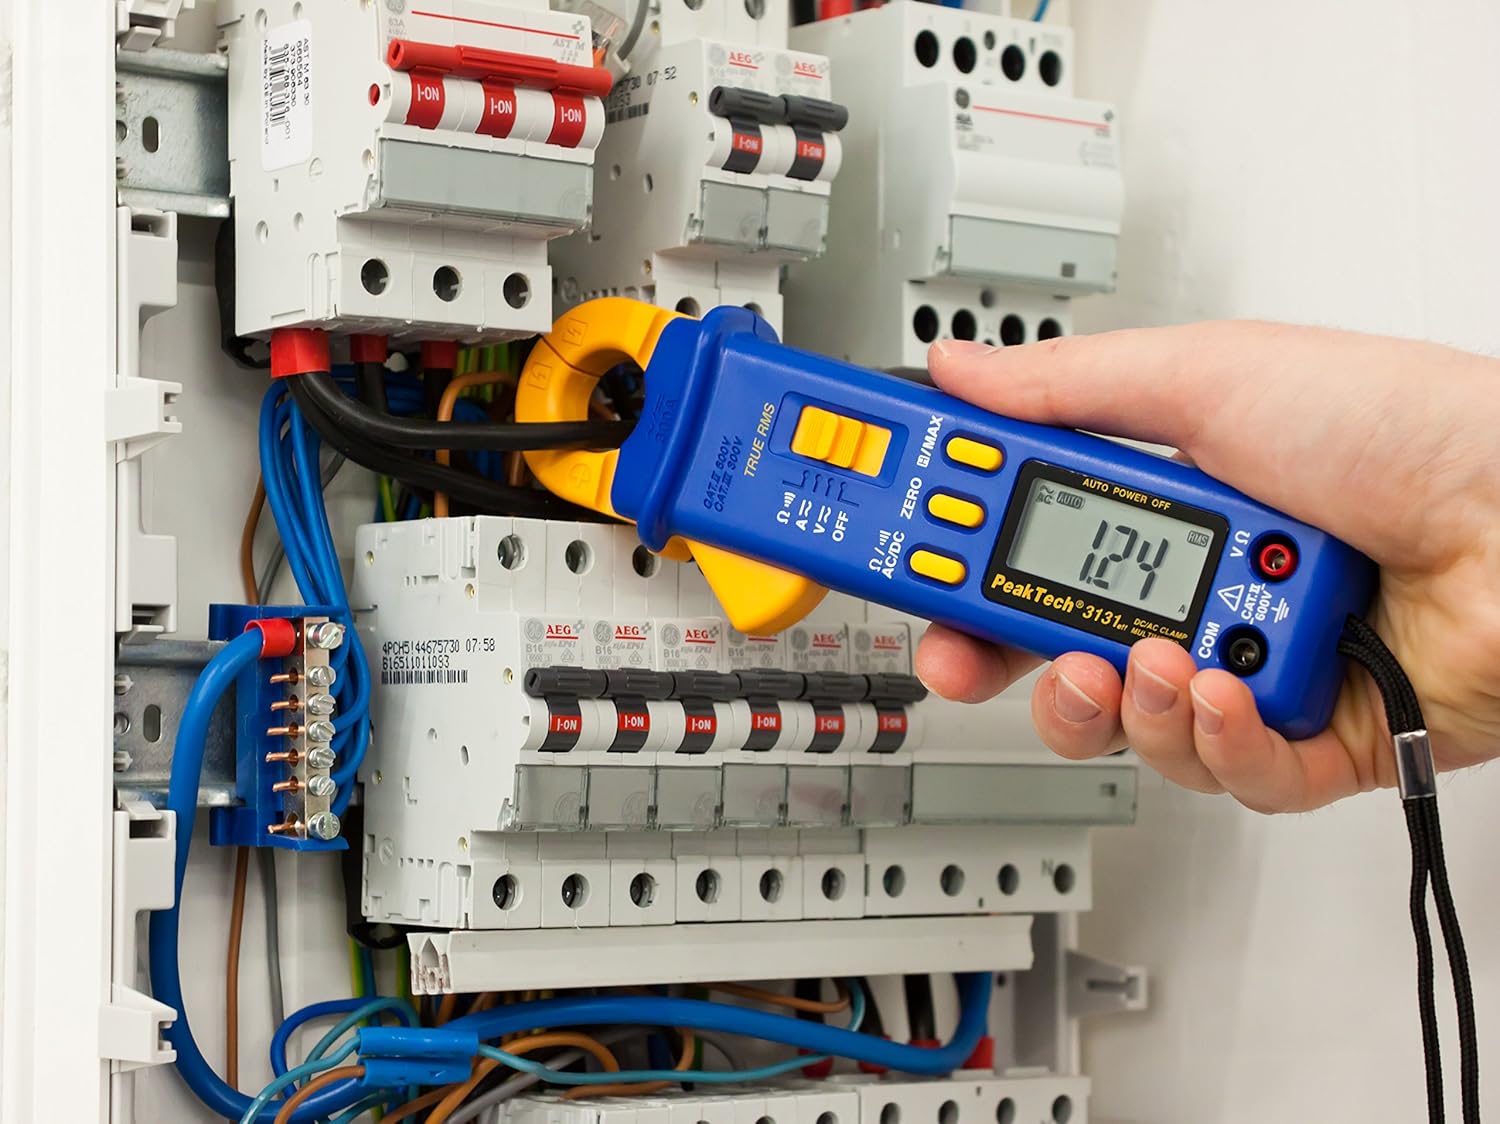
Figure 3: The PeakTech P 3131 Clamp Meter in use, measuring current on a single conductor within an electrical panel.
5.3 AC/DC Voltage Ntụ
Iji tụọ voltage:
- Jikọọ ndị na-enye ule dịka akọwara na Nkebi nke 4.2.
- Tụgharịa ọkpụkpọ ahọpụtara ọrụ na V~ (Mpịakọta ACtage) ma ọ bụ V= (DC Voltage) ọnọdụ.
- Jikọọ ihe nyocha ule ahụ n'otu akụkụ na sekit ma ọ bụ ihe ị chọrọ ịtụ.
- Gụọ voltage uru na LCD ngosi.
5.4 Resistance and Continuity Measurement
To measure resistance or check for continuity:
- Jikọọ ndị na-enye ule dịka akọwara na Nkebi nke 4.2.
- Tụgharịa ọkpụkpọ ahọpụtara ọrụ na Ω/))) (Resistance/Continuity) position.
- For resistance: Connect the test probes across the component. Ensure the circuit is de-energized.
- For continuity: Touch the test probes to the two points you want to check. A continuous beep indicates a low-resistance path (continuity).
- Gụọ uru iguzogide na ngosipụta LCD.
5.5 Ọrụ Pụrụ Iche
- Ezi RMS: The meter measures True Root Mean Square values for AC voltage and current, providing accurate readings for non-sinusoidal waveforms.
- Data Hold (H): Pịa H/MAX button briefly to freeze the current reading on the display. Press again to release.
- Maximum Value Hold (MAX): Pịa ma jide H/MAX button to capture and display the maximum measured value. Press again to exit.
- ZERO Function: Used to zero the display for DC current measurements to eliminate offset errors.
- Auto Ranging: The meter automatically selects the appropriate measurement range.
- Gbanyụọ ike akpaaka: The meter automatically turns off after a period of inactivity to save battery. This feature can typically be disabled by holding a specific button during power-on (refer to the device's on-screen indicators or a more detailed manual if available).
6. Nlekọta
6.1 Nhicha
Wipe the meter's case with a damp ákwà na ihe nhicha dị nro. Ejila ihe na-eme ka ihe dị nro ma ọ bụ ihe mgbaze dị nro. Hụ na mita ahụ kpọrọ nkụ kpamkpam tupu e jiri ya.
6.2 nnọchi batrị
Refer to Section 4.1 for instructions on battery replacement. Always use two fresh 1.5V AAA batteries. Remove batteries if the meter is not used for an extended period to prevent leakage.
6.3 Nchekwa
Store the meter in a cool, dry place, away from direct sunlight and extreme temperatures. Use the provided carrying case for protection.
7. Nchọpụta nsogbu
| Nsogbu | Ihe nwere ike ime | Ngwọta |
|---|---|---|
| Mita ahụ anaghị agba ọkụ. | Batrị nwụrụ anwụ ma ọ bụ arụnyere na ezighi ezi. | Lelee polarity batrị; dochie batrị. |
| "OL" or "OVER" displayed. | Ntụle gafere oke achọrọ ma ọ bụ oke ikike mita kachasị. | Select a higher range (if manual ranging) or ensure measurement is within meter's limits. |
| Inaccurate DC current reading. | Residual magnetism in clamp agba. | Pịa ZERO button before measurement. |
| Enweghị ụda na-aga n'ihu. | Sekit mepere emepe ma ọ bụ iguzogide oke. | Check connections; ensure circuit is complete. |
If problems persist, contact PeakTech customer support or a qualified service technician.
8. Nka na ụzụ nkọwa
| Oke | Nkọwapụta |
|---|---|
| Ngosipụta | 3 3/4 digit LCD, max. 3999 counts |
| DC Voltage (DCV) | 0.1 mV to 600 V (Accuracy: 0.5% + 2 digits) |
| AC Voltage (ACV) | 1 mV to 600 V (Accuracy: 1.5% + 5 digits) |
| DC Ugbu a (DCA) | 10 mA to 300 A (Accuracy: 1% + 2 digits) |
| AC ugbu a (ACA) | 10 mA to 300 A (Accuracy: 1% + 3 digits) |
| Nguzogide (Ω) | 0.1 Ω to 40 MΩ (Accuracy: 0.9% + 2 digits) |
| Nnwale na-aga n'ihu | Ọrụ Buzzer |
| Ezi RMS | Yes, for AC measurements |
| Ọkụ na-emeghe | 22 mm max. conductor diameter |
| Ogo nchekwa | EN 61010-1, CAT II 600 V |
| Ịnye ọkụ | 2 x 1.5V batrị AAA |
| Akụkụ (L x W x H) | 192 x 66 x 27 mm (ihe dị ka 7.56 x 2.6 x 1.06 sentimita) |
| Ibu | 205g (ihe dị ka 0.45 lbs) |
9. Akwụkwọ ikike na nkwado
PeakTech products are manufactured under strict quality control. This product is covered by a standard manufacturer's warranty against defects in materials and workmanship. Please refer to the warranty card included with your product or visit the official PeakTech websaịtị maka nkọwa na usoro akwụkwọ ikike.
For technical support, service, or calibration inquiries, please contact your local PeakTech distributor or the PeakTech customer service department. Contact information can typically be found on the PeakTech websaịtị ma ọ bụ na nkwakọ ngwaahịa.
Ask a question about this manual
Ask about setup, troubleshooting, compatibility, parts, safety, or missing instructions. Manuals+ will review the question and use this page’s manual context to help answer it.