
Okwu mmalite
Thank you for choosing the Oster TSSTTVVGS1 4-Slice Toaster Oven. This compact and versatile appliance is designed to provide efficient toasting, baking, and broiling for your everyday needs. Please read this instruction manual thoroughly before operating your new toaster oven to ensure safe and optimal performance. Keep this manual for future reference.

Foto 1: N'ihu view of the Oster TSSTTVVGS1 4-Slice Toaster Oven.
Ozi nchekwa dị mkpa
Na-agbaso usoro nchekwa nchekwa mgbe niile mgbe ị na-eji ngwa eletriki iji belata ihe egwu ọkụ, ujo eletrik na/ma ọ bụ mmerụ ahụ n'ahụ mmadụ, gụnyere ndị a:
- Gụọ ntuziaka niile tupu i jiri ngwa.
- Emetụla ebe dị ọkụ aka. Jiri aka ma ọ bụ mkpọ.
- Iji chebe megide ujo eletriki, etinyela eriri, plọg, ma ọ bụ ngwa n'ime mmiri ma ọ bụ mmiri mmiri ọzọ.
- Nleba anya dị mkpa mgbe ụmụaka na-eji ngwa ọ bụla ma ọ bụ nso.
- Kpupu na ntinye mgbe ejighị ya na tupu ihicha. Kwe ka ọ dị jụụ tupu ịtinye ma ọ bụ wepụ akụkụ.
- Ejikwala ngwa ọ bụla nwere eriri ma ọ bụ plọg mebiri emebi ma ọ bụ mgbe ngwa ahụ dara ma ọ bụ mebie ya n'ụzọ ọ bụla.
- Ejila n'èzí.
- Ekwela ka eriri kwụgidere na nsọtụ tebụl ma ọ bụ counter ma ọ bụ metụ ebe dị ọkụ aka.
- Etinyela na ma ọ bụ nso gas na-ekpo ọkụ ma ọ bụ ọkụ eletrik, ma ọ bụ na oven ọkụ.
- Ekwesịrị iji nlezianya mee ihe mgbe ị na-ebugharị ngwa nwere mmanụ ọkụ ma ọ bụ ihe ọ bụla na-ekpo ọkụ.
- Ejila ngwa maka ndị ọzọ na-abụghị ebumnuche ebumnuche.
- Buru ụzọ tinye plọg mgbe niile na ngwa, wee tinye eriri n'ime oghere mgbidi. Ka ịkwụpụ njikọ, gbanyụọ njikwa ọ bụla ka ọ bụrụ “gbanyụọ,” wee wepụ plọg na mpụta mgbidi.
- Agaghị etinye nri buru ibu ma ọ bụ arịa ọla n'ime oven nke nwere ike ịkpata ọkụ ma ọ bụ ihe egwu ọkụ eletrik.
- Ọkụ nwere ike ime ma ọ bụrụ na ekpuchiri oven ma ọ bụ metụ ihe ndị nwere ike ire ọkụ, gụnyere ákwà mgbochi, draperies, mgbidi na ihe ndị yiri ya, mgbe a na-arụ ọrụ.
- Do not place any materials other than manufacturer’s recommended accessories in this oven.
- Etinyela katọn, rọba, akwụkwọ, ma ọ bụ ihe ndị yiri ya na oven.
- Echekwala ihe ọ bụla, karịa ngwa ndị nrụpụta akwadoro, na oven a mgbe anaghị eji ya.
- Ejila igwe na-akpachapụ anya na-ehicha ihe. Iberibe nwere ike ịgbapụ pad ahụ ma metụ akụkụ eletriki aka, na-emepụta ihe egwu nke ujo eletrik.
- Na-eyi ihe mkpuchi mkpuchi mkpuchi mkpuchi mgbe niile mgbe ị na-etinye ma ọ bụ wepụ ihe na oven ọkụ.
Ntọala na ojiji mbụ
Iwepu ngwongwo
Carefully remove the toaster oven and all accessories from the packaging. Ensure all packing materials, including any protective films or inserts, are removed from the appliance before use. Verify that all components listed in the 'Included Components' section are present.
Ndokwa
Place the toaster oven on a flat, stable, heat-resistant surface. Ensure there is adequate ventilation around the appliance, with at least 4-6 inches of clearance on all sides and above to prevent overheating. Do not place it directly against a wall or under cabinets.
Nhicha mbụ
Before first use, wipe down the interior and exterior of the toaster oven with a damp cloth. Wash the baking pan and wire rack in warm, soapy water, then rinse and dry thoroughly. Ensure the removable crumb tray is properly inserted.

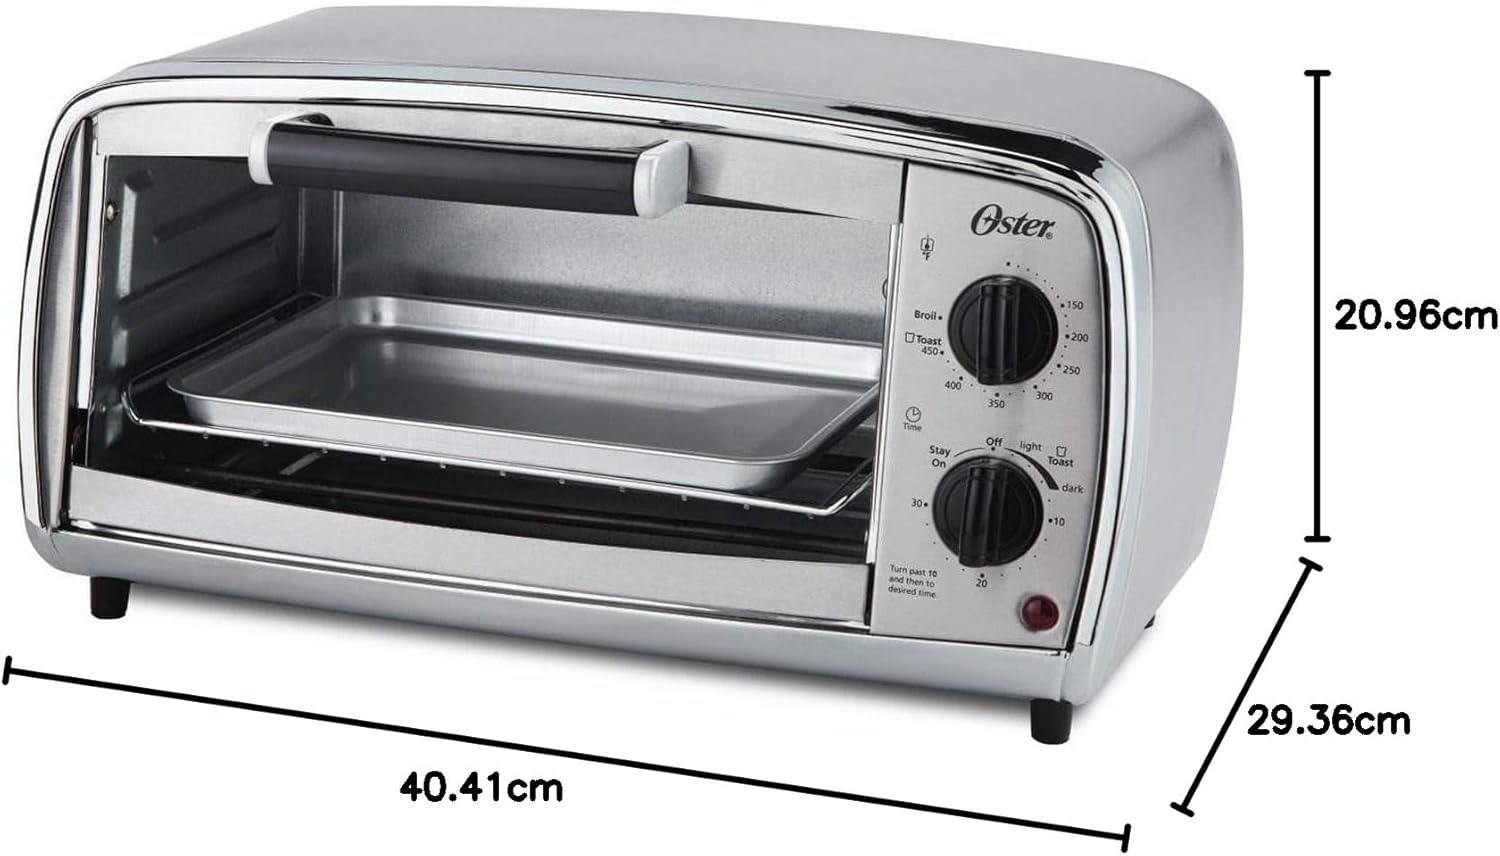
Ọgụgụ 2: Ime view showing the baking pan and wire rack.
First Use (Burn-Off)
It is normal for a new toaster oven to emit a slight odor or smoke during its first use. This is due to the burning off of manufacturing residues. To minimize this, operate the oven empty on the 'Bake' function at 450°F (230°C) for approximately 15 minutes. Ensure the area is well-ventilated during this process.
Ntuziaka ọrụ
The Oster TSSTTVVGS1 features user-friendly control dials for various cooking functions.

Figure 3: Control panel with temperature, function, and timer dials.
Ọkpọ oku njikwa
- Ọkpọ oku njikwa okpomọkụ: Located at the top, this dial allows you to select the desired cooking temperature from 150°F to 450°F.
- Function Selector Dial: The middle dial selects the cooking mode: Broil, Ime, ma ọ bụ Toast.
- Ọkpọ oku ngụ oge: The bottom dial sets the cooking time up to 30 minutes. For continuous operation, select 'Stay On'. For toasting, turn past 10 and then back to the desired toast shade (light to dark).
Ọrụ nri
- Toast: Ideal for bread, bagels, and frozen waffles. Place items directly on the wire rack. Select 'Toast' function, set the temperature to 450°F, and adjust the timer for desired browning. The oven has a 4-slice capacity.
- Ime: Use for casseroles, cookies, and reheating. Place food in the baking pan on the wire rack. Select 'Bake' function, set the desired temperature, and set the timer.
- Broil: Perfect for melting cheese, browning toppings, or cooking thin cuts of meat. Place food on the baking pan. Select 'Broil' function, set the temperature to 450°F, and set the timer. Monitor food closely as broiling is a fast cooking method.
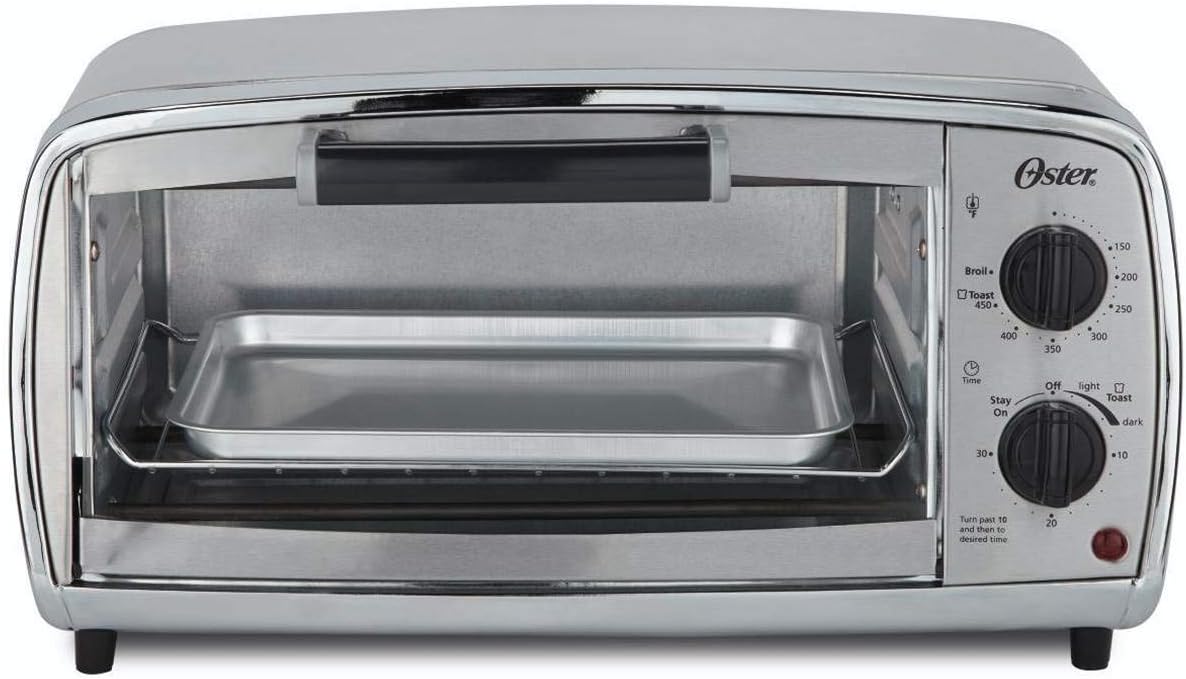
Figure 4: Toaster oven in use, showing food being prepared.
Nlekọta na nlekọta
Regular cleaning and maintenance will ensure the longevity and optimal performance of your toaster oven.
Na-ehicha ime ime
Always unplug the appliance and allow it to cool completely before cleaning. Remove the wire rack and baking pan. The interior walls can be wiped with a damp cloth and mild liquid soap. For stubborn stains, use a non-abrasive cleaner. Do not use metal scouring pads or harsh chemicals.
Cleaning the Removable Crumb Tray
The removable crumb tray slides out from the bottom front of the oven. Pull it out, discard crumbs, and wash it in warm, soapy water. Rinse and dry thoroughly before reinserting. This feature simplifies cleanup and helps prevent grease buildup.
Ọgụgụ 5: gbawara view highlighting the removable crumb tray.
Na-ehicha Mpụga
Jiri mgbasa ozi hichaa elu mpụtaamp cloth and dry thoroughly. Do not use abrasive cleaners or polishes that may scratch the stainless steel finish.
Nchọpụta nsogbu
- Ngwa anaghị agbanwuo: Hụ na e tinyere eriri ọkụ eletrik n'ime oghere eletriki na-arụ ọrụ nke ọma. Lelee ihe mgbochi sekit ezinụlọ gị.
- Uneven toasting/cooking: Ensure food is placed centrally on the rack. Preheat the oven for a few minutes before adding food for more consistent results. Adjust cooking time and temperature as needed.
- Smoke or odor during operation: A slight odor is normal during first use. If excessive smoke occurs, unplug the oven immediately. Check for food spills or debris on heating elements or crumb tray. Ensure the crumb tray is clean.
- Ihe ngụ oge anaghị arụ ọrụ: Ensure the timer dial is turned past the '10' mark and then back to the desired setting for toasting, or directly to the desired time for baking/broiling. For continuous operation, select 'Stay On'.
Nkọwapụta
| Njirimara | Nkọwa |
|---|---|
| Ụdị | Oster |
| Nọmba nlereanya | TSSTTVVGS1 |
| Agba | Igwe anaghị agba nchara |
| Ike | 4-Mpekere |
| Ọrụ | Toast, Bake, Broil |
| Ụdị njikwa | Mkpọchi |
| Wattage | 1000 watt |
| Akụkụ ngwaahịa (D x W x H) | 11.56" x 15.91" x 8.25" |
| Interior Chamber Dimensions (W x D x H) | 10.87" x 7.98" x 3.46" (lower rack to upper heater) |
| Ibu Ibu | 1 pound |
| Ihe onwunwe | Igwe anaghị agba nchara |
| Atụmatụ pụrụ iche | Durable, Easy Clean, Manual Controls, Removable Drip Tray, See-through Glass, Dropdown Door |
Ozi akwụkwọ ikike
This Oster TSSTTVVGS1 4-Slice Toaster Oven comes with a 1 afọ emeputa nwere ikike ikike. Please refer to the warranty card included with your product for specific terms, conditions, and registration details. Keep your purchase receipt as proof of purchase.
Nkwado ndị ahịa
For any questions, assistance, or to report issues with your Oster TSSTTVVGS1 4-Slice Toaster Oven, please contact Oster customer service. Contact information can typically be found on the product packaging, the official Oster websaịtị, ma ọ bụ kaadị akwụkwọ ikike.