
1. Okwu mmalite
This manual provides detailed instructions for the installation, operation, and maintenance of your DELTA FAUCET Leland 1400 Single Lever Tub and Shower Faucet. Please read all instructions carefully before beginning installation or use to ensure proper function and safety.
The Leland 1400 series features a single lever design for temperature and flow control, a Monitor Scald-Guard valve to maintain water temperature, and a Touch-Clean showerhead for easy maintenance. This product is constructed from solid brass for durability and reliability.
2. Ozi nchekwa
- Gbanyụọ isi mmiri mgbe niile tupu ịwụnye ma ọ bụ rụọ ọrụ mmiri mmiri.
- Yiri akụrụngwa nchedo nkeonwe kwesịrị ekwesị, dị ka enyo nchekwa, n'oge ntinye.
- Ọ bụrụ na ịmaghị maka akụkụ ọ bụla nke usoro nrụnye, kpọtụrụ onye na-ahụ maka plumber tozuru oke.
- Gbaa mbọ hụ na njikọ niile echekwabara iji gbochie ntapu.
- Do not use harsh chemicals or abrasive cleaners on the faucet finish, as this may damage the product and void the warranty.
3. Ihe ngwugwu
Nyochaa na akụrụngwa niile dị tupu ịmalite nrụnye. Ngwungwu ahụ kwesịrị ịnwe:
- Single lever tub and shower faucet trim
- Showerhead with Touch-Clean nozzles
- Tub spout with pull-up diverter
- Mounting hardware and seals
- Ntuziaka nwụnye
Note: The rough-in valve (Monitor Scald-Guard) is typically sold separately and must be installed according to its specific instructions.
4. Ntọala na nwụnye
This section outlines the general steps for installing the Leland 1400 tub and shower faucet trim. Refer to the rough-in valve's specific instructions for valve body installation.
- Kwadebe Mpaghara Nwụnye: Ensure the rough-in valve is securely installed in the wall and the water supply is turned off. Clear any debris from the pipes.
- Install the Showerhead: Apply plumber's tape to the threaded end of the shower arm extending from the wall. Thread the showerhead onto the shower arm and hand-tighten. Use a wrench to tighten an additional 1/4 to 1/2 turn. Do not overtighten.
- Install the Tub Spout: The tub spout is a pull-up diverter type. Depending on your rough-in plumbing, it will either thread directly onto a pipe extending from the wall or secure with a set screw onto a smooth copper pipe. Ensure the spout is flush against the wall and sealed properly.
- Install the Faucet Handle Trim: Follow the instructions provided with your specific rough-in valve for installing the escutcheon (wall plate) and the single lever handle. This typically involves securing the escutcheon to the valve body and then attaching the handle.
- Nwale maka ntapu: Once all components are installed, slowly turn on the main water supply. Check all connections for leaks. If leaks are present, turn off the water, tighten the connections, and retest.
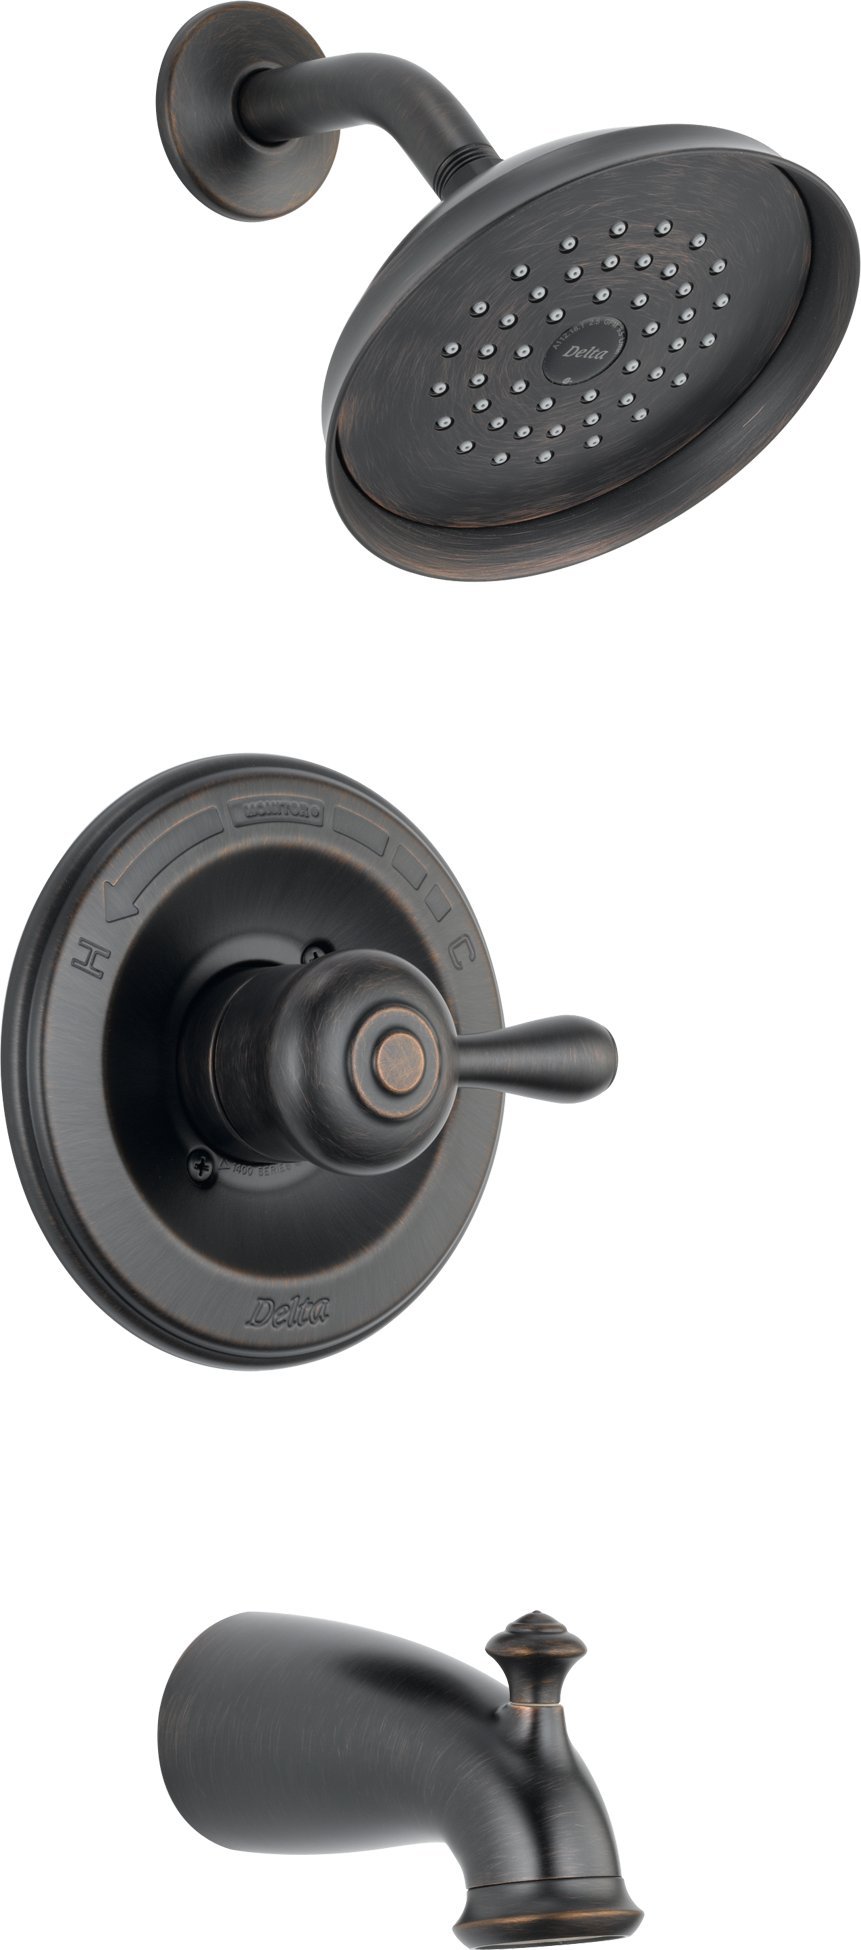
Image 1: The Leland 1400 Single Lever Tub and Shower Faucet, showcasing its design and components. This image illustrates the installed faucet, including the showerhead, single lever handle, and tub spout.
5. Ntuziaka ọrụ
The Leland 1400 faucet features a single lever for controlling both water temperature and flow.
- Turning On/Off and Adjusting Flow: Lift the single lever handle to turn on the water and increase flow. Push the lever down to decrease flow and turn off the water.
- Na-agbanwe okpomọkụ: Rotate the single lever handle left (counter-clockwise) for hotter water and right (clockwise) for colder water. The Monitor Scald-Guard valve will help maintain a consistent temperature within +/-3 degrees Fahrenheit, preventing sudden temperature changes.
- Diverting Water to Shower: To divert water from the tub spout to the showerhead, pull up the knob on the top of the tub spout. Push the knob down to return water flow to the tub spout.
6. Nlekọta
Regular cleaning and maintenance will ensure the longevity and optimal performance of your faucet.
- Ichachachaa mmiri mmiri: Jiri nwayọ hichaa ọkpọ mmiri, damp cloth. For stubborn spots, use a mild soap and water solution. Rinse thoroughly and dry with a soft cloth. Avoid abrasive cleaners, harsh chemicals, or polishes, as these can damage the finish.
- Cleaning the Touch-Clean Showerhead: The showerhead features Touch-Clean nozzles. To remove mineral buildup, simply rub the rubber nozzles with your finger or a soft brush. This helps maintain spray performance.
- Nlekọta Cartridge: If you experience consistent drips or significant changes in water flow/temperature control, the pressure balance cartridge may need servicing or replacement. Refer to the rough-in valve's manual or contact customer support for guidance.
7. Nchọpụta nsogbu
If you encounter issues with your Leland 1400 faucet, refer to the following common solutions:
| Nsogbu | Ihe nwere ike ime | Ngwọta |
|---|---|---|
| Low water flow from showerhead or tub spout | Mineral buildup in showerhead nozzles; partially closed shut-off valves; debris in cartridge. | Clean Touch-Clean nozzles; ensure shut-off valves are fully open; clean or replace cartridge. |
| Water temperature too hot or too cold | Temperature limit stop incorrectly set on valve cartridge; issues with water heater. | Adjust the temperature limit stop on the valve cartridge (refer to valve manual); check water heater settings. |
| Faucet drips or leaks | Katrij a na-eyi; rụrụ njikọ. | Replace the cartridge; tighten connections. |
| Diverter not working properly | Debris in diverter mechanism; worn diverter seal. | Clean or replace the diverter mechanism in the tub spout. |
If these solutions do not resolve the issue, contact DELTA FAUCET customer support or a qualified plumber.
8. Nkọwapụta
| Njirimara | Nkọwapụta |
|---|---|
| Ụdị | DELTA FAUCET |
| Nọmba nlereanya | 14478-RBSHL-PARENT |
| Ihe onwunwe | Bras |
| Ejikwa ihe | Bras |
| Ụdị nkwụnye | Ugwu mgbidi |
| Ngwa gụnyere | Ọkụ ọkpọ |
| Ridgedị Cartridge | Single function pressure balance cartridge (Monitor Scald-Guard) |
| nnabata | ADA kwadoro |
9. Akwụkwọ ikike na nkwado
This DELTA FAUCET product is backed by a Lifetime Limited Warranty on the faucet and finish. This warranty covers defects in material and manufacturing for as long as the original consumer purchaser owns the home in which the faucet was first installed.
For warranty claims, technical assistance, or to purchase replacement parts, please contact DELTA FAUCET customer support. Keep your proof of purchase for warranty validation.
For more information, visit the official DELTA FAUCET website or refer to the warranty documentation included with your product.